Table of Content:
- Video Tutorial: Showcasing Companies in your Event App
- Adding Companies to your Event
- Organizing Companies Using Groups
- Managing Company Logos in Bulk
- Assigning Company Representatives
- Creating Company Sections
1. Video Tutorial: Showcasing Companies in your Event
2. Adding Companies to your Event
Within your Event App, you can create a dedicated "Companies" section to showcase event sponsors and exhibitors, which are stored in your Companies Library within Experience Manager. You can add companies similarly to how you create people profiles, either by manually entering details using the Add Company button or by utilizing an Excel template for bulk importing.
2a. Manually Creating Company Profiles
- Access the Companies library and select the Add Company button to begin creating a profile
- In the pop-up window that opens, enter the following details
- Company Name (required): Input the name of the company as you want it to appear in your Event App.
- Logo: To upload a logo, either drag and drop the file into the designated area or click on the upload field to select it from your device. Please ensure that the logo is in one of the following formats: *.jpeg, *.jpg, *.png, *.bmp, or *.webp, and does not exceed a file size of 24 MB.
- After you have filled in all required information, simply click the Add Company button to finalize and save your company profile.

- After successfully adding the company, you will be taken to the Companies Details Page. This is where you can enhance the profile further by including additional information such as an About section, contact information, relevant documents, and more. On the Companies Details Page, you have the opportunity to provide the following details for each Company Profile:
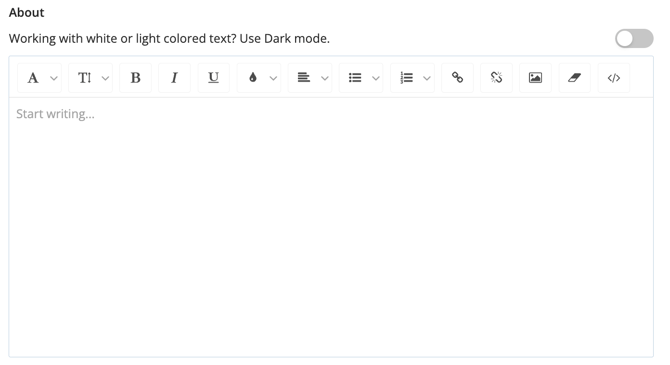
- About: Utilize the Rich Text Editor to enrich the company profile by adding detailed descriptions, company information, images, and any other relevant data.
- Company Groups: You can assign one or more groups to each Company Profile to help organize them effectively. Before assigning groups, make sure to create them in the Company list. For guidance on creating Company groups, please refer to the instructions provided below.

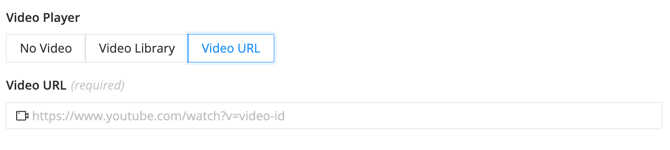
- Video Player: To enhance the Company Profile, you can embed a video directly within the profile. This can be accomplished by either using a Video URL from popular video hosting platforms like YouTube or Vimeo or by selecting a video from your own video library. Please ensure that you have uploaded the video to your library beforehand so that it can be easily accessed when embedding it into the Company Profile.
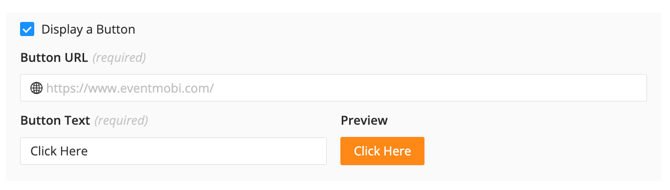
- Display A Button: To activate a Call to Action Button, simply check this box. Once enabled, you can provide the URL for an external website and specify the text that will appear on the button. A preview of the button's design will be available next to the fields. Please be aware that the button color will automatically match the link color chosen in your Event Design Studio.
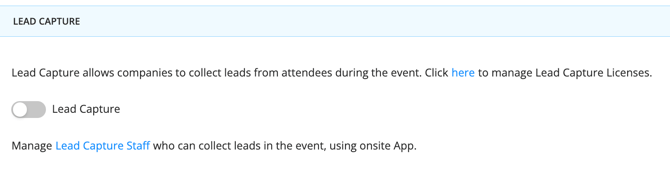
- Lead Capture: You can activate or deactivate the lead capture feature for this specific company using this toggle. If you wish to manage your Lead Capture licenses, navigate to the "Lead Capture" area in the products section of Experience Manager. Please note that this toggle will only be visible if Lead Capture is part of your purchased package.
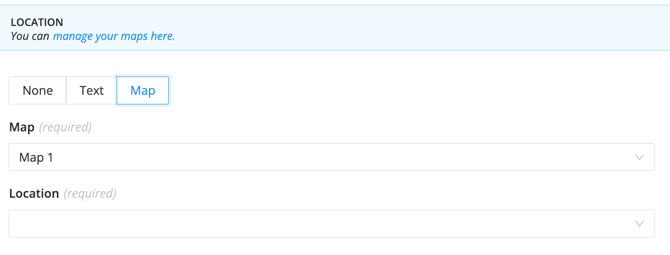
- Location: You can enhance the Company Profile by adding a location. This can be accomplished by either entering a descriptive text that will display beneath the Company name or by selecting a specific location pin from an Image Map, provided you have created one in your Maps library. Additionally, you have the option to incorporate a Google Map if it has been added to your Maps library.
- Sessions: Connect a session from your session library to this company profile. This will assist attendees in discovering relevant sessions and activities associated with this company.

- Documents: You can directly link documents from your documents library to the company profile. This feature allows attendees to easily access valuable resources and materials provided by the company, enhancing their experience and engagement.

- Contact Information: This section enables companies to input their contact details, making it easier for attendees to connect. The available fields include Phone Number, Website, Facebook, X (formerly known as Twitter), and LinkedIn.

- External Links: This area allows you to connect to relevant external websites, such as blogs, podcasts, or demo booking pages, that provide additional information or resources related to the company.

- About: Utilize the Rich Text Editor to enrich the company profile by adding detailed descriptions, company information, images, and any other relevant data.
- Once you have completed entering all the required information, be sure to click the green "Save Details" button located at the bottom of the page to preserve your changes.

2b. Creating Company Profiles in Bulk with Excel
To add multiple companies simultaneously, you can take advantage of the Excel import feature, which allows you to complete an Excel template and efficiently import companies in bulk.
- Click on the Import/Export option located on the right side of the Companies List.

- Select Import Companies to download the template you will need to work with

- Open the downloaded Excel file and complete all necessary information for your Company profiles.

Following columns are available:- Company Name (required): Input the name of the company as you want it to appear in your Event App.
- About: Include comprehensive descriptions, company details and any other relevant information to give attendees a thorough understanding of the company. You may also use HTML tags in this section to format your text directly or to add images.
- Phone Number: Input the primary contact phone number to help attendees connect directly with the company.
- Website: Provide the URL of the company’s official website for attendees to learn more about the organization.
- Facebook: Enter the URL of the company’s official Facebook page, allowing attendees to follow or interact with the company on social media.
- X: Include the URL for the company’s official X (formerly known as Twitter) profile to promote engagement and updates.
- LinkedIn: Add the LinkedIn profile link to help attendees connect with the company on a professional networking platform.
- Map: Enter the name of a Map as uploaded in your Maps library (image or Google Map). If you want to add a location using plain text only, leave this field blank and use the "Location" column instead.
- Location: Enter a descriptive text for the company’s location or enter the exact name of the location pin as used in the Maps library.
- Groups: Enter one or more group names (for example, "Gold Sponsors" or "Exhibitors"). There is no need to create these groups in the Experience Manager beforehand. By entering the group names in this column, they will be automatically generated upon import. If you wish to assign multiple groups to a single company, simply separate the names with commas.
- External ID: If this field is left blank, the system will automatically assign a default External ID. To utilize a custom External ID, be sure to complete this field prior to the initial import, as External IDs cannot be modified or deleted once they have been created.
- Lead Capture: To enable or disable the Lead Capture feature for this company, simply input "Yes" to activate it or "No" to deactivate it.
- Video URL: Add a link from hosting platforms like YouTube or Vimeo.
- Company Representatives (External ID):Include the external IDs of representatives associated with this company. These representatives can be displayed on the company profile page, facilitating easier communication for attendees.
- Please note that Company Representatives listed in this column will not have access to the Company Portal or Lead Capture features, as these require separate permissions in other columns.
- Before designating individuals as Company Representatives, ensure their profiles are added to the people library. You can obtain the External IDs by exporting your current people list and copying the information from the "External ID" column.
- Sessions (External IDs): Link relevant sessions from your session library to this company profile. This helps attendees discover associated activities or presentations. Ensure sessions are added to the session library. You can obtain the External IDs by exporting your current session list and copying the information from the "External ID" column.
- Lead Capture App Permission (Email IDs): Grant permissions for specific individuals to use the Lead Capture app on the company’s behalf by adding their email-addresses. Make sure this person has been added to your people library prior to granting access.*
- Company Portal Permission (Email IDs): Grant permissions for specific individuals to use the Company Portal in order to fill-out the company’s profile and exporting captured leads by adding their email-addresses. Make sure this person has been added to your people library prior to granting access.*
- CTA URL: Input a Call-to-Action URL for external websites, such as registration forms, product demos, or resource pages.
- CTA Button Text: Define the text for the Call-to-Action button (e.g., "Learn More" or "Book a Demo"). The button’s design will match the event’s link color settings in the Event Design Studio.
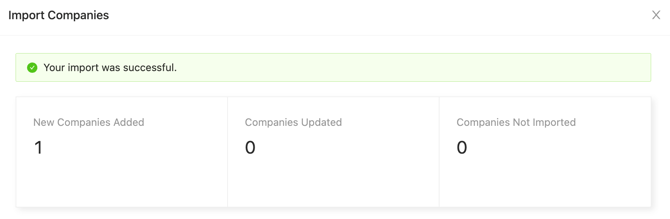
- Choose the Import/Export option to select Import Companies and upload your file.
*Important: Please note that when you populate the columns for Lead Capture App Permission (Email IDs) and Company Portal Permission (Email IDs), our system will automatically send an invitation email directly after the import. This email, which cannot be customized, will notify the designated Company Representatives that they have been granted access to the Company Portal and/or Lead Capture, along with instructions on how to access these features.
Please be aware that the External ID column will be automatically filled in once you re-import the data into the Experience Manager. If you wish to assign a custom External ID rather than using the default option, be sure to complete this column prior to your initial import.
3. Organizing Companies Using Groups
Groups can be used to help in organizing your company profiles, should you need to display them based on such things as sponsorship tier or product type. If you are planning to display your profiles in this manner, then we recommend establishing any relevant groups first to allow you to easily link your profiles while you are creating them.
Adding New Groups
- Access the Companies library to navigate to the Groups tab

- Select Add Company Group
- Input the name of the Company Group
- Use the color picker tool to select a color or input a HEX code
- Save your changes

Company Groups can also be created directly from the Companies Excel Template by inputting the name of the group that you would like to create into the Groups column. If you would like to create and/or assign multiple groups to the profile you are creating, simply input a comma between each group name.
Reorder Company Groups
The order of Company Groups plays a key role in how companies are displayed in the Event App. Companies are listed by their assigned group in the Company Sections, following the same order you set in the Experience Manager. Groups at the top of the list will appear first in the Event App. Within each group, companies are automatically arranged in alphabetical order. By organizing your groups thoughtfully, you can control the visibility and prominence of companies in your event.
- To rearrange the current groups, simply click on the "Reorder Groups" button.
- You can then drag and drop the groups into your desired order.
- Once you have arranged them to your satisfaction, make sure to click "Save Order" to apply your changes.

4. Managing Company Logos in Bulk
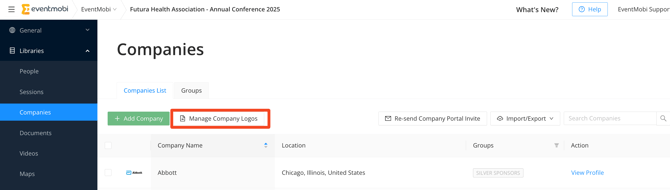
The "Manage Company Logos" feature in the Companies library allows for bulk uploading of company logos, accommodating up to 150 images at once. Supported file formats include *.jpeg, *.jpg, *.png, *.bmp, and *.webp. Each image can have a maximum file size of 24MB, ensuring high-quality logos can be uploaded efficiently.
- Click on "Manage Company Logos" in your Company library.
- Select "Upload Company Logos" and proceed by clicking on "Continue"

- You can either drag and drop your files into the designated area or click on the Upload area to choose files directly from your local drive. Once you have selected your files, please wait for the upload process to complete before clicking on "Continue" to proceed.

- Logos image files that have been named to match the company profile will auto-match, or you will have the option to select which Company profile from a dropdown menu.

5. Assigning Company Representatives
Manually Adding Representatives
To assign Company Representatives to a specific company, follow these straightforward steps:
- Select the desired company from the company library.
- Go to the "Company Representatives" tab and click on the "Add Representative" button.

- In the pop-up window, type the name of the individual you wish to designate as a Representative, and then select their name from the drop-down menu. Please ensure that this person has been added to the people library prior to assigning them a specific role.

-
Permissions: Determine whether to grant additional access rights to this individual.
-
Company Portal: You can provide access as a Company Admin, enabling them to manage the company's profile within the Company PortalCompany Admin rights are also necessary to export the complete list of leads collected during an event.
-
Lead Capture: This option allows the individual to log into the "Lead Capture by EventMobi" app and capture leads on-site. Please note that this checkbox will only be available if a lead capture license has already been assigned to the company.
-
No checkbox selected: If no options are selected, this individual will still be listed as a Company Representative on the company profile in the Event App, but without any additional access rights.
-
- Hide Representative: This option will conceal the Representative's profile from the company profile, enabling you to provide access to an individual associated with the company without their information being visible in the company's profile.
- Click on "Add Representatives" to save your changes.
Important: Please note that when you check the permission box for Company Portal and/or Lead Capture, our system will automatically send an invitation email directly after clicking "Add Representative". This email, which cannot be customized, will notify the designated Company Representatives that they have been granted access to the Company Portal and/or Lead Capture, along with instructions on how to access these features.
Adding Representatives Using Excel
Company representatives can also be assigned permissions from the Companies Excel template. To access this template, click on the Import/Export button.
- Select Import if you have not yet started building your profiles, and select the download link available on the pop-up that appears.
- Select Export if you have already added in your profiles and need to update their profile to assign them as Company Admins.
The following columns are essential for designating Company Representatives and providing them with access to the Company Portal or Lead Capture features:
- Company Representatives (External ID):Include the external IDs of representatives associated with this company. These representatives can be displayed on the company profile page, facilitating easier communication for attendees.
- Please note that Company Representatives listed in this column will not have access to the Company Portal or Lead Capture features, as these require separate permissions in other columns.
- Before designating individuals as Company Representatives, ensure their profiles are added to the people library. You can obtain the External IDs by exporting your current people list and copying the information from the "External ID" column.
- Lead Capture App Permission (Email IDs): Grant permissions for specific individuals to use the Lead Capture app on the company’s behalf by adding their email-addresses. Make sure this person has been added to your people library prior to granting access.*
- Company Portal Permission (Email IDs): Grant permissions for specific individuals to use the Company Portal in order to fill-out the company’s profile and exporting captured leads by adding their email-addresses. Make sure this person has been added to your people library prior to granting access.*
To save your changes to the Companies library, select the Import option to upload the template. Once your file has imported, an email invitation will be sent to any new email addresses that you have entered into the Company Admin(s) column.
Note: The number of Company Admins is not limited per company, so you will have access to add as many people as needed.
For additional information regarding access to the Company Portal and Lead Capture features, please consult the related articles:
Company Portal for Organizers
Company Portal for Company Representatives
Lead Capture for Organizers
Lead Capture for Company Representatives
6. Creating Company Sections
- Visit the Menu Sections area found under the Event App menu in the Experience Manager
- Select Edit for the existing Companies section, or choose the Add Section > Companies to create a new one
- On the pop-up that appears, click on the Specific Company Groups option
- Select all relevant options from the Company Groups drop down menu
- Save your changes

Sorting Logic / Company Order:
By default, companies are sorted by their group. The order of the groups is determined by the position of each group in the Group Tab (from first to last). Within each group, companies will be sorted alphabetically.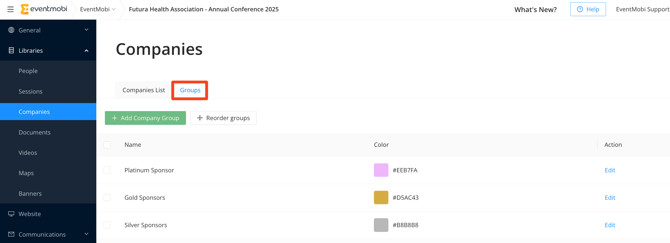
Workaround for Alphabetical Sorting:
To achieve an alphabetical arrangement of all companies, consider creating a new group and positioning it at the top of the Groups tab. By assigning all companies to this newly created group, you will ensure that they are displayed in a strictly alphabetical order, independent of any group positioning.
7. Offering Sponsorship Opportunities
The Event App offers many different ways to promote the people and companies that are contributing to your event as sponsors and/or exhibitors. When it comes to selling sponsorship opportunities, we recommend creating tiered packages that will outline the specific types of promotion that will be included.
The cost, shape and form of the sponsorship packages will ultimately be at the discretion of your team and tailored to your event. To help in making this process easier, we have outlined some of the options that you can include in the packages or tiers that you are creating, outside of creating company profiles.
Designer Pages
The Page Designer offers the flexibility to showcase your top sponsor(s) using visually appealing and eye catching designs. Using a Designer Page, you can promote your key contributors directly from the Home Page, or even create a dedicated page within the Event App.
Adding Widgets To Highlight Sponsors
- Visit the Page Designer library in the Experience Manager
- Select an existing Designer Page or choose the Add Page option to create a new Designer Page to highlight your sponsor(s)
- Click on Add Widget to add content to the Designer Page you are working, Image and Text Block are best suited to share logos and information about your sponsor(s) directly from the page
- Select the Mobile View (if applicable) to adjust the design for a smartphone device screen
- Click on Publish Changes to save your design
- Visit the Home Page or Sections area in the Experience Manager to assign to the Home Page or a section of the Event App
. 
For a comprehensive guide on creating custom Designer Pages, please refer to the relevant article.
Banners
Banners help in promoting your top sponsor(s) from various areas of the Event App, including the top of the left hand menu, and within your People, Sessions and Companies sections. These ads rotate randomly as attendees interact with the Event App, and can help in directing them to important content such as the Company profile or a website where they can find more information.
Banners can also be used to promote any sessions or activities that are being hosted or presented by your sponsors, if you choose.

.png?width=280&height=553&name=iPhone-XR-2018-eventmobi.com%20(1).png) .
. .png?width=280&height=553&name=iPhone-XR-2018-eventmobi.com%20(2).png)
Use the Settings area to disable Banners from specific section types, when needed. You can also create multiple ads for any sponsor(s) that you would like to have appear more frequently within the random rotation.
Learn more about showcasing companies,by creating Banners in the following article.
Sponsored Content
Additional promotional opportunities are offered by allowing companies to sponsor content such as sessions, activities or surveys. Both of these options can help in connecting your sponsors with attendees by offering additional exposure, interaction and/or the collection of data that can help them in gathering leads.
Check out the following articles on Creating Sessions and Creating Surveys for more information!

.png?width=280&height=553&name=iPhone-XR-2018-eventmobi.com%20(3).png)
Gamification Challenges
Creating challenges encouraging attendees to visit sponsor and exhibitor booths onsite or virtually can help in creating traffic to the companies contributing to the event with minimal effort required on their part.
Within the Gamification option of the Event App, attendees will see the challenges that you have created, and will be able to complete them in any order that they see fit. To bring more visibility to specific sponsors or exhibitors, you can adjust the order that the challenges display within the game itself.
To receive points for the challenge, attendees will need to receive a passcode that they will then input into the Event App Gamification section - these codes will need to be unique for each challenge that you are creating and will need to be distributed to the Company Representatives so that they can share them with anyone that visits the booth to learn more.
Check out this article for instructions on how to create your Game Challenges!

.png?width=280&height=553&name=iPhone-XR-2018-eventmobi.com%20(4).png) .
. .png?width=280&height=553&name=iPhone-XR-2018-eventmobi.com%20(5).png)
Sponsored Sessions
Adding a sponsor to a session listing increases sponsor visibility by displaying their branding alongside session details such as speakers, documents, and links. This feature provides sponsors with greater recognition and exposure throughout the event experience while helping attendees easily identify the organizations supporting specific sessions. Sponsors can be linked from the Companies Library, with updates automatically reflected in the company record for seamless event management.
Check out this article for instructions on Linking Sponsors to Sessions!