Presenting at an EventMobi Studio Session
Learn all the features you have as a speaker and best practices for a professional and engaging live stream presentation.
Presenting at a Session
Presenting in a virtual setting has a different set of requirements than an in-person event that you will want to address to ensure they're no distractions and you can provide the best possible presentation at your session.
Below we're going to cover all the steps you will need to take to join the EventMobi Studio and all the features you will have once you join the studio, from there we can move into best practices for presenting in a virtual setting and what to look out for when you're live.
When you're added a speaker to a session, you will get an automated email letting you know that you have been added and the direct link where to find that session in the event.
Notification to Assigned Speakers
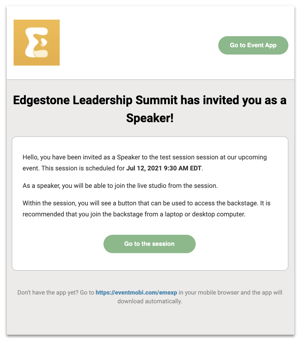
When you're added a speaker to a session, you will get an automated email letting you know that you have been added and the direct link where to find that session in the event.
Clicking Go to the session will direct you to the login page and direct you to the session that you will be presenting at.
Join the Studio
To make joining your specific session as easy possible, we have created a button that will only show to you as a speaker to join the EventMobi Studio with any other speakers and the producer. If you do not see this when you initially view the session, you may need to refresh your page to populate it.
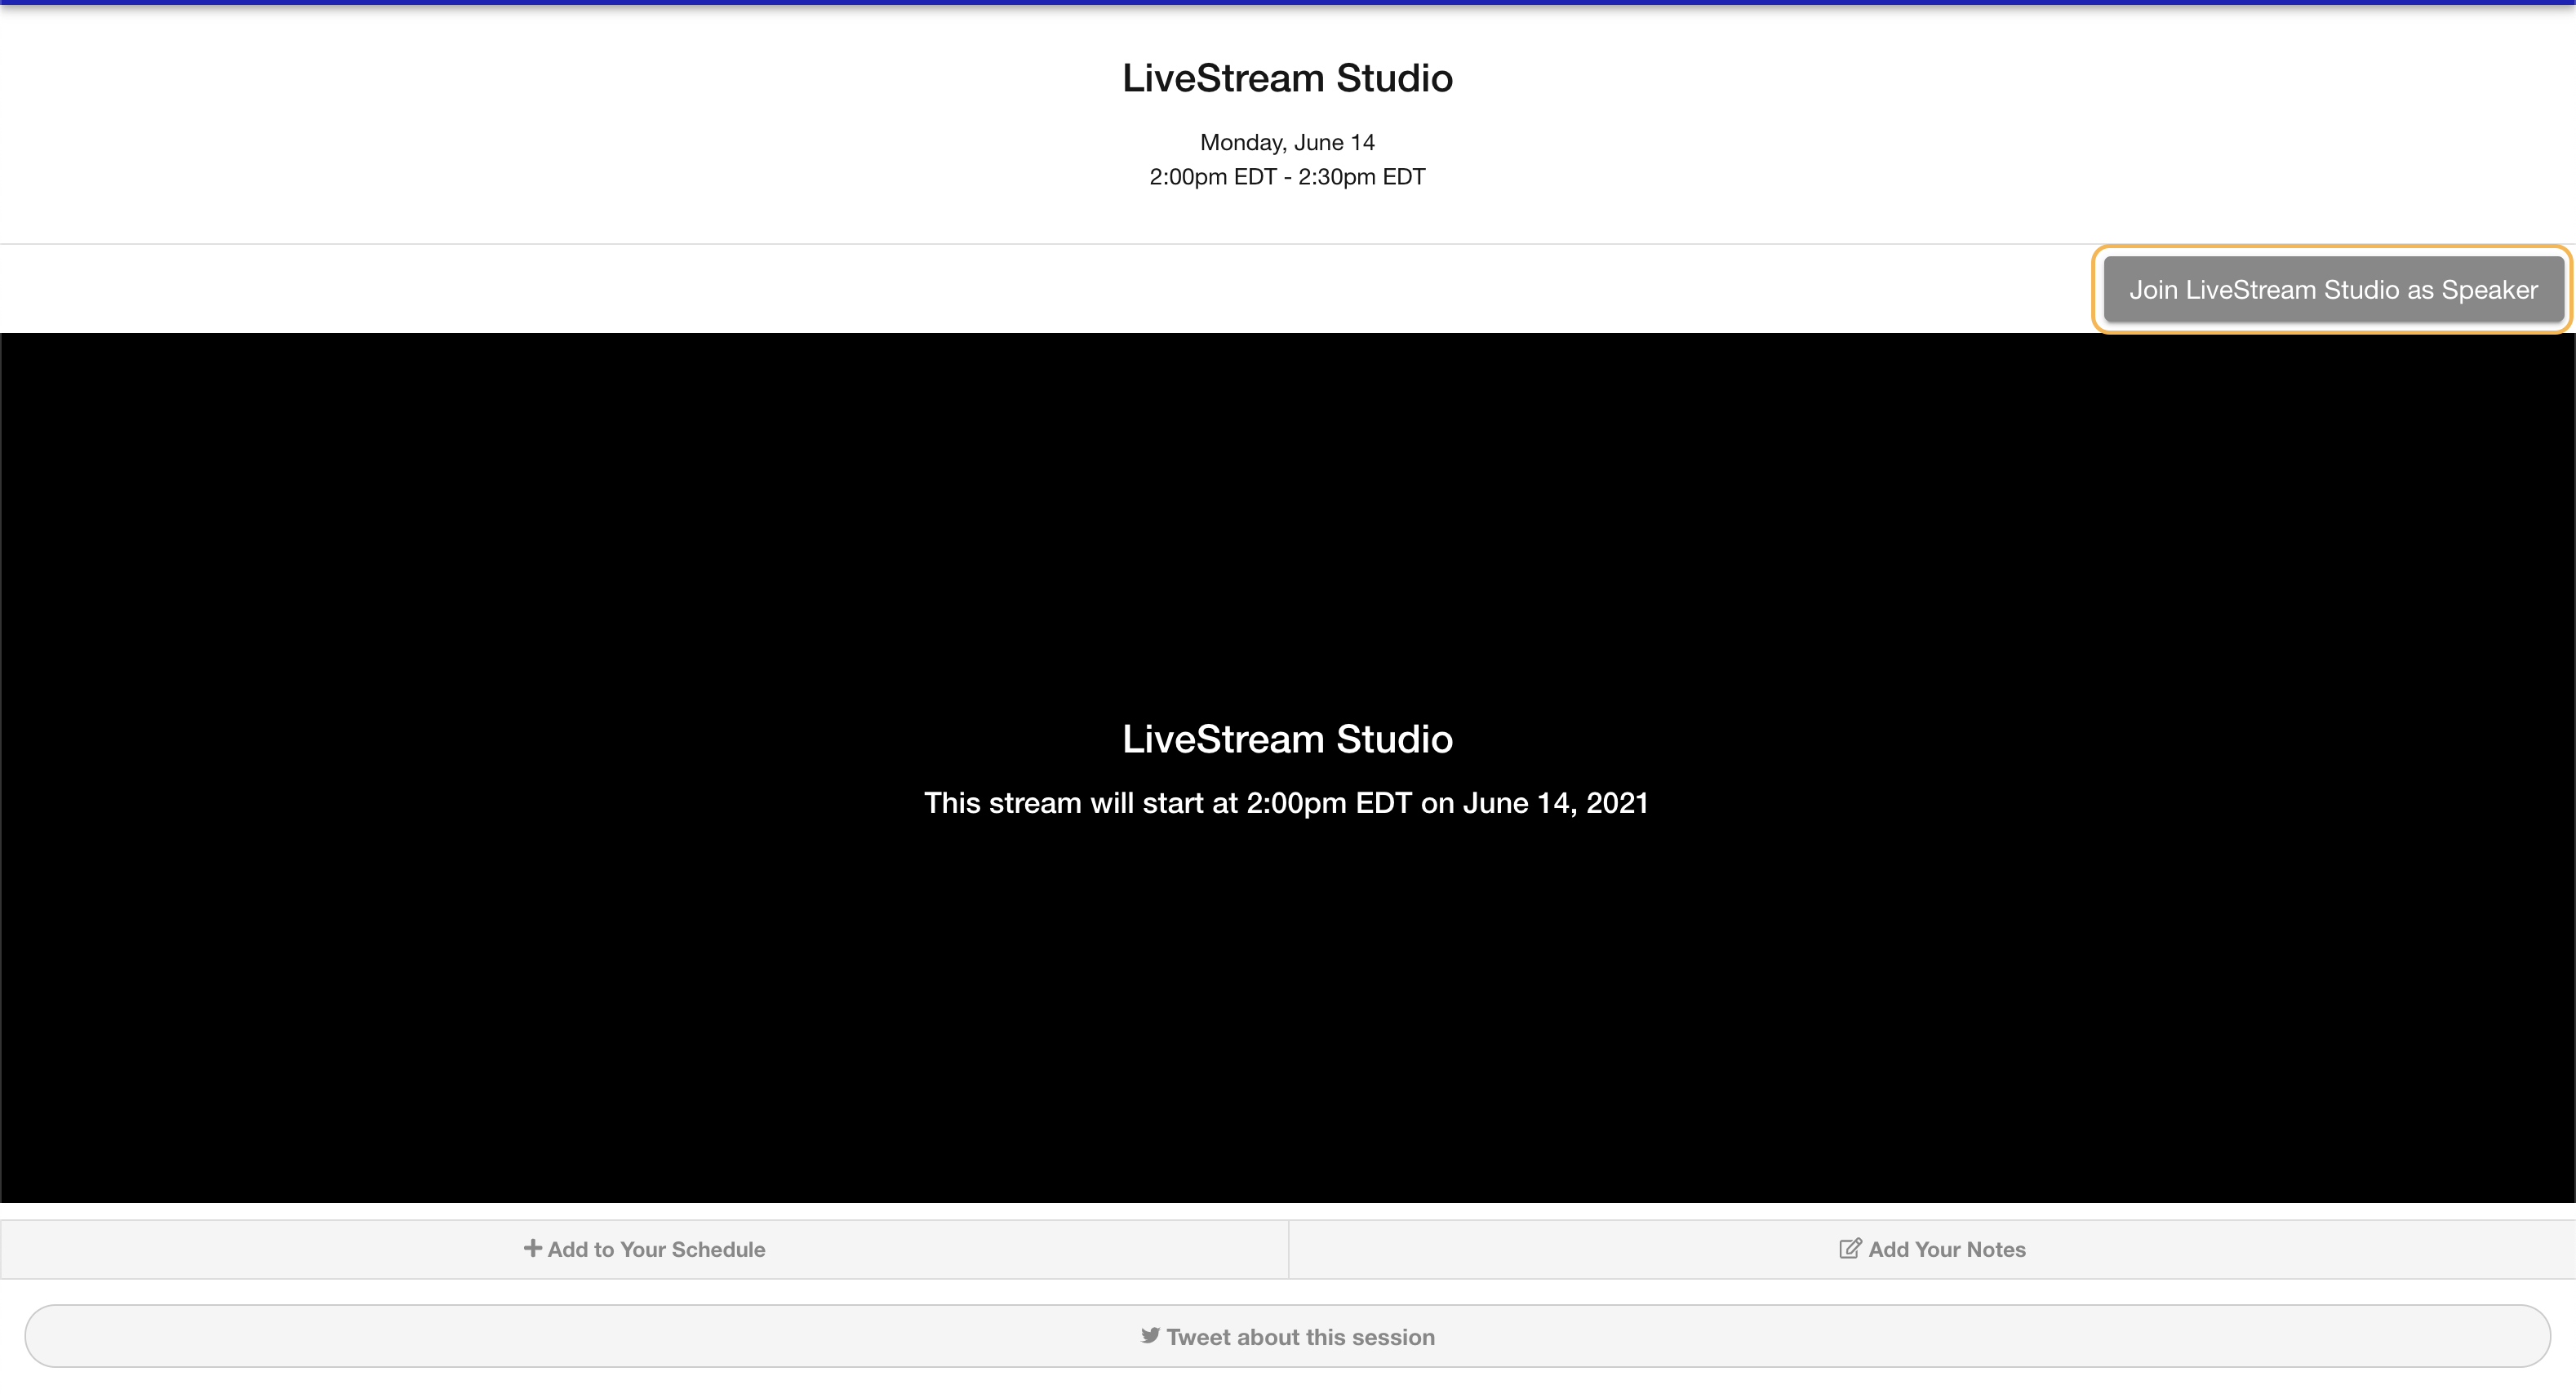
Speakers will see the exact same prompt letting them know that a new tab will open to join the studio with the producers.
It's important to note that the speaker will enter a waiting room and the producer will need to join the room and allow them to enter the studio once inside.
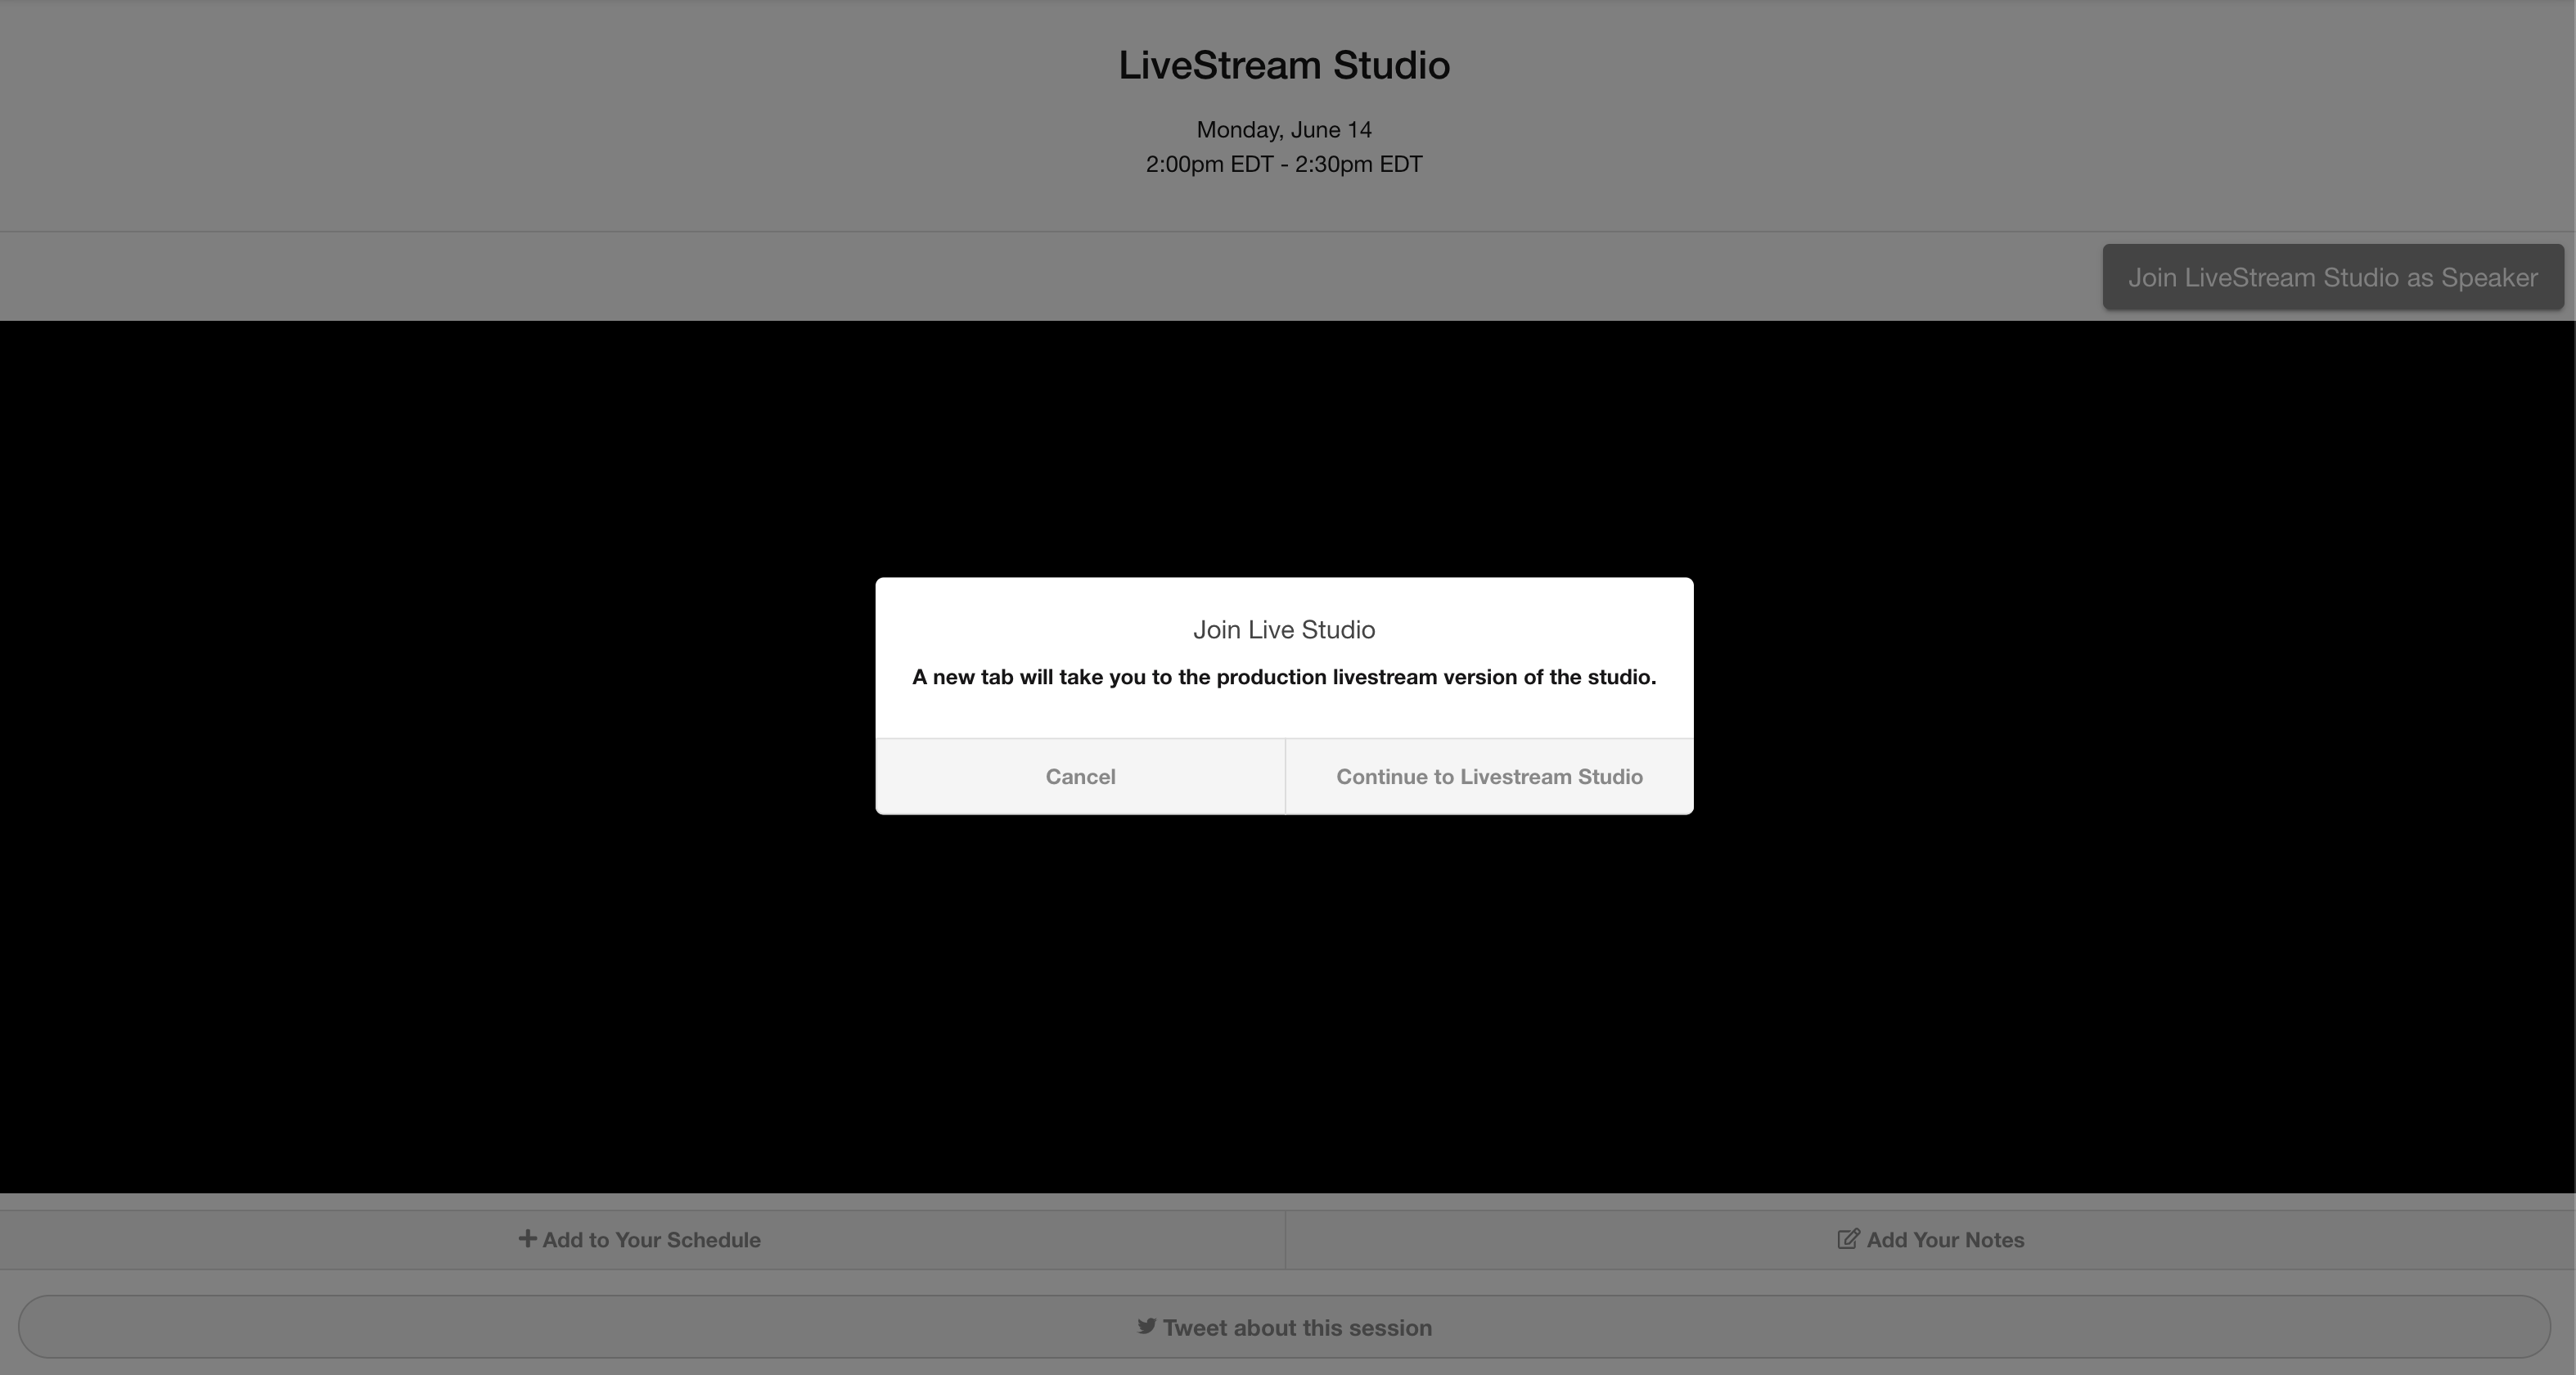
Continue to EventMobi Studio, will bring you into the studio, your first and last name will automatically be populated based on how your name was entered in the EventMobi Event App by the organizer or through your self-edit profile link (Attendee Portal).
You can update your name at anytime by clicking the profile icon at the top right hand side, then Edit Profile option.
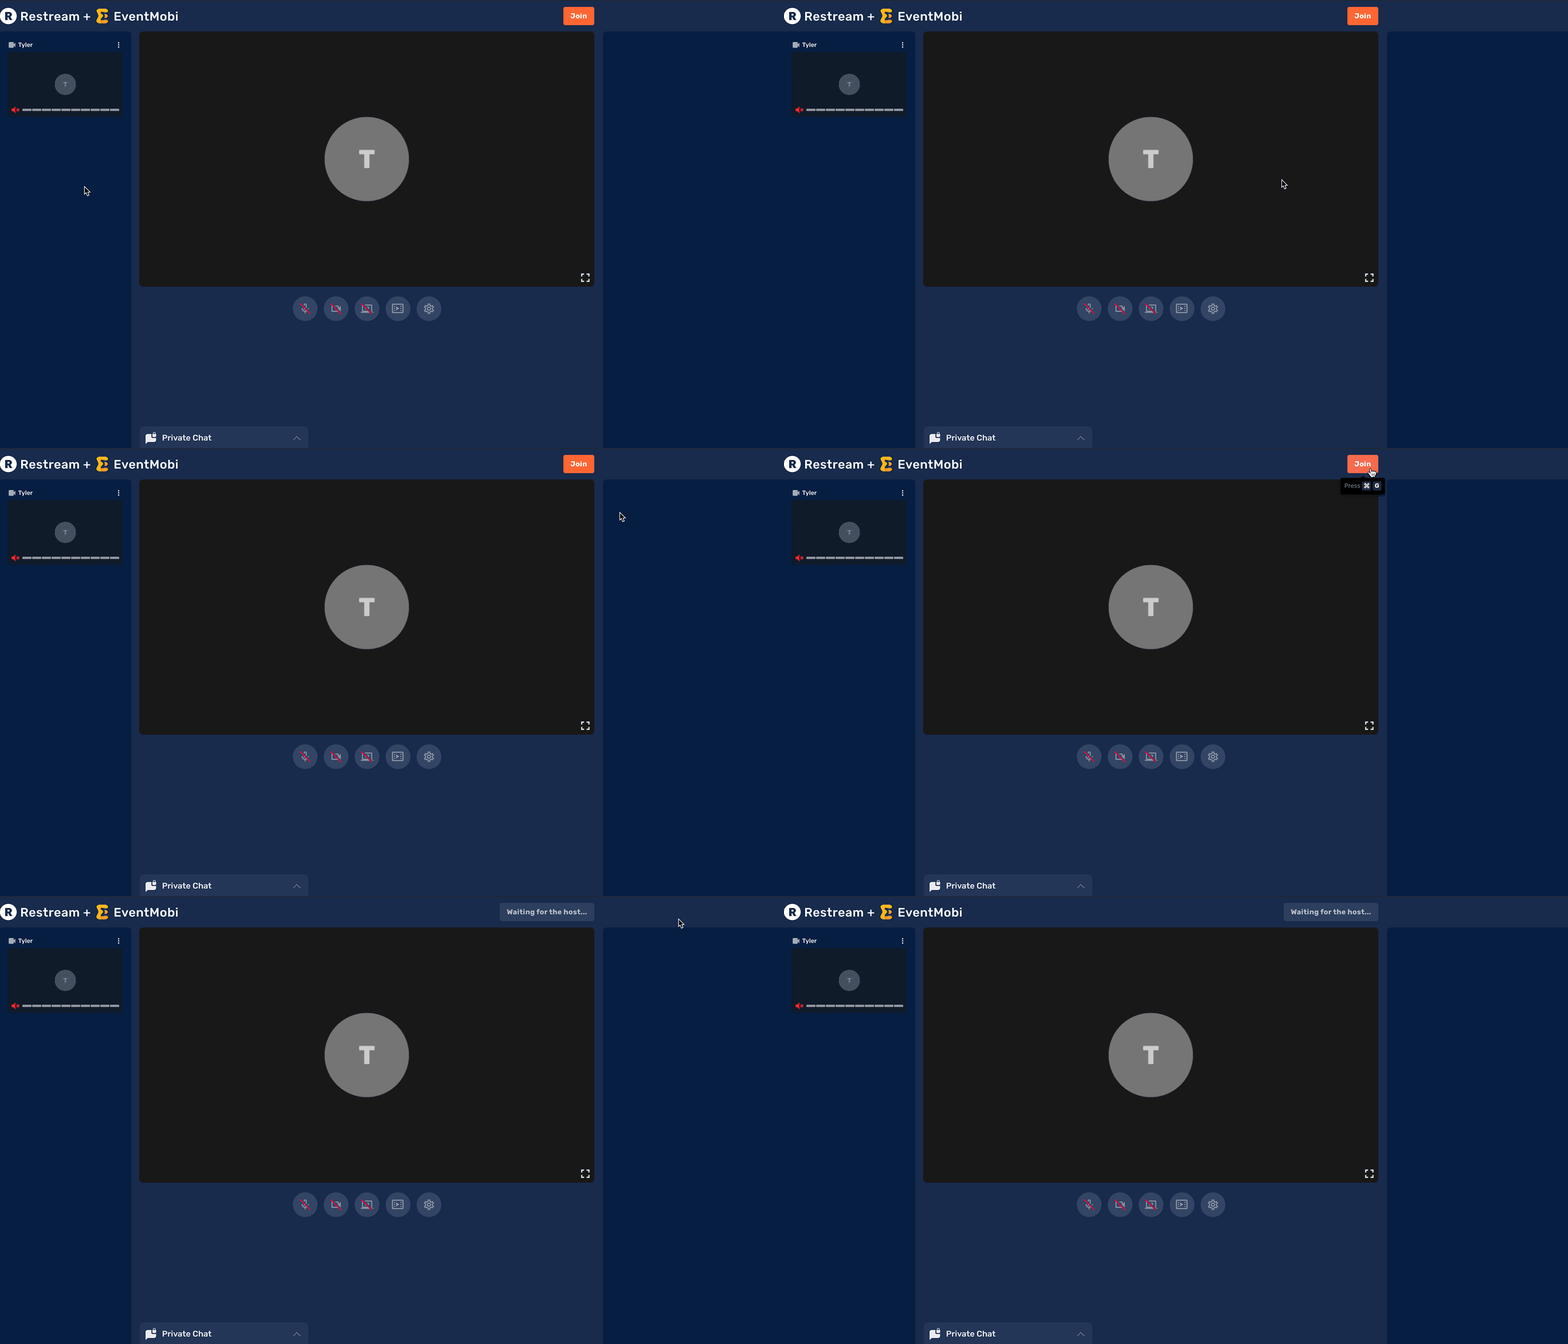
Once you join the studio, you will enter a waiting room where you can check your camera, microphone, and adjust your positioning before joining the studio. Once you're ready, you will select Join at the top right corner of the studio to enter.
Prepare For Your Session
There are three very important technical aspects that you will want to test before you join the EventMobi studio and get ready to go live:
- Confirm name in Studio
- Check Internet Connection
- Confirm Microphone & Camera setup
Confirm Name in Studio
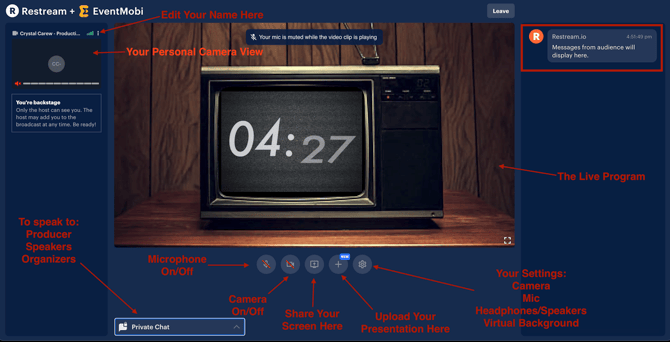
When you join the EventMobi studio, your name will automatically be carried over from the Event App. It is important to always confirm the name that shows on the left hand side above your camera preview.
This is the name that will display to your audience.
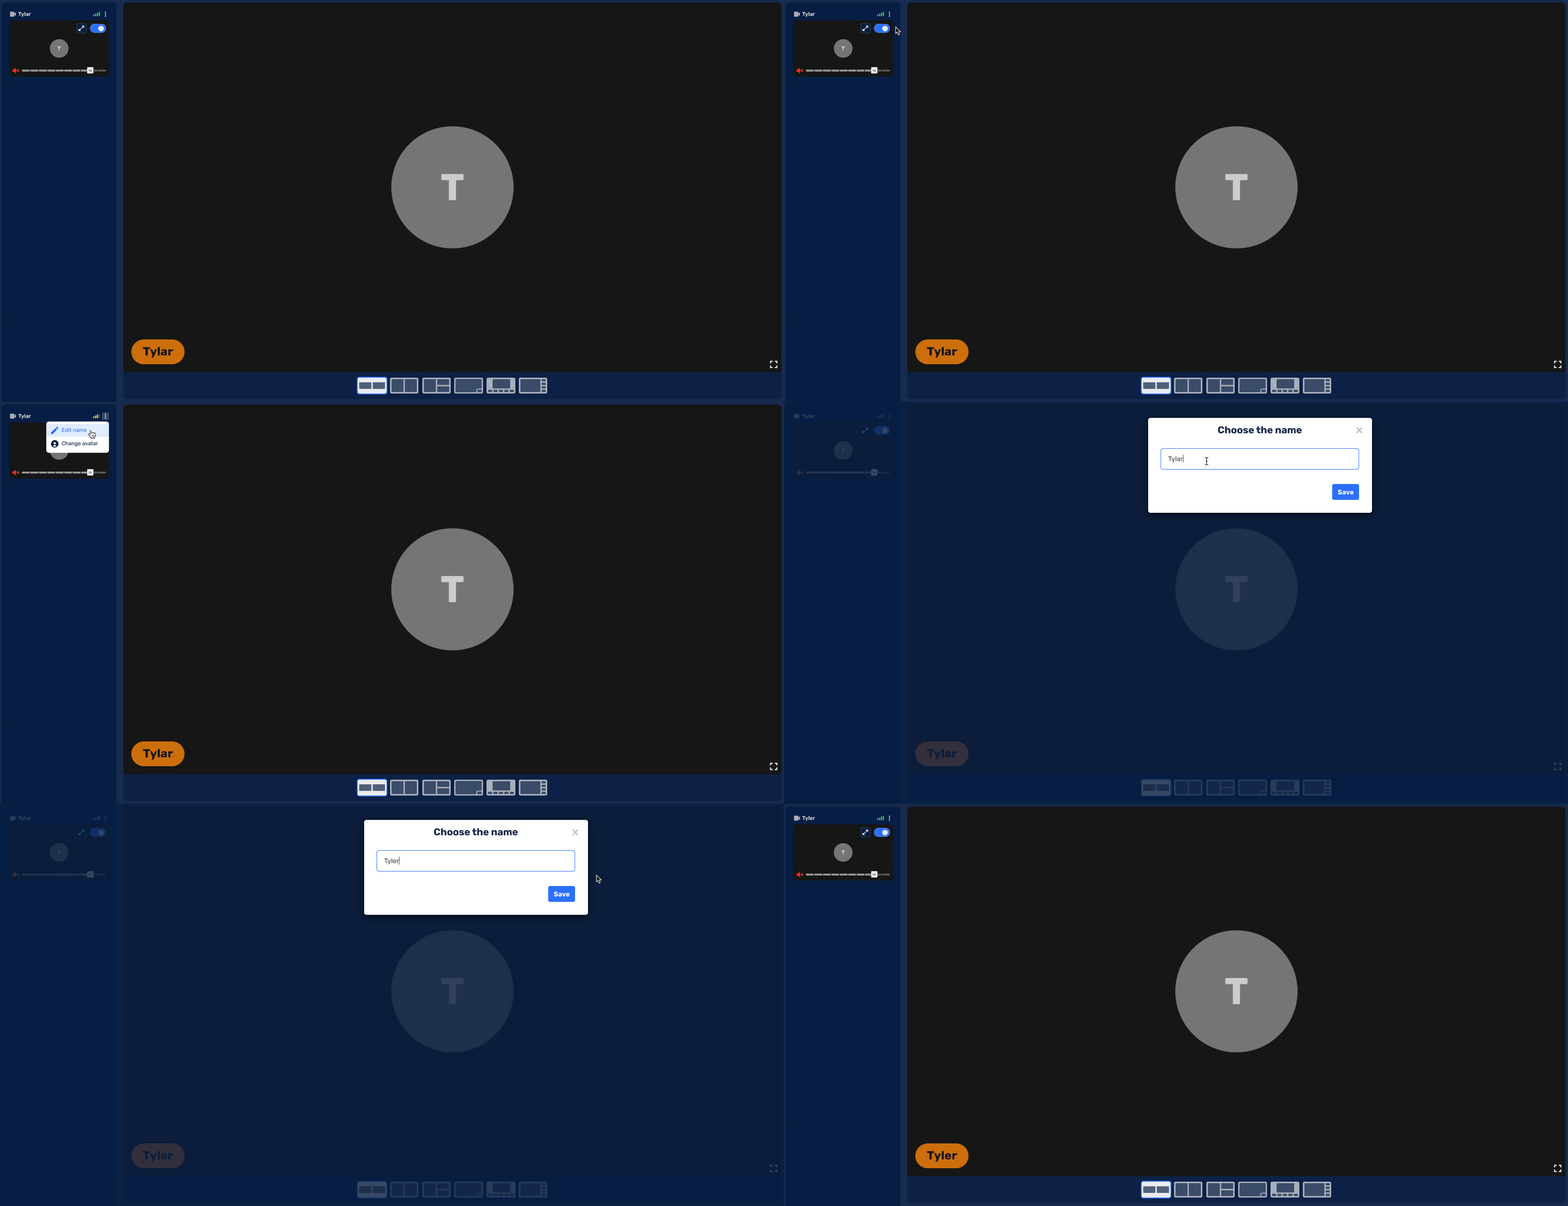
We recommend that you keep your name as simplified as possible, if you enter too many characters - you run the risk of cutting off your title depending on how many speakers are showing at the same time.
We recommend a 33 character maximum limit. First & Last name will generally be enough
Check Internet Connection
Your internet connect strength is just as important as the content you're presenting during the livestream. Your connection impacts your microphone, camera, and slideshow presentation and can also impact the quality of other speakers in your session.
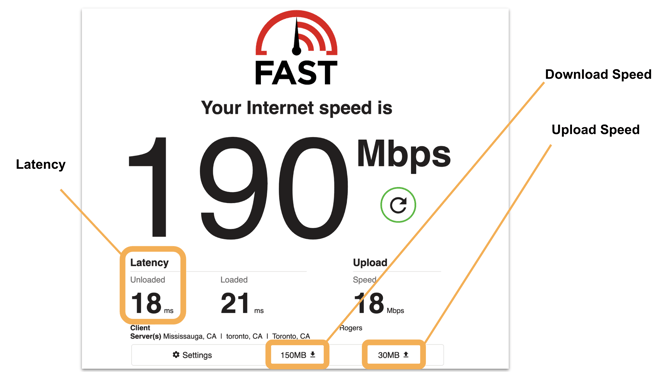
You can test your internet speed by completing this test: fast.com
We recommend the minimum below internet speeds to ensure you won't run into any issues during your live stream:
Minimum Recommend Internet Speeds
Upload: 10Mbps
Download: 25Mbps
Latency: <30ms
Reading Fast.com Speed Test
Confirm Microphone & Camera Set Up
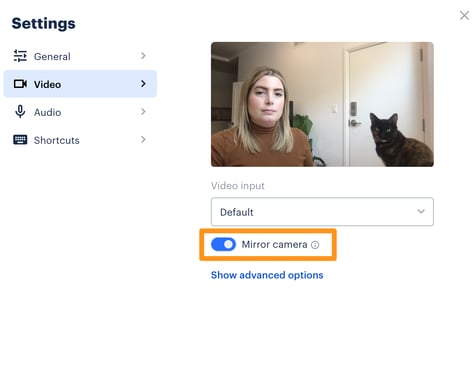
When you join the studio, you will will have access to your settings which can be found by clicking on the gear symbol. Here you can adjust your camera, video resolution, microphone, and speakers. This can all be adjusted while you're in the waiting room and while you're in the studio.
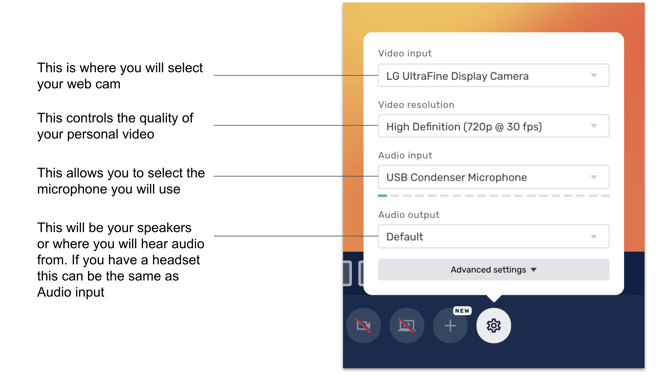
From the Settings area you will also find an option to Mirror Camera where you can flip the video horizontally.
Speaker Features
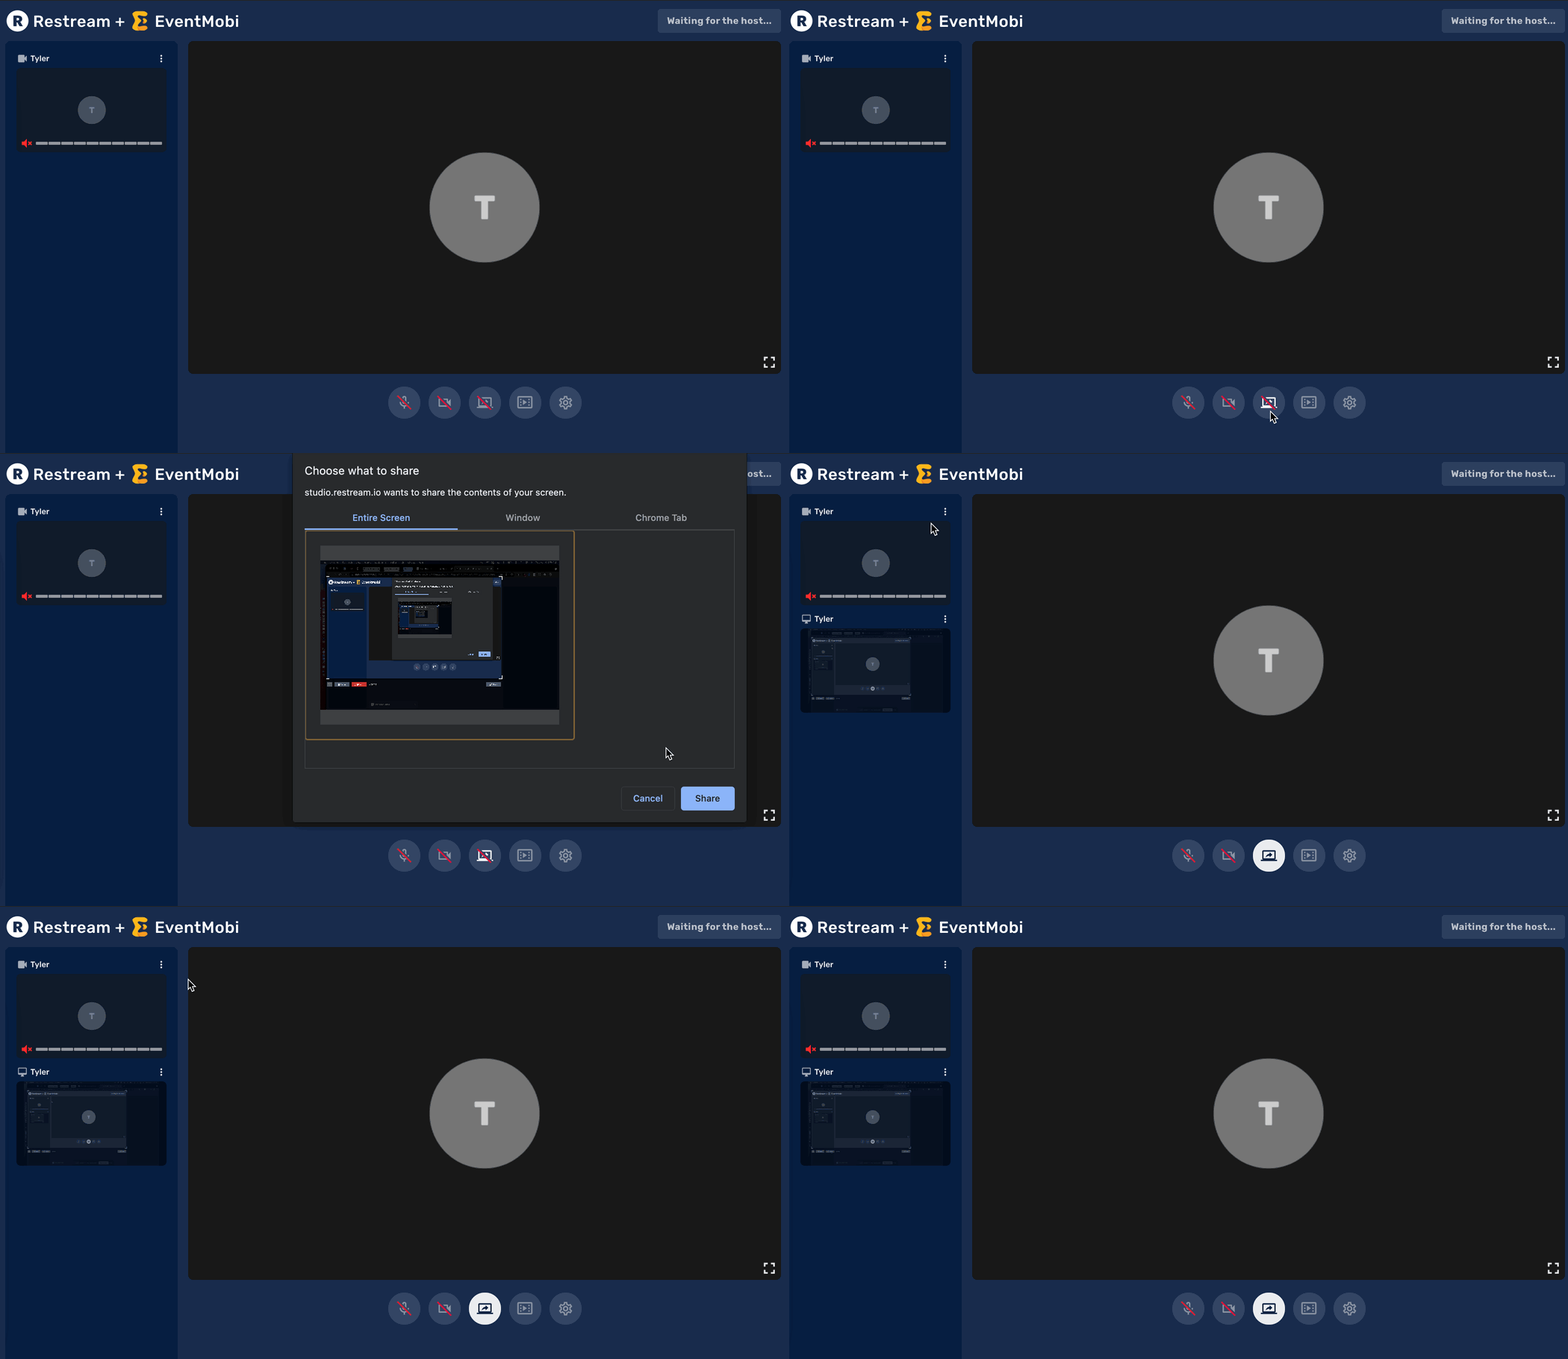
Share Your Screen
Similar to other meeting tools, you will also have the option to share your own screen. This can be initiated from your screen and once you select your screen to share, it will automatically join the left hand menu for the producer to add into the live stream whenever ready.
When you want to end your share screen, you can just select the Share Screen button again and it will cancel the share screen and remove it from the live stream.
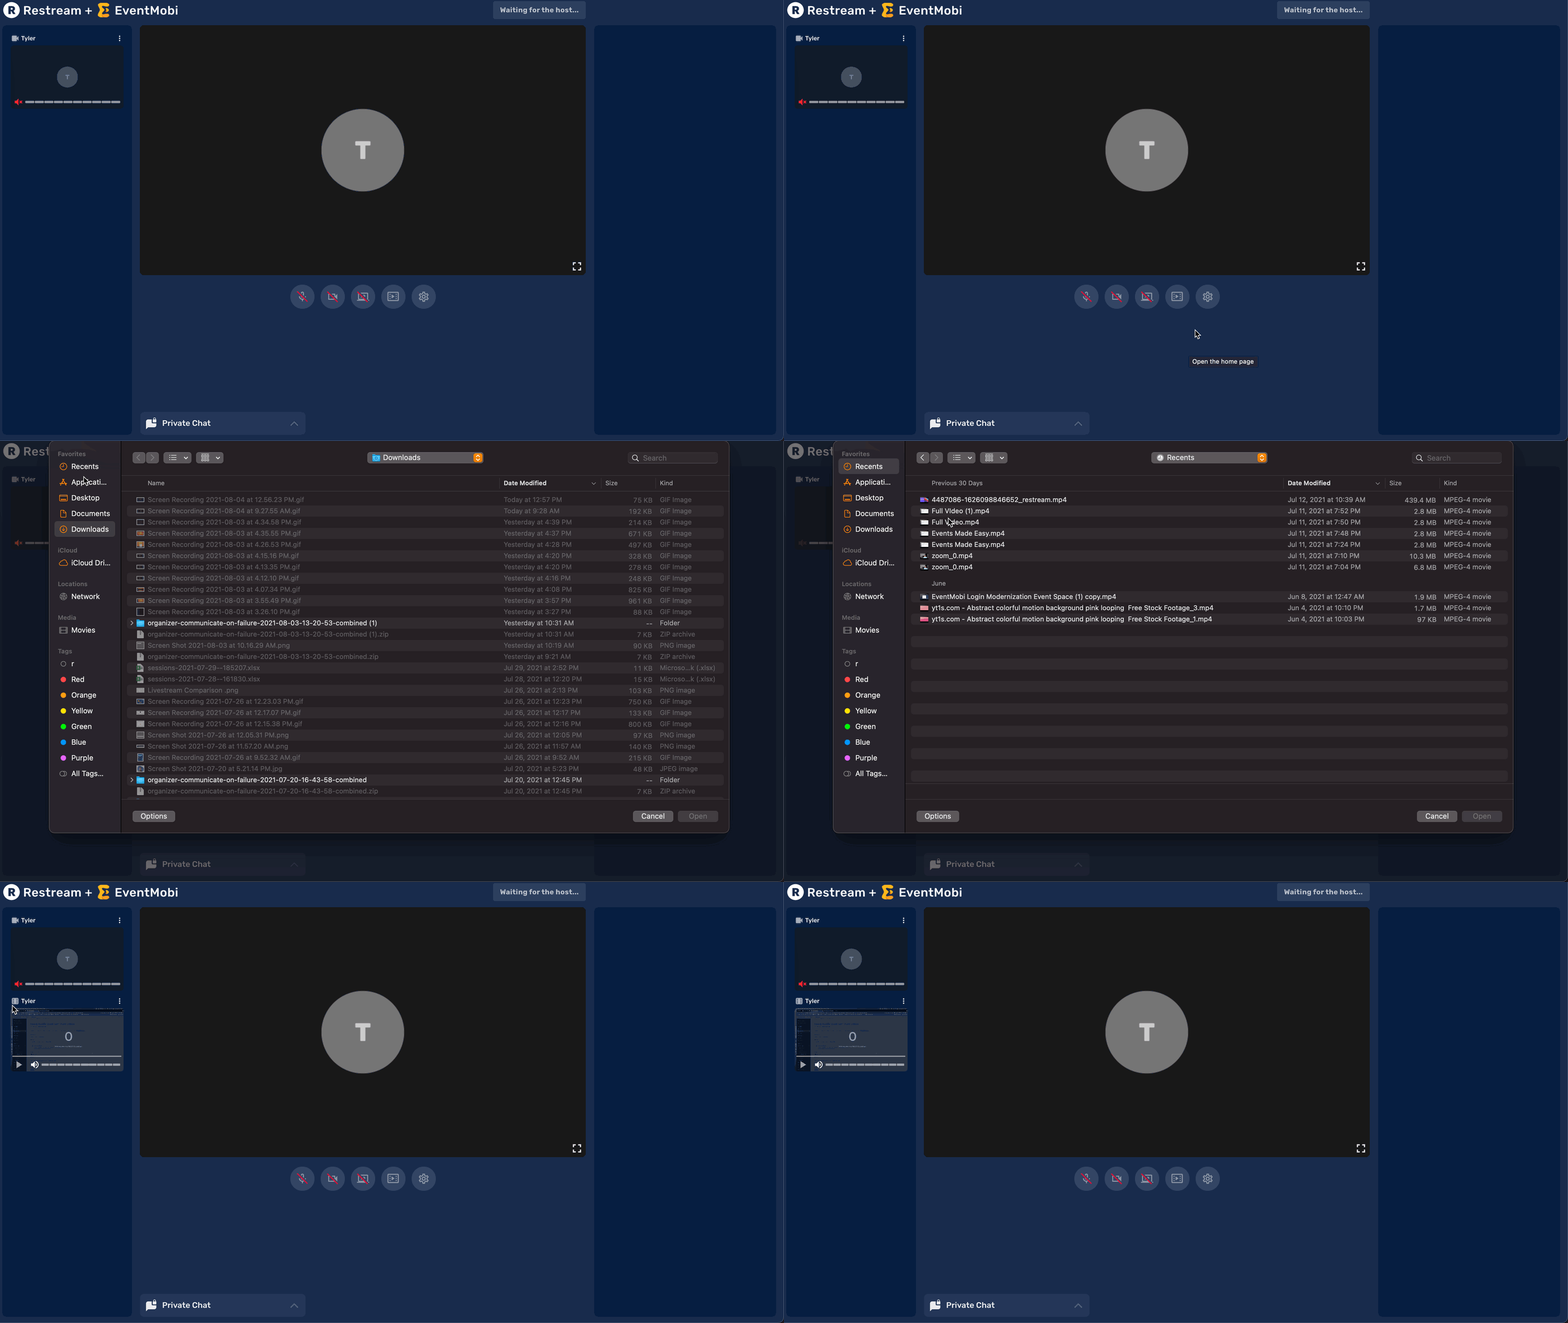
Add Local Video
Adding a local video gives you the flexibility to share pre-recorded content from your computer and right into the live stream. When you select Add Local Video, you will then need to find it on your device and select it - this will then add it to the left hand menu for the producer to add.
Once the video is added to the live stream, it will start from the beginning and you will be able to see how much of the video has played by the duration bar located in the bottom of the video.
Local video's are a lot more demanding on your computer and rely heavily on your hardware to ensure the quality isn't diminished during the live stream. Adding this to the stream should be tested before the session to ensure it works properly.
Going Live

Everything can be freely done in the studio without attendees seeing the live stream. The producer
of the live stream will decide when the session goes live and you will be able to know the session is live when you see Live located at the top left hand corner of the studio with a duration counter.
Once you see the Live icon, you're now streaming into the EventMobi Session and presenting to attendees all over the world!
