![]()
When activating a new registration for your event, it automatically creates predefined fields which can be found in the Registration tab under Form. Some of these fields will be activated by default, while others are not.
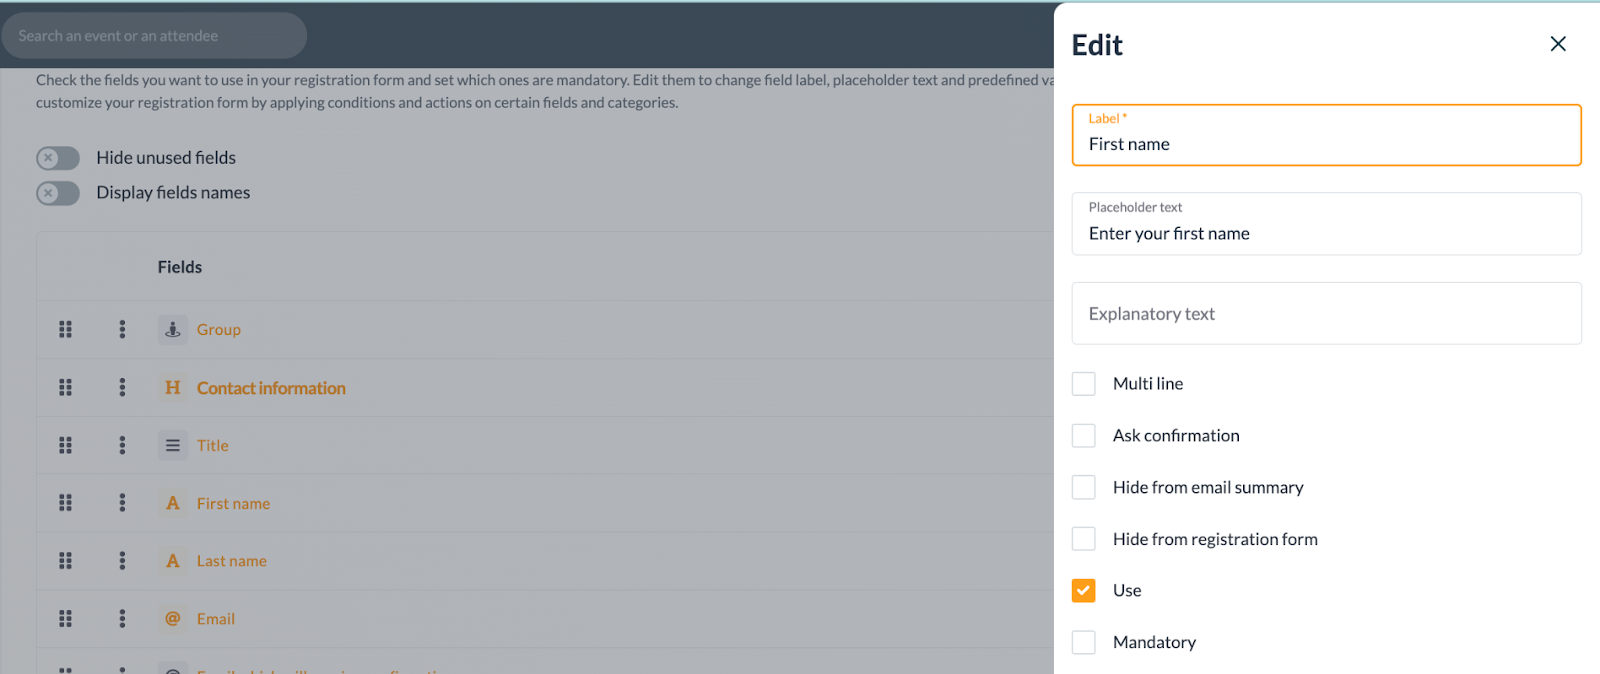
Clicking on the predefined field, you can choose to activate it and/or set the field as mandatory. Mandatory fields will prevent the attendee from continuing on in the registration process until the field has been updated.
Note: The Email Address field cannot be deactivated.
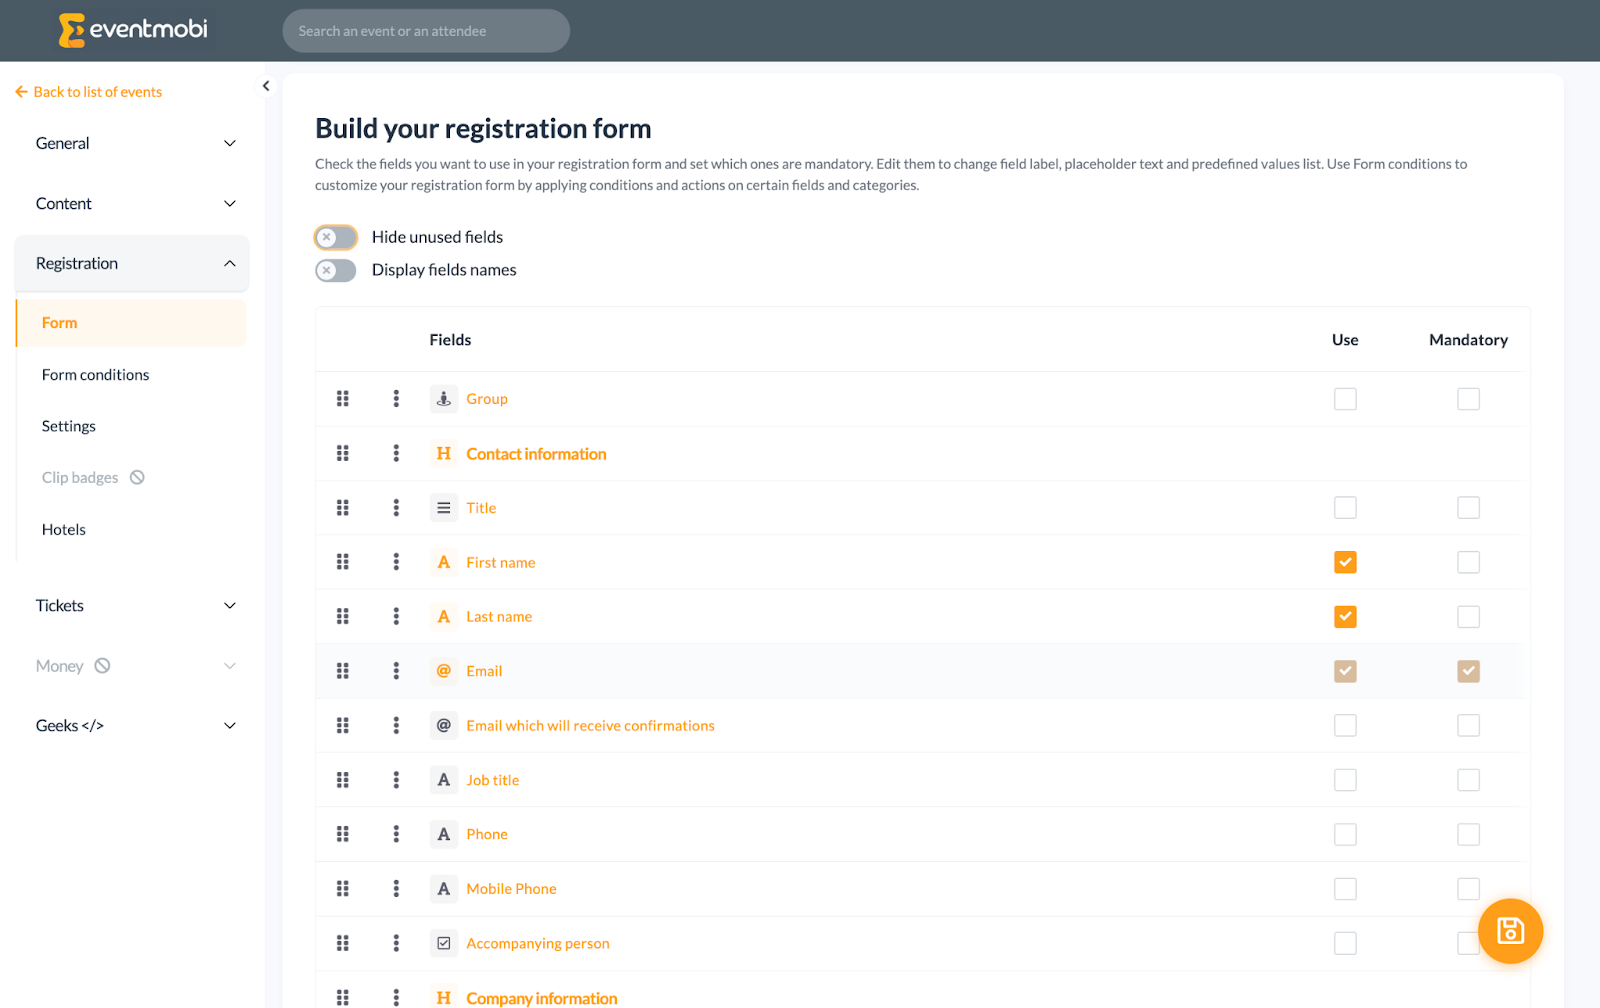

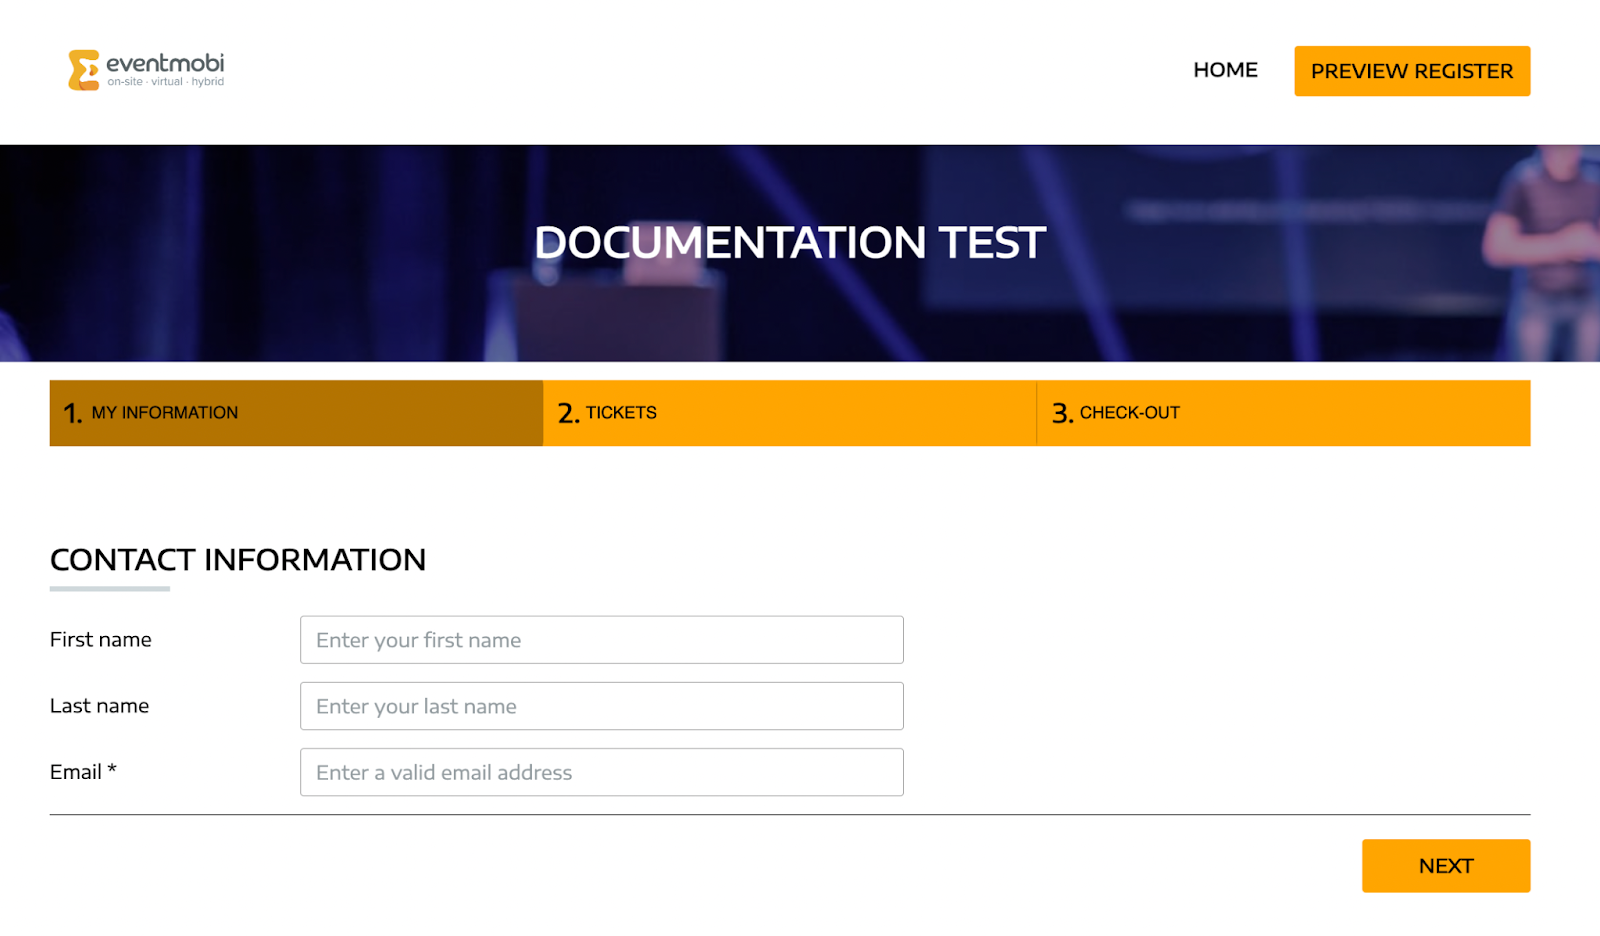
Any fields that have been activated will then display on the registration page.
Customizing Predefined Fields
To adjust the order of the registration fields, you can click on the six dots and then drag and drop the field into place. Alternatively, fields can be customized using the three dots to the left and selecting the Edit option available.
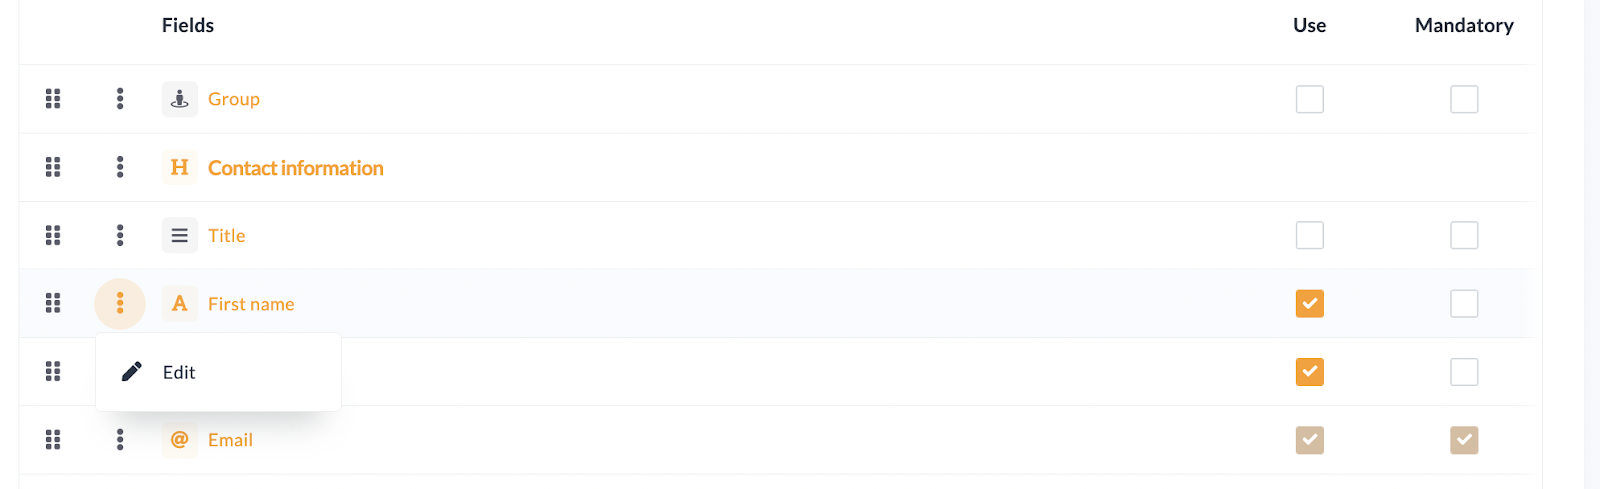
Alternatively, fields can be customized using the three dots to the left and selecting the Edit option available.
The following predefined fields should not be deleted or recreated. These predefined fields are crucial for the integration between the registration site and the Event App, along with other areas of the registration site.
- Email address: This will be synced to the Attendee profile in the Event App default field. This field is the most important one as this will allow the attendee to be able to login in the Event App
- First name: This will be synced to the Attendee profile in the Event App default field
- Last name: This will be synced to the Attendee profile in the Event App default field
- Job title: This will be synced to the Attendee profile in the Event App default field
- Company: This will be synced to the Attendee profile in the Event App default field article
- Country: Needed for the TAX Settings conditions. See more in this article
- State: Needed for the TAX Settings conditions. See more in this article
- VAT Nr: Needed for the TAX Settings conditions. See more in this article
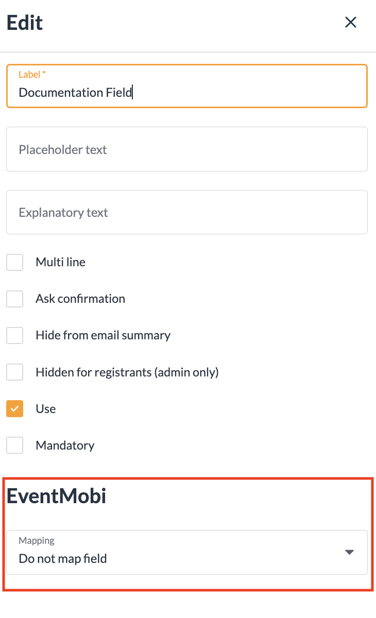
Syncing & Mapping Fields
When creating your registration fields, you will also have the option of determine whether the information captured should be synced and which field within the People profile of the Experience Manager it should be synced to.
When editing a field, you will have a dropdown menu available to select one of the following options:
- Do not map field: This will prevent the contents of the field from being synced over to the Experience Manager.
- Create new Custom Field: This will create a field within the Experience Manager and sync the data over. Note: Deleting this field will act in deleting it from Experience as well.
- Custom Field: This will allow you to sync the data of the field into a custom field that you have created in the Experience Manager. Note: Deleting this field in the EventMobi Registration platform will not delete the field in Experience.