Table of Content:
- Public vs. Private Registration
- Setting Up Private Registration
- RSVP for Private Registrations
- Importing People to send invitations
- Sending Invitations
- Managing Registration Statuses
- Email Campaign Analytics
1. Public vs. Private Registration
| 🔒 Private Registration | 🌍 Public Registration |
|
|
2. Setting Up Private Registration
General Settings
-
Enable Private Registration:
-
Navigate to Registration Details section located in Registration menu of Experience Manager.
-
In the General tab within the Privacy section, choose the option for Private Registration. This setting restricts access to the registration form exclusively to invited users listed in the People Library who have verified their email addresses.
- Choose a Title and Description that will be prominently displayed above the Email address field in the registration form. To the right of this page, you will find a preview of the registration form, allowing you to review how the Title and Description appear in the initial step of the registration process.

-
-
Define Registration Period:
-
Set the Start Date and End Date for when registration will be available.

-
- (Optional) Enabling RSVP for Private Events:
- Navigate to Registration Details > RSVP tab.
- Select Enable RSVP.

-
Customize response options:
-
Accept Option: Define the text (e.g., "Yes, I will attend").
-
Decline Option: Define the text (e.g., "No, I will not attend").
-
Include optional descriptions for each
-
Response option to provide additional context or guidance for registrants.

-
-
(Optional) Terms & Privacy:
-
Enable the checkboxes to display the Privacy Policy and Terms of Use.
-
Optionally require users to accept the Terms of Use before completing registration

-
To configure your Privacy Policy and Terms of Use, please navigate to the Privacy & Terms section found under the General tab in the Experience Manager.
3. RSVP for Private Events
The RSVP feature is optional and can be activated when setting your registration to private. In a private registration scenario, only individuals listed in your People Library are allowed to access and complete the registration form. The system verifies the entered email address against this list; if the email is found, the registration process proceeds. If not, a notification is displayed to inform the user that the email address is not authorized for registration.
When RSVP is enabled, the same verification process applies as with private events. Once a user's email address is confirmed, they are presented with options to either Accept or Decline the invitation. If they accept, they can proceed to select a ticket and fill out the necessary registration fields. Conversely, if they decline, they will receive a notification confirming their decision, and their registration status in the People Library will be updated to reflect this decline, ensuring event organizers are informed accordingly.
To activate the RSVP feature for private registrations, navigate to the RSVP tab within the Registration Details section and toggle the "Enable RSVP" option to the on position. Once this is done, you will be able to customize the Response Options as needed.

4. Importing People to send invitations
-
Go to Libraries > People.
-
Download the Template: Click on the Import/Export button and select Import. Then, download the provided template.


-
Fill Out the Template:
-
Open the downloaded Excel sheet and enter the required details.
-
At a minimum, fill out the following fields: First Name, Last Name, Email Address, and Registration Status.

-
The Registration Status must be one of the following:
-
registered
-
invited
-
not_started (Recommended when importing people for invitation purposes)
-
-
-
Import the File:
-
Save the completed Excel file.
-
Return to the Import/Export button, select Import, and upload your file.

-
5. Sending Invitations
The Communications Hub streamlines the invitation process for event organizers by enabling the creation and distribution of personalized invitations that include key event details and reflect your brand identity.
Customize your invitations with personalized text, images, and branding that match your event’s theme. Include clear calls-to-action for registration or RSVP, linking directly to the registration form for easy access.
After sending your invitations, track email engagement metrics like open and click-through rates to evaluate effectiveness and improve future campaigns. For more guidance on designing and personalizing your email campaign, refer to the associated article with tips and best practices.
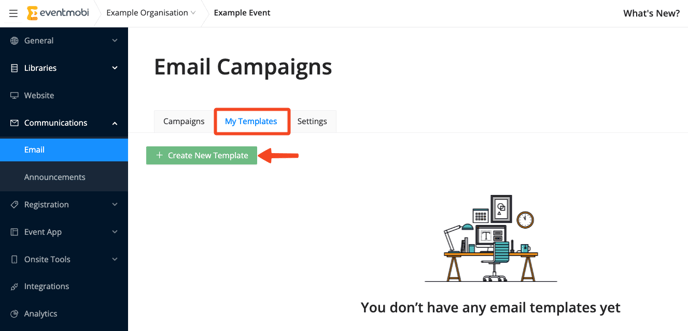
Create an Email Campaign:
-
-
Go to Communications → Email.
-
Click Create Campaign.
- Provide a name for your Campaign and select "Save & Continue"

- Choose a Template or feel free to start from scratch.

-
Customize Your Invitation:
-
-
Feel free to get creative and add your own personalized text and branding to make your invitation truly shine! You can easily design your invitation email using the content options available on the right side of the email builder.
-
Don’t forget to include the Event Site Button in your invitation email. This will make it super easy for your invited guests to find the registration link!

- Once you’ve finished designing your email, don’t forget to save your progress! To return to the Experience Manager and send your email campaign, just click on "Exit."
-
For comprehensive guidance on designing and personalizing your email campaign, please refer to this article.
Sending Invitations:
After the email build has been left, you can adjust the campaign settings according to who should receive the email and when it should be sent out.
- Campaign Name: This will be pre-populated based on the Campaign Name you initially set when creating a new campaign. This is for internal reference only, but can be edited as needed.
- Audience: This will determine which attendees should receive the email campaign. You can select All People, Specific People Groups, Individuals or Specific Registration Status from the People library.
- Subject Line: This will be visible to attendees and will act as the subject line of the email that is sent out.
- Send From: This email address will be used in the "Send From Email" field found in the Event Details section of the Experience Manager. Please note that this information can only be modified on the Event Details page under the General menu. It will be utilized for all communications associated with the event.
- Send Time: This will determine when the email campaign is sent. You can choose to Send Manually to have the email campaign send right away, or Schedule a Time to determine what date and time the email should be sent to your audience.

Updating Recipients' Registration Status
When selecting the audience for your email campaign, you have the option to automatically update recipients' registration status to "Invited."
By enabling this setting, any recipients who have not yet started the registration process will have their status updated to "Invited" once the email is sent.
This feature helps organizers track who has already received an invitation, making it easier to follow up with those who still need to be contacted.

Final Review Before Sending
Before clicking Send Email, it’s important to do a final review. Use the Preview option to check the email layout and content, and send a Test Email to verify how it appears in recipients' inboxes.
Only organizers can receive test emails. Ensure your email address is listed as an organizer for this experience organization. To send a test email, select the recipients from the dropdown list in the Send Test Email option.

6. Managing Registration Statuses
Registration Statuses help track each person's progress in the registration process and are displayed in the People Library.
Registration Statuses:
| not started | The person hasn’t begun the registration process. |
| invited | The person has been invited to register. |
| registered | The person successfully completed registration. |
| pending | The person started but hasn’t completed the registration process. |
| declined | For RSVP events, the status ‘Declined’ will appear if an invitee chooses not to attend. |
Each person’s Registration Status updates automatically based on their progress but can also be adjusted manually in the People Library. When adding profiles, you can set the status individually or in bulk using the People Excel template. Edits can also be made later directly from the profile.

Note: Once a Registration Status is set to Registered, it cannot be changed.
7. Email Campaign Analytics
To view the analytics related to your email campaign, select the Sent option from the Campaigns area. This page will outline each campaign and provide some key insights at-a-glance, including the open rate, click rate and bounce rate.

The View option will provide additional insights related to the campaign, including:
- A list of recipients
- Delivery rates (emails bounced, marked as spam and unsubscribed)
- Open rate
- Click rate, along with top clicked inks from the email
The data outlined on this page may be delayed by 24 hours. Please allow this timeframe to view the most accurate analytics related to the email campaign.
