Table of Contents
- Tickets Area Overview
- Settings
- Ticketing
- Stock Management
- Locations
- Ticket Categories
- Adding Categories
- Editing Categories
- Syncing People Groups
- Option Groups
- Options
- Discounts
- Early Bird Tickets
- Bulk Uploading Coupons
- Volume Discounts
- Refunds
Tickets
The selection that you make here will impact how you create Categories and Options from the Tickets area. You will also have access to make adjustments from the Settings page found in this area.
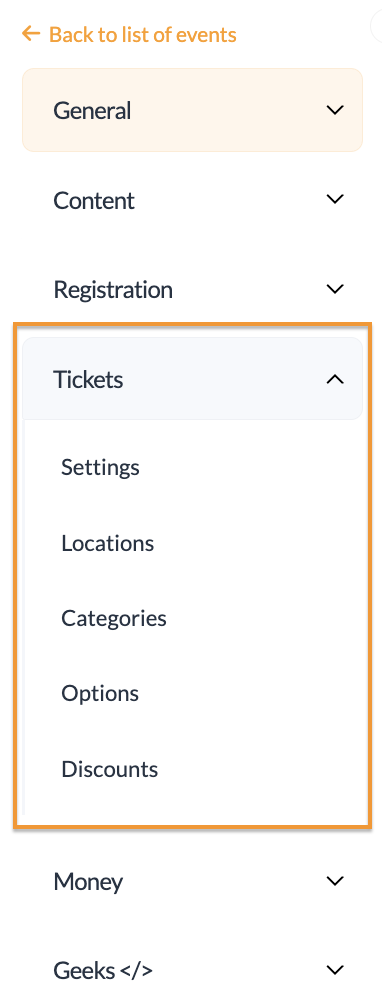
The Tickets area will be broken down into the following pages:
- Settings
- Locations
- Categories
- Options
- Discounts (This will only be visible if your event is paid)
Settings
The Settings page will offer you additional options to determine the cost and currency of tickets.
Ticketing
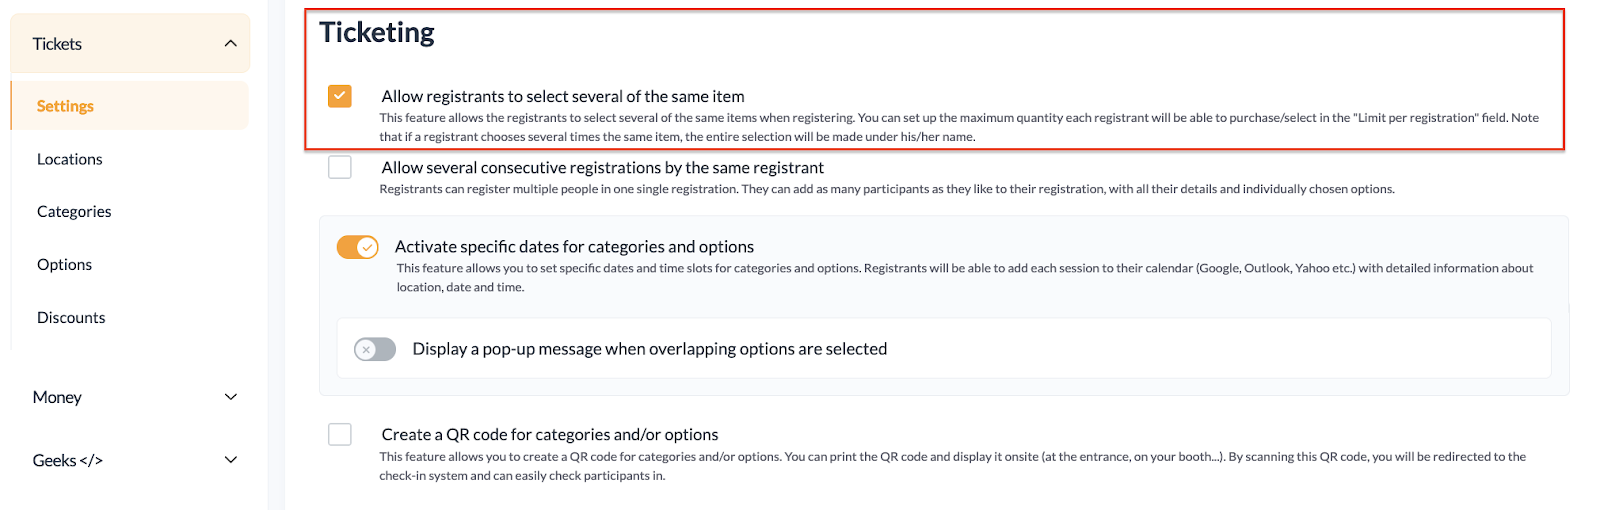
The Ticketing area on the Settings page will provide you with options to:
- Allow registrants to select several of the same item
- Allow several consecutive registrations by the same registrant
- Activate specific dates for categories and options (Note: This needs to be selected if you are connecting the registration site to your Event App.)
- Display a pop-up message when overlapping options are selected
(By turning this on, you can add or customize a message when a registrant selects overlapping ticket options.) - Create a QR Code for categories and options

Stock Management
Stock Management will need to be enabled in situations where you are looking to offer a limited number of tickets or session seats, to offer merchandise, and so forth.
From this page you will find the following settings:
- Activate stock management
- Hide sold out items (This setting is disabled when the waiting list is active.)
- Activate waiting list for sold-out options
- Manage my category quantity globally

🔍 Note: The Stock Management setting is also available under Categories and Options. You will only need to activate the setting once to apply it to all areas.
Locations
From the Locations area you will have the option of enabling a Main Location or Multiple Locations.
The Main Location is also available to adjust from the Essentials page found in the General area of the EventMobi Registration platform.
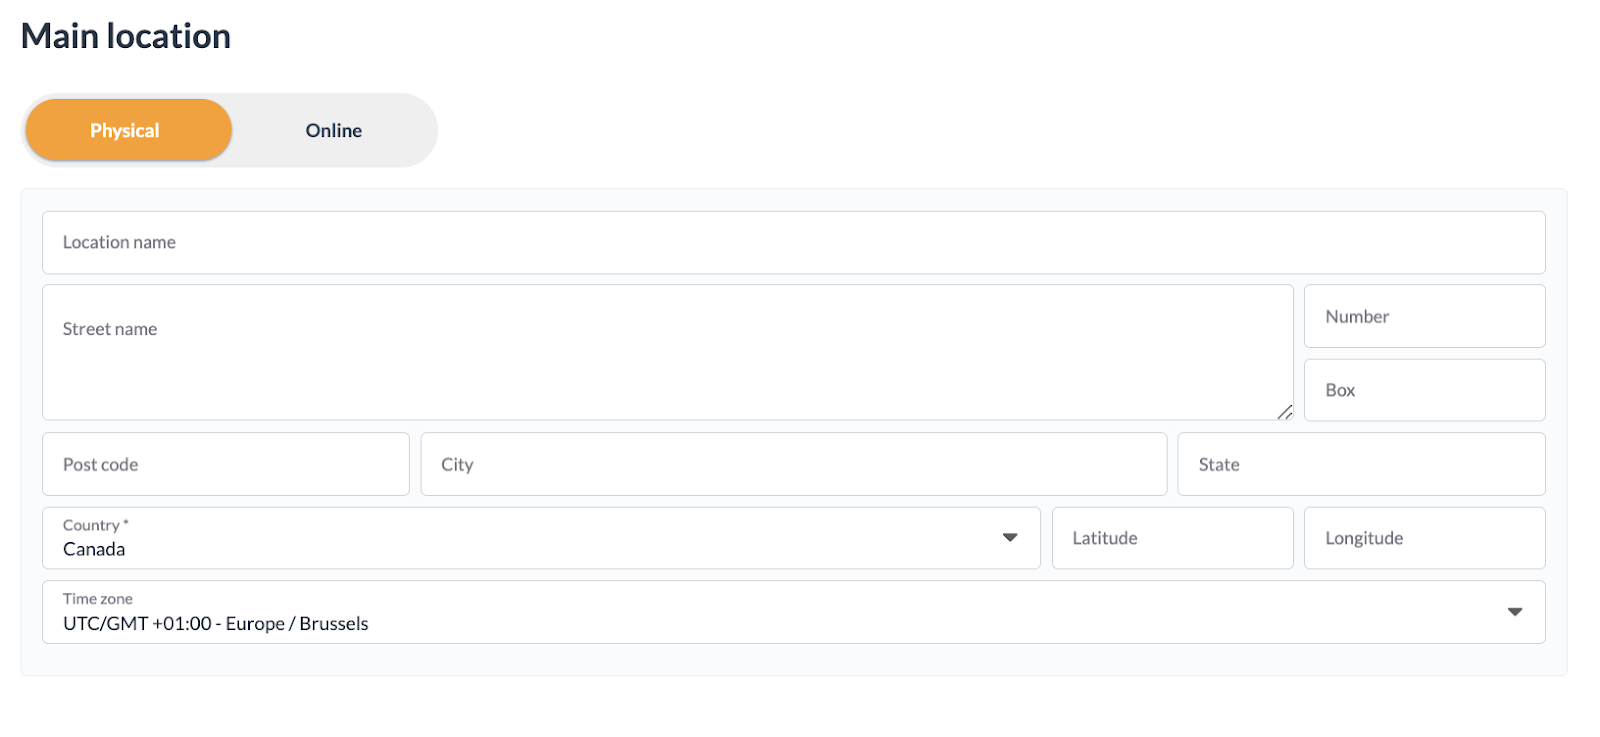
Using the Multiple Locations option you can input any locations that will need to be matched to your Categories and Options.
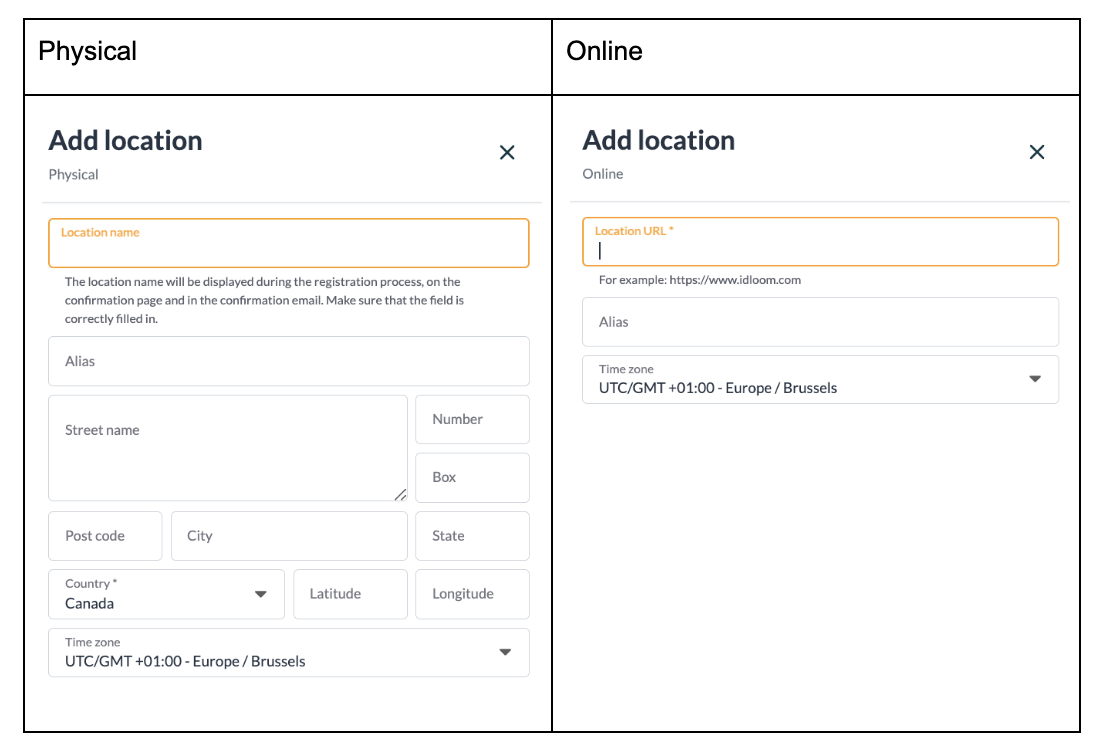
The locations that you are adding to this area can be set as Physical or Online locations.
Ticket Categories
Categories allow you to determine how registrants will be participating in the event. If your event only includes a few options, for example to determine if someone will be attending Day 1, Day 2 or All Dates, then Categories may be a good fit to offer a single option during the registration process.
If there are additional factors that need to be factored into the registration process, then incorporating Options may be better suited to your event.
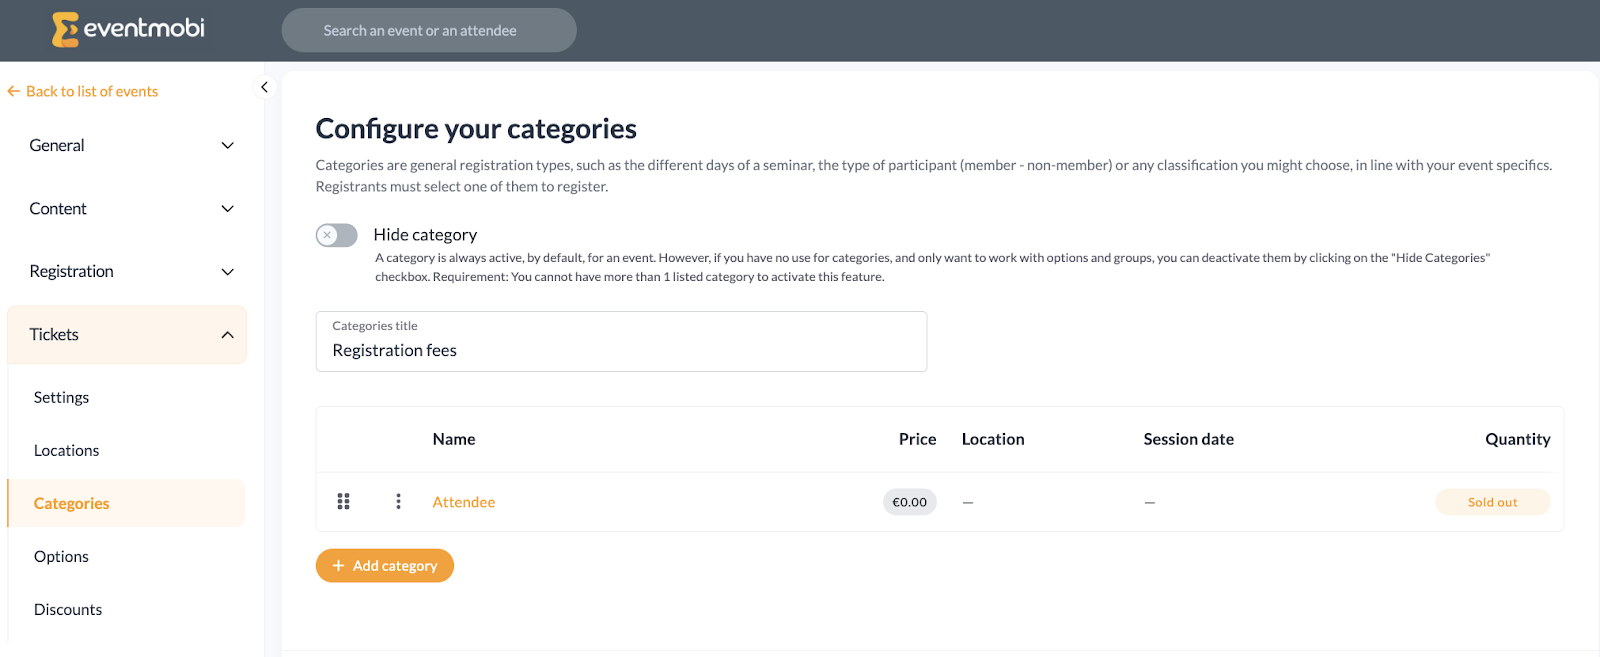
From the Categories area you will find the following settings:
- Hide Category: Categories are always active by default, however, if categories are not relevant to your event and you would prefer to offer only Options and Options Groups then this checkbox can be selected to deactivate the Categories on the registration site. (Note: This can only be activated if you have a single listed category)
- Categories Title: This will be visible from the registration site
- Add Category: Select this option to create any categories that you would like to offer
Adding Categories
After selecting the Add Category option, you will be asked for the following details:
- Name
- Description
- Quantity
- Price (only applicable if the event is set to Paid)
- Start and End Date
- Default Registration Status: This feature allows event organizers to assign specific registration statuses to different ticket categories. (refer to the linked article for guidance on creating custom statuses)
- Groups (Check out the Syncing People Groups area in this article for instructions)
Editing Categories
Please be aware of the following information when it comes to editing the categories you have created for your registration site:
- Free tickets can be changed to Paid tickets when an attendee is modifying their registration
- Attendees can switch to a different paid ticket category when updating their registration, as long as the Allow ticket downgrades setting is turned on. This settings can be found under Registration > Settings section.
-2.png?width=670&height=89&name=image%20(9)-2.png)
- Admins have the option of changing the category for an attendee from the EventMobi Registration platform (both Free and Paid)
- Admins that have changed from a Paid category to another one can send a Failed Payment email from the EventMobi Registration platform to collect the balance between the previous Paid category and the new one.
Syncing People Groups
When you have the integration set up, you are able to add a People Group from Experience directly to one or multiple categories in the EventMobi Registration platform. This option is only available if you have linked the registration to your event in Experience, and if you have set up the groups in the People library first.
Once these steps are completed you will be able to link the people groups to any category.
🔍 Note: Make sure to fully set up your connection between People Groups from Experience to the registration’s Categories to ensure a smooth process and to not manually update your attendees in the future.
⚠️ Important Notes
- Default Groups for Attendees and Speakers will not be displayed from the dropdown menu in the Registration platform. Only custom Groups that have been created will be available to select. Registrants will automatically receive the Attendee People Group and Speakers will automatically receive the Speaker People Groups when the information is synced.
- Any new People Groups or existing People Groups that you add to a Category once registration is live and attendees have registered will not be synced over. This means that all existing registrants will need to be updated manually from the Experience Manager.
Option Groups
Groups help you to organize a series of options into a section, to help in outlining what selections attendees can make during the registration process. 
You can set a specific range of numbers that a registrant can select. This applies to all ticket options within that group, not to each individual ticket option. It will limit the minimum and maximum number a registrant can choose.
Additionally, you have display settings and the option to show ticket options in a collapsible view.

Options
Once your Categories and Option Groups have been set, you can begin creating the Options that will be available during registration. Options can be considered as the final level of selections that will be available as people are registering for the event.
There is no maximum number of options that can be included in the registration site you are creating, and these can be set to apply to any or all Categories and Options Groups that you would like them to display from.
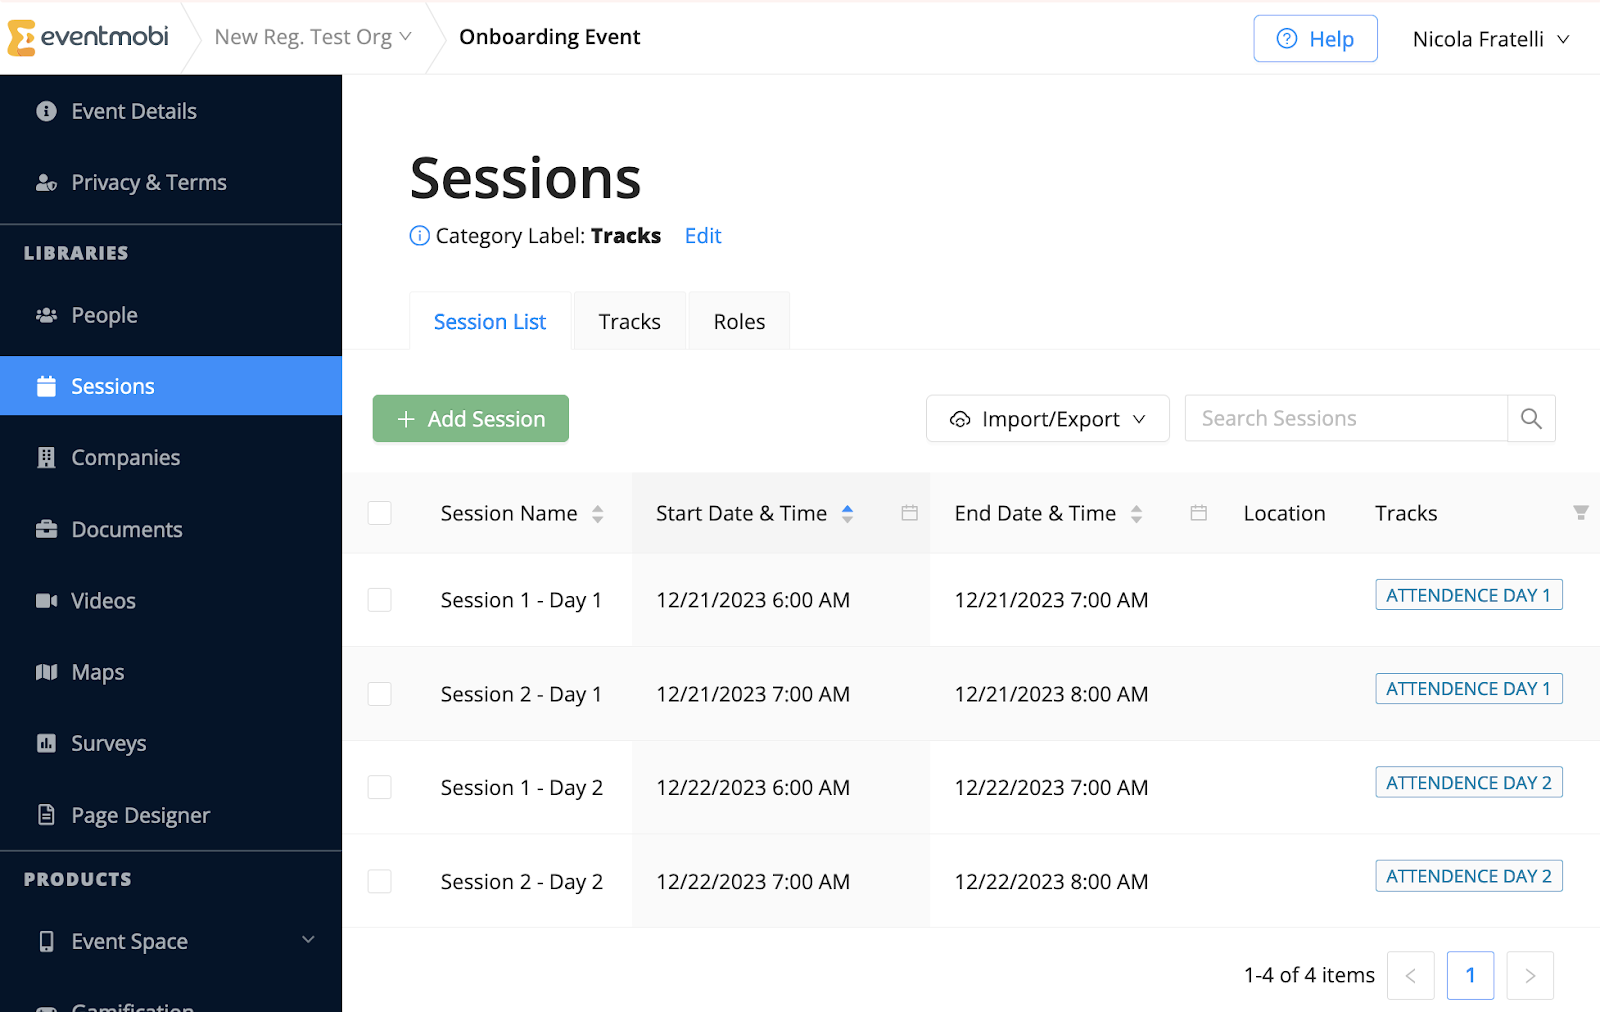
Options will be synced to the Experience Manager as individual sessions within the Sessions library.
🔍 Note: Options that you would like to sync to the Event App will need to include a date, start time and end time, as this is a requirement for sessions within the Experience Manager.
Keep the following information in mind when it comes to editing options for your registration site:
- Attendees cannot unsubscribe from a Paid option that has been previously taken, and will only have access to add options.
- Attendees that are modifying their registration and adding a Paid option will be asked to pay the balance amount.
- Admins will have access to change the options for an Attendee within the EventMobi Registration platform (Paid and Free).
- Admins that change a Paid option to another one can send a Failed Payment email from the EventMobi Registration platform that will provide the Attendee with a link to pay the balance between the previous category and the new one.
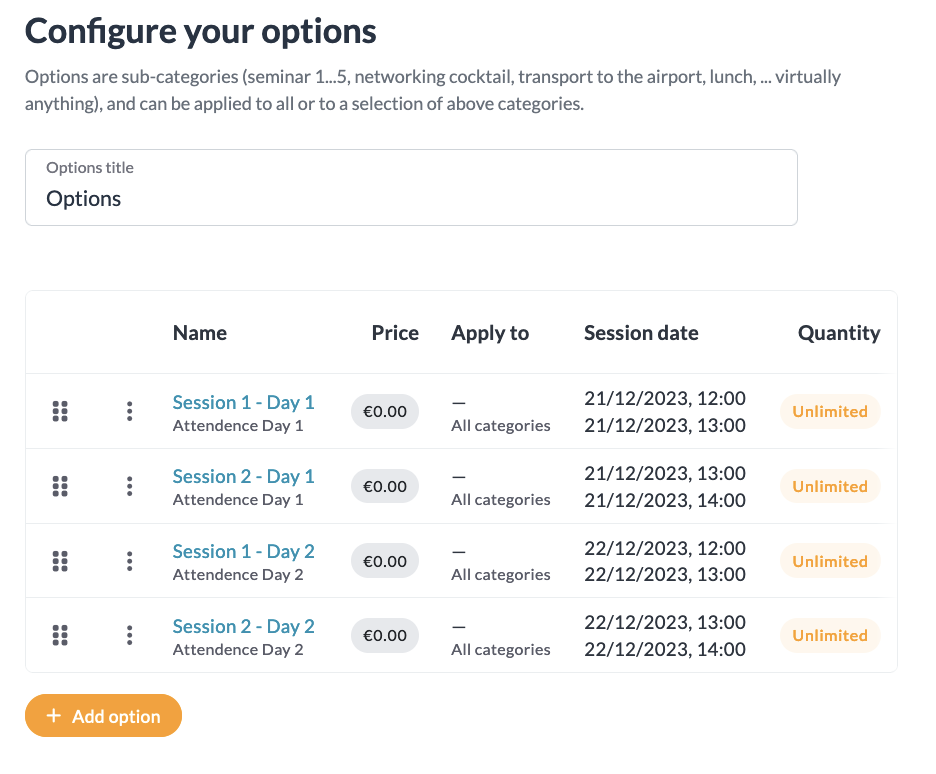
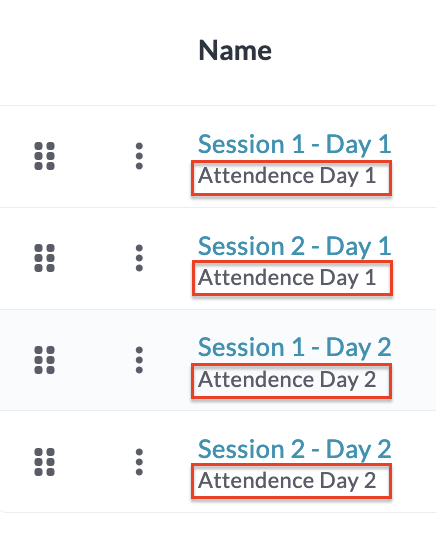
In the example below, you see how both Options and Option Groups are synced and organized into the Experience Manager. As the image displays, the Options will be represented as individual session items (Session 1 - Day 1, Session 2 - Day 1, etc.) and the Options Groups will be represented as the Tracks that they are organized into (Attendance Day 1, Attendance Day 2, etc.).
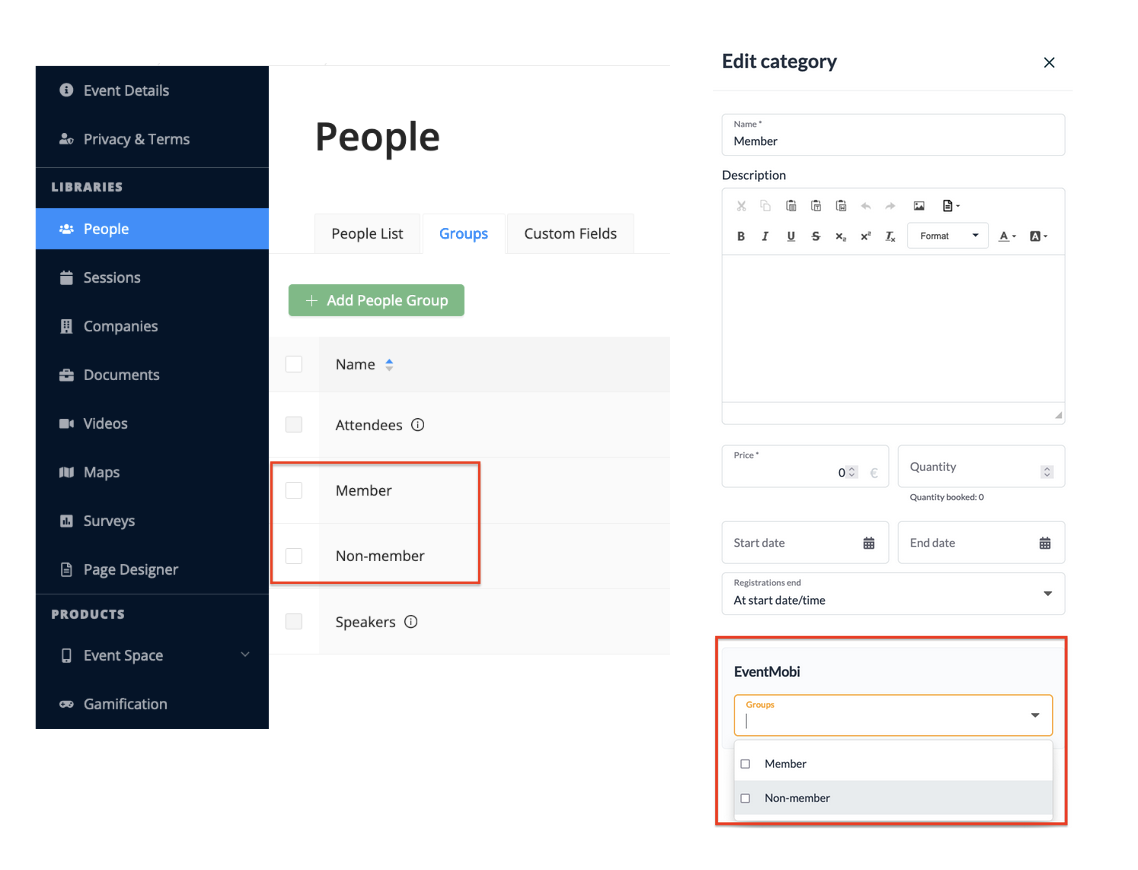
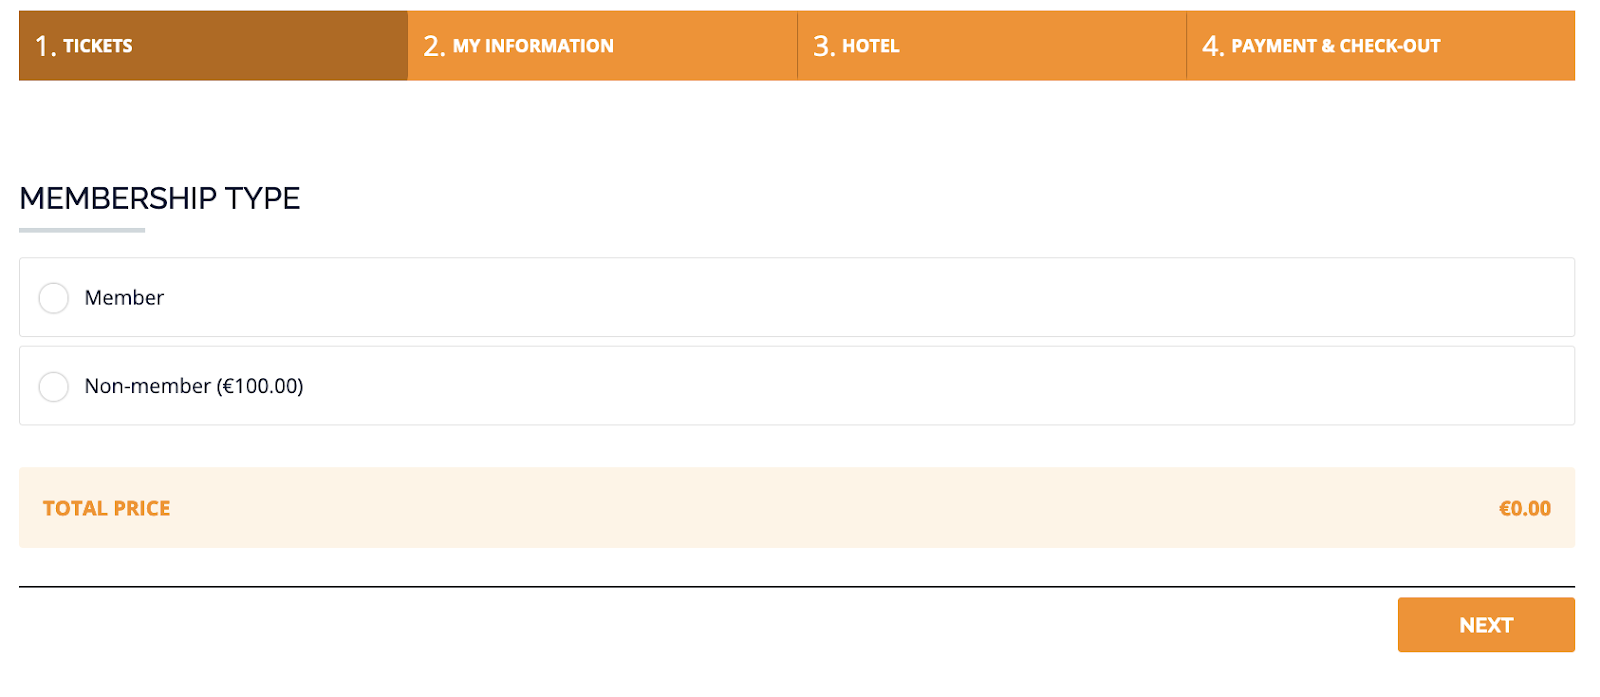
In the following example, we can now see how the Categories are represented during the registration process. In this case, a category has been set to represent the different Membership Types (Member and Non-member).
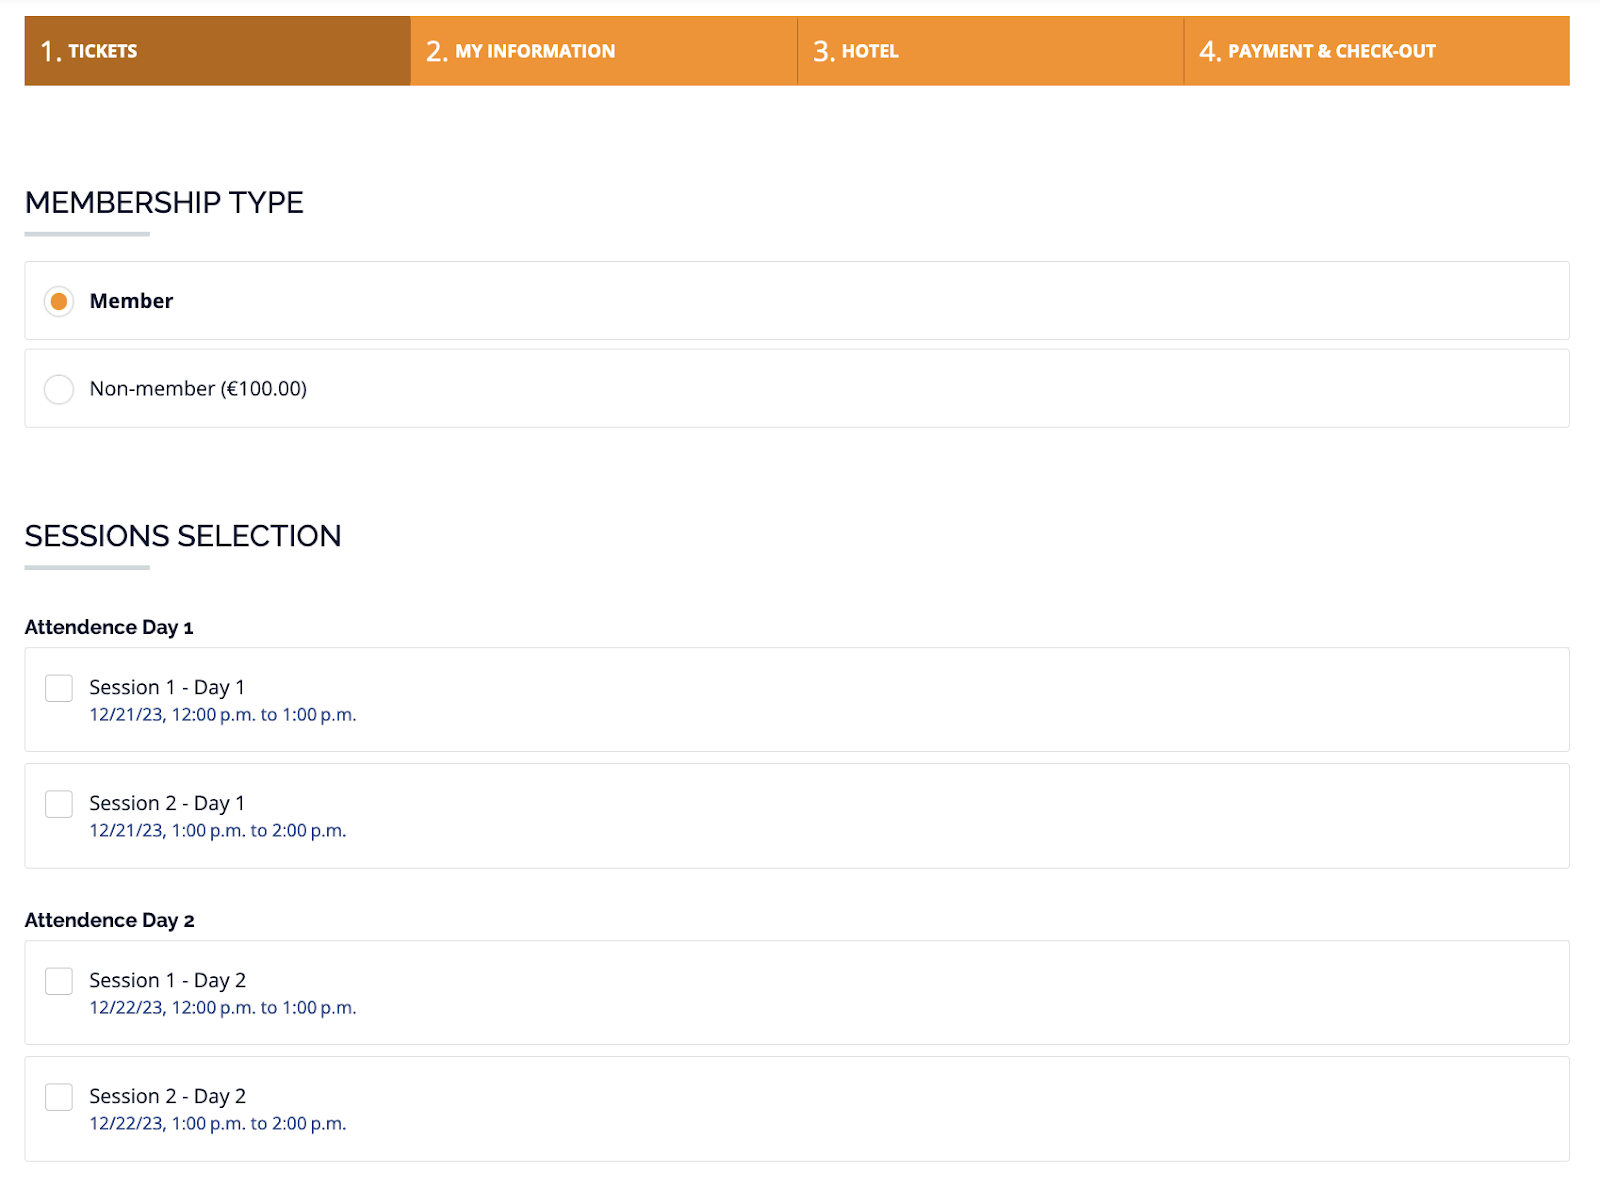
Finally, the image below displays how the Option Groups and Options are displayed and made available based on the category selection that has been made.
Discounts
Discounts allow you to offer special rates on registration fees in the following ways:
- Early Bird Pricing
- Coupons
- Volume Discounts

Early Bird
From the Discounts section you will find a toggle where you can Activate early bird prices for categories and/or options. There is also an option to activate a specific quantity for the early bird tickets.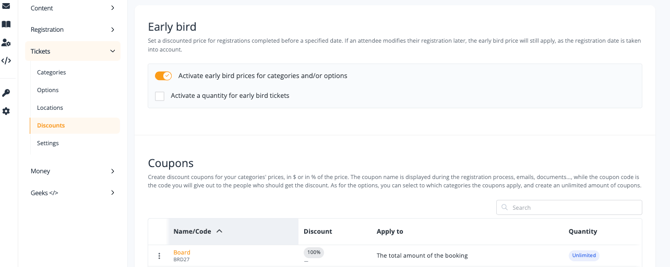
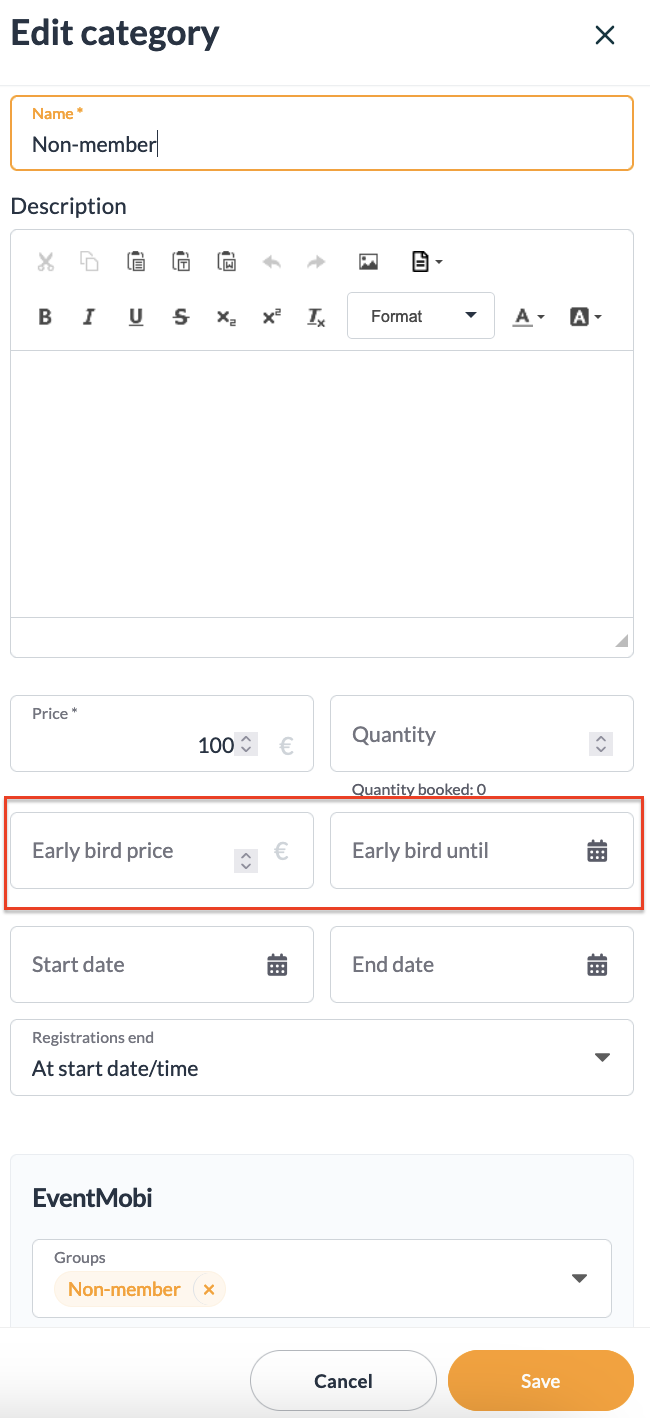
From there, under Categories the option is available to set Early Bird pricing to a specific price within a Category or Option, valid until a specific date. From there the regular price can be included which will automatically become the primary ticket option once the early bird end date passes.
🔍 Note: Early Bird discounts will need to be activated before the registration site goes live, as this option cannot be set after an attendee has registered.
Once an attendee has registered:
- Early Bird price cannot be changed.
- Early Bird end date can only be adjusted if the date has not yet passed.
Coupons
Using Coupons you can offer to waive the total registration fee, to all or specific categories and/or all or specific options.
You can also search for coupons effortlessly with the new search bar.
You can create a new coupon by clicking on the ADD COUPON button.
When creating coupons, you will be asked for the following information:
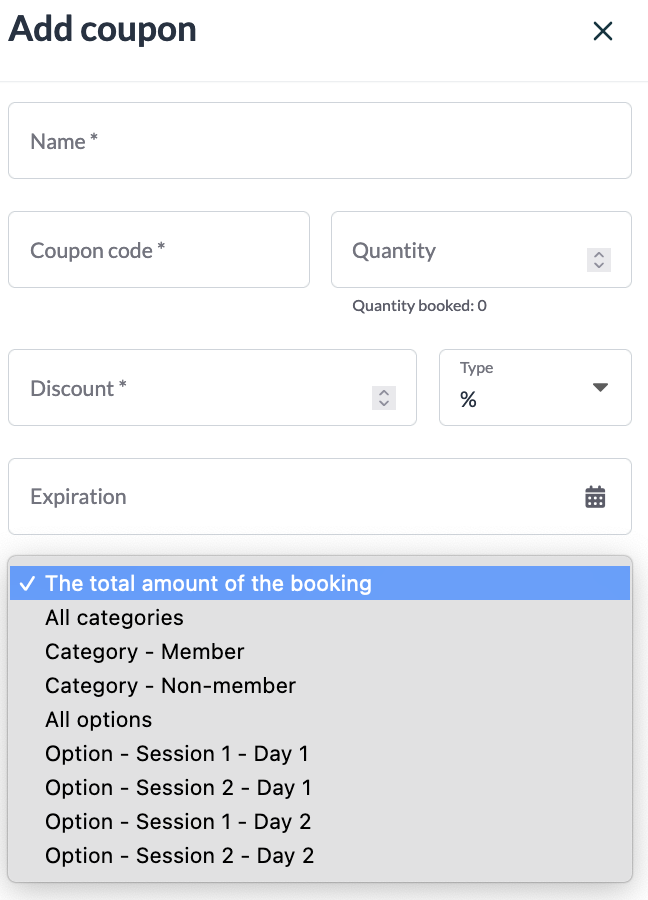
- Name (Used to identify the voucher)
- Code (Must be unique for each coupon - this is used during the registration process)
- Quantity
- Discount
- Type (Percentage or Amount)
- Expiration date
- To what it applies to
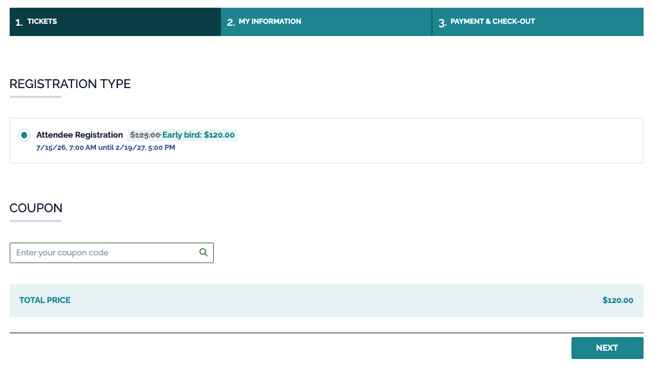
Once a coupon has been added to the registration site, it will be displayed as an area where the registrant can apply the discount code.
Bulk Uploading Coupons
In addition to creating coupon codes manually, you can import multiple coupons at once using the bulk upload feature. This is especially useful when you need to create a large number of unique discount codes for your event.
To Import Coupons
- Under Tickets, navigate to Coupons
- Click Import coupons
- In the pop-up window, follow the steps below
Step 1: Download the Template
Click Download template to access the Excel (XLSX) file.
- The template includes all required fields and valid values based on your current event setup
- The first row contains an example and must be deleted or replaced before uploading
- Do not modify column headers, as this may cause the import to fail

Complete the Template
Fill in the spreadsheet with your coupon details.
- Each row represents a single coupon code
- Ensure all required fields are completed
- Use the correct format for all fields

⚠️ Important Note:
- The expires_at field must follow this format:
YYYY-MM-DD HH:MM:SS
(Example: 2026-12-31 23:59:59)
Step 2: Upload Your File
- Drag and drop your completed file into the upload area, or click to select it
- Once uploaded, the system will begin processing your coupons
After processing is complete, your coupons will be available in the Coupons list.
⚠️ Limitations
- Coupons created via import cannot be edited
- To make changes, you must delete the coupons and re-import them
✅ Best Practices
- Use the import feature for bulk creation of unique coupon codes
- Always review your file for formatting errors before uploading
- Test with a small batch before importing a large list
- Keep a copy of your original file for future reference
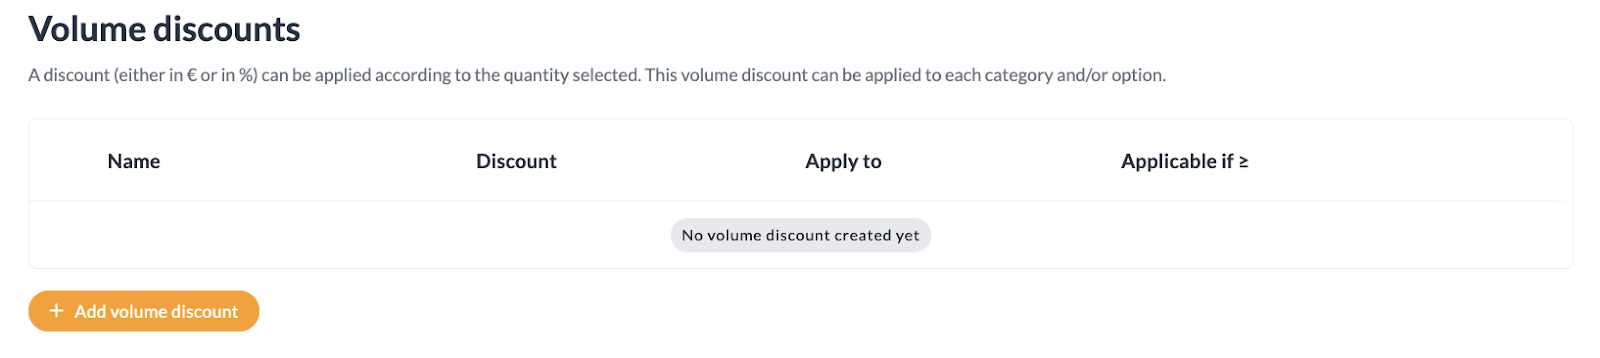
Volume Discounts
This discount option allows reduced pricing when there are multiple categories and/or options that are selected during the registration process, and are activated as soon as the set parameters are met.
In order for this option to work as intended, you will need to select Ticketing setting to Allow registrants to select several of the same item available from the Settings page of the Tickets area in the EventMobi Registration platform.
When adding a Volume Discount, you will be asked to provide the following information:
Name
- Minimum quantity threshold
- Discount value and type
- To where it applies
Refunds
The refund function should only be used for handling overpayment, not for cancellation of single registrations itself. A detailed guide on how to use the refund function can be found in this article.
🔍 IMPORTANT INFORMATION
All refunds must be processed directly from the payment gateway connected to your registration site.