![]()
EventMobi Registration offers the option of creating your own Custom Registration Statuses to help you manage the various states of registration that may apply to your attendees. Using Custom Registration Statuses, you can better align the attendee status to your registration process.

You will find three primary status types: pending, attending, and not attending. These can be individually customized in terms of naming and color coding, allowing them to align seamlessly with your event's identity and workflow.
To manage your registration statuses, simply navigate to your Profile > Event Settings, click on the Registration Statuses section. Here, you can conveniently view, edit, and organize all of your registration statuses.
Click on an existing status to edit it. Then, choose a name and a color for that status and save your changes.
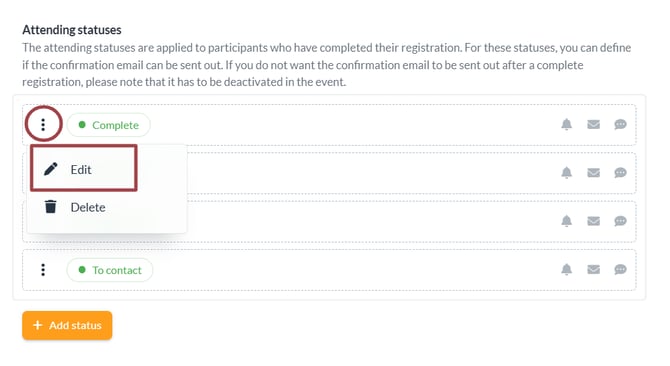
You can also rearrange the order of your statuses, by maintaining the three dots button and dragging and dropping the status within the type of status.
.png?width=296&height=72&name=image%20(8).png)
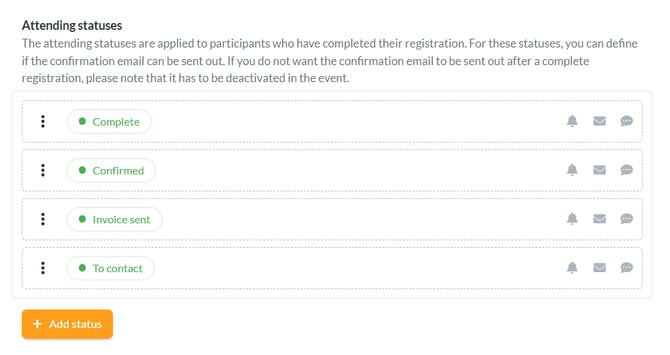
Managing Attending and Not Attending Statuses
When it comes to attending and not attending statuses, you'll have additional management options:
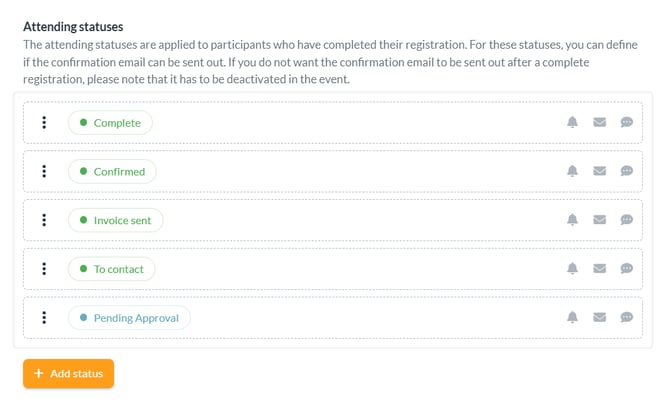
- Create New Status: In addition to the default attending and not attending statuses, you can create new statuses that align with your event's unique requirements. For example, you could establish a Pending Approval status for attendees awaiting confirmation, or designate a VIP status to distinguish special attendees.

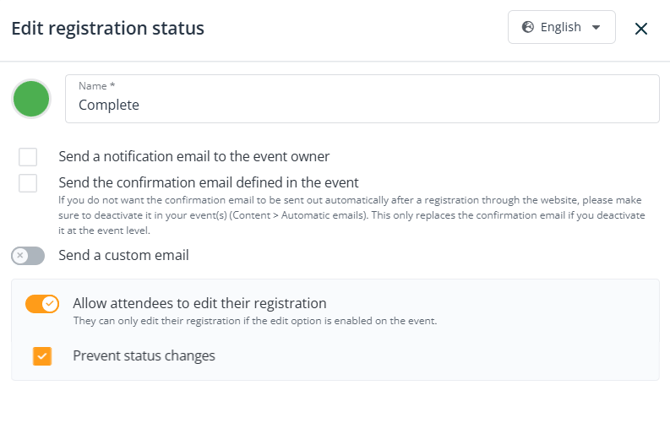
- Notify Owner: Send an email notification to the event owner when a specific status is applied to an attendee. This email will contain the attendee's name, the applied status, and a link to the attendee's contact details.
The event owner can be defined at the event level (General > Essentials).
-1.png?width=332&height=111&name=image%20(10)-1.png)

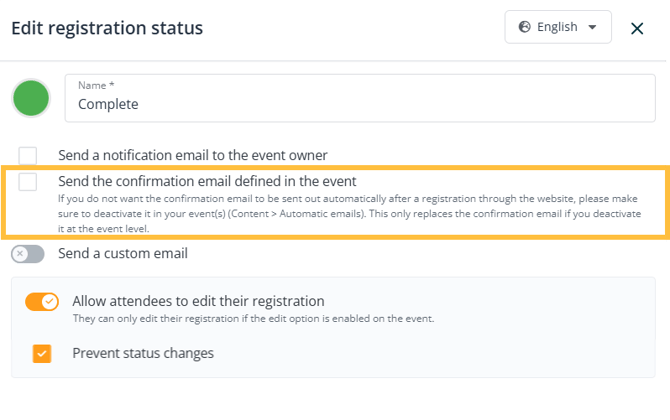
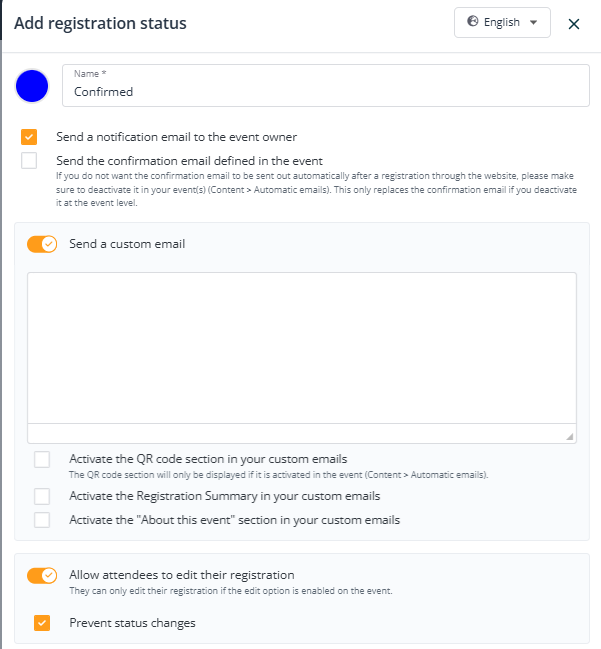
- Automatic Confirmation Email: You can activate the automatic confirmation email as set in the Event. Customize the email in your event and activate it in your profile for the desired statuses.
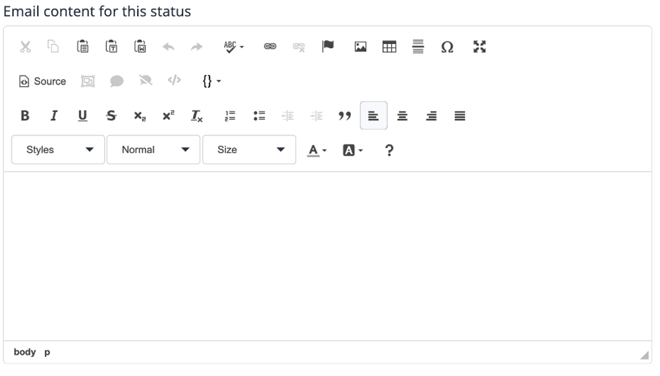
- Custom Email Templates: Create custom email templates that will be sent to attendees when a specific status is applied. Customize content and design to match your communication style. Activate the toggle, enter your desired text and save the content of the email.
Default Status Settings
Specify the default status that will be assigned when an attendee registers through the event website. This default status can be chosen from the attending or not attending options available in the drop-down list located at the bottom of the page in the profile settings.
.png?width=670&height=131&name=image%20(14).png)
On top of that, you can also define the status that is applied by default on the event-level (Registration > Settings). The event-level status takes precedence if different from the profile-level status.

Languages
For all statuses, you can add translations by selecting the country button located at the top right of the page when editing a status.
.png?width=218&height=91&name=image%20(15).png)
You can then input the translation for the name of your statuses in a specific language, as well as the custom email if applicable. This is particularly crucial when you're organizing events in multiple languages, ensuring that your attendees receive personalized and relevant communication based on their language preferences.
Tip: you can further assign specific registration statuses to different ticket categories. For additional details, refer to our article "How to Create Registration Tickets" available here.
Use Case: Craft Your Own Approval System
Tailor an approval system to your requirements using our innovative Custom Registration Statuses feature. As an attendee registers, they will be assigned a Pending Approval status. A personalized email will keep them informed about their status, ensuring they stay up-to-date.
Why opt for an approval system? It provides you the ability to meticulously manage attendee access, guaranteeing a seamless event experience.
In the background, event owners receive notifications about newly registered attendees with a Pending Approval status. With a simple click, they can access the back office to review and approve registrations. When an attendee's status is switched to Confirmed, an automatic confirmation email is triggered.
Leverage this feature to effectively establish an approval system for your event registrations:
- Create the necessary statuses, such as Pending Approval, Confirmed, and Rejected, and apply colors based on your preferences. If you want tickets from the pending approval status to be accounted for in your stock management, create the pending approval status within the Attending list. Otherwise, create it in the Not Attending list.
- Set the default status to Pending Approval on profile or event-level.

- Activate and create custom email templates for the pending approval and the rejected status. For the pending approval status, also activate the email to the event owner.

- Also, activate the confirmation email for your confirmed status and other settings if necessary.
Important Note: Be attentive to prevent unintended emails from being sent by deactivating the automatic sending of confirmation emails in the event settings. To accomplish this, navigate to your event's settings and proceed to (Content > Automatic Emails > Settings).
.png?width=670&height=175&name=image%20(16).png)
Important note: If you activate payment methods, ensure that you adjust them according to your needs. Please also be aware that no refunds can be processed through EM Registration.