
A Location area will be available from the session detail page that you are updating when creating or editing a session. Under Location Type you will have the option of selecting:
- None: Select this if you do not wish to include a location for the session.
- Text: Select this option if you would like to display the location in text format.
- Map: Select this option if you would like to direct attendees to a specific map.
Interactive Mapping
If you are looking to guide your attendees to the appropriate image map within the Maps section, you can use the Interactive Mapping option available. This feature allows attendees to click on the location within a session (or Company profile) to be directed to the applicable image map, and a corresponding pin drop demonstrating where the session or company is located.
How to Set Up Interactive Mapping
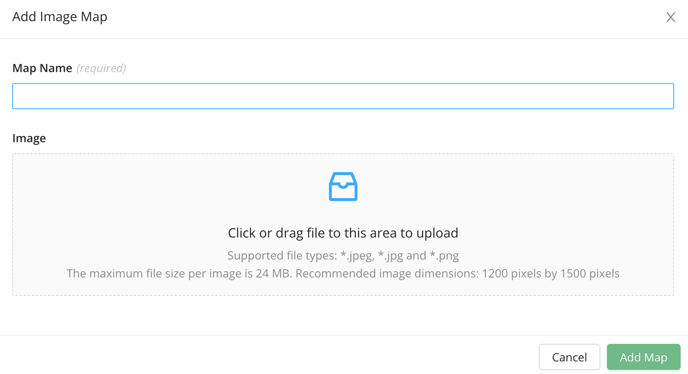
- Visit the Maps library and select Add Map
- Input the Map Name and upload your image file (must be in JPEG, JPG or PNG)
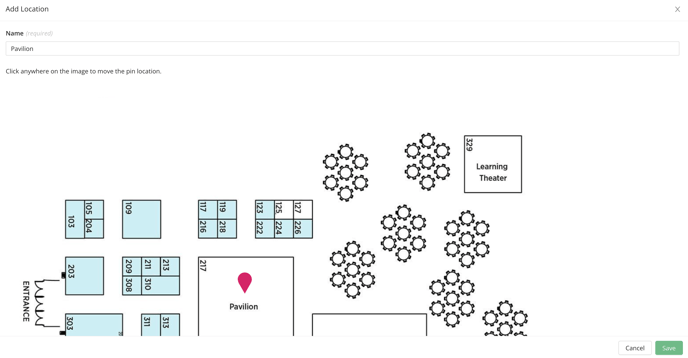
- On the Location tab, select the Add Location option to create a new pin drop
- Input the name of the location and then click on the area of the image that you would like the pin drop to display
- Save
To assign the locations that you have created on your image map(s) to their respective sessions or Company profiles, visit the relevant library and click into the item (profile or session) that you are looking to update.
Adding Interactive Mapping from the Experience Manager
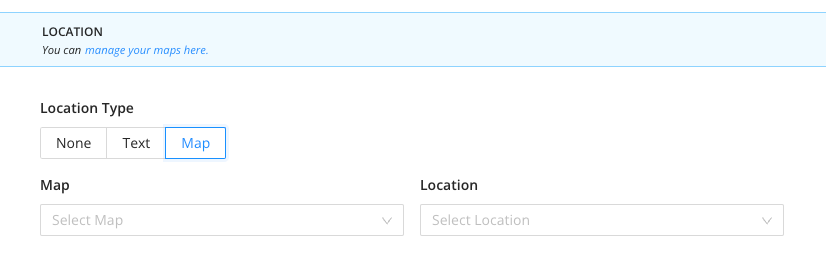
- Scroll to the Location area on the profile or session details page
- Select the Map option under Location Type
- Choose the relevant Map from the dropdown menu offered, followed by the relevant Location
- Save
Adding Interactive Mapping using the Excel Template
- Select the Import/Export option in the relevant library
- Choose the Export option to download an Excel Template with all of your sessions or profiles
- In the Map column, input the name of the relevant map
- In the Location column, input the name of the relevant location
- Save your changes
- Select the Import/Export option, but this time choose the Import option
- Upload the template that you just made changes to
Note: The Map and Location names that you are entering into the Excel template will need to be entered in the exact spelling that they are listed in the Maps library. These names are also case sensitive, so we recommend copy and paste if possible.