![]()
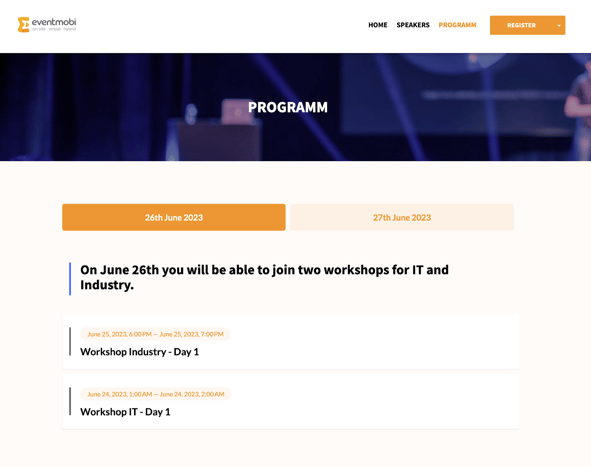
Your EventMobi Registration site will offer you the option of showcasing the various sessions and activities that will be taking place using an Agenda/Program page that attendees can review to find more information.
The Agenda/Program page is used to display session information. If you are looking to offer session selection from your registration site, please read our Knowledge Base articles on Creating Tickets.
Building an Agenda with the Program Builder
The Program Builder allows you to build your Agenda with ease and flexibility. You will have the option of building your Agenda from scratch, or you can use existing sessions that you have added to the EventMobi Registration platform already.
To get started you will want to navigate to follow these steps:
- Navigated to the Content area of the Registration platform
- Select Website and scroll to the Additional Pages area on the page
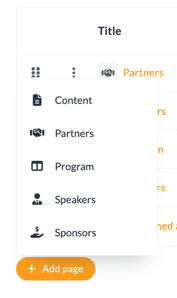
- Click on Add Page and select the Program option
You can also use the default page that is created when you begin working on a new event.
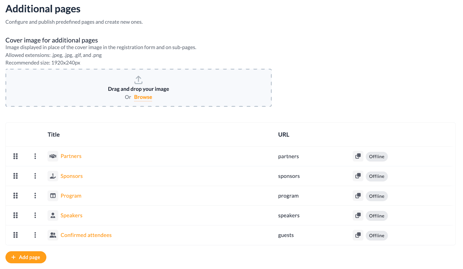
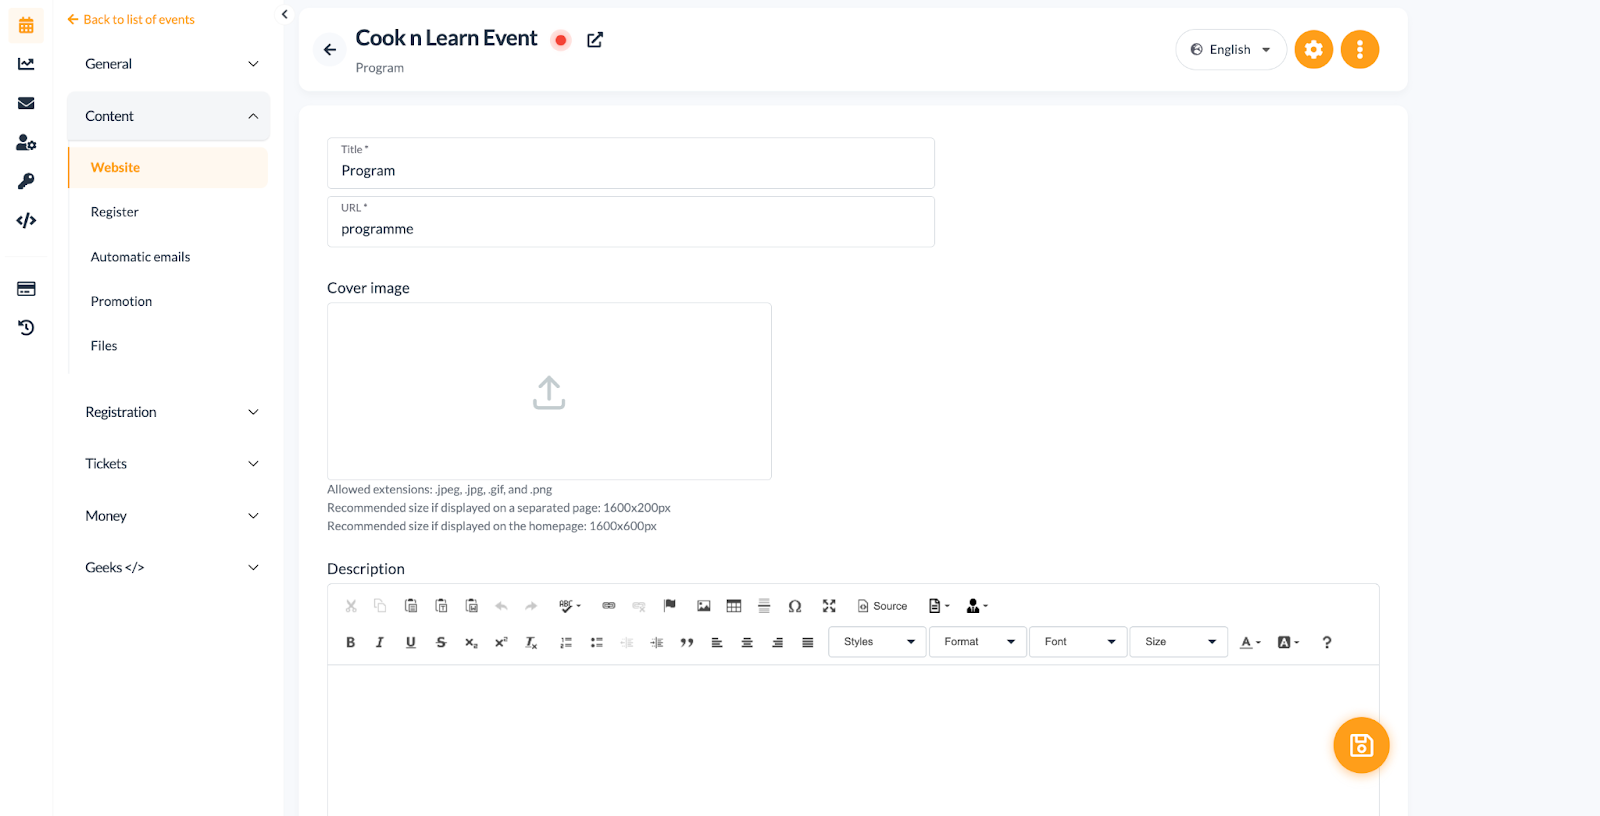
- Define the Title and URL that will apply to the Program you are creating, followed by the Save button to access the Program Builder
- If applicable, upload a Cover Image, add a Description and determine if the Program should display on the Home Page of your registration site.
Designing your Program Page
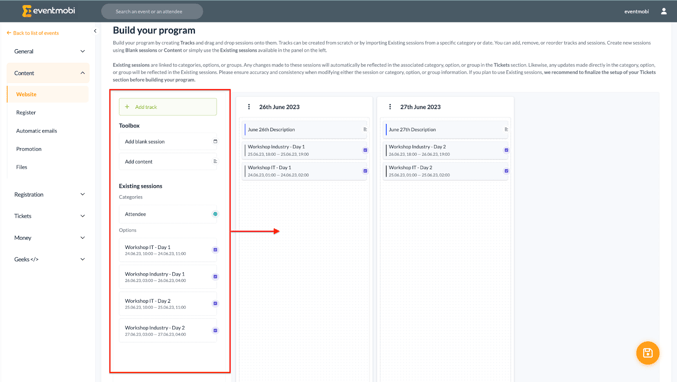
Using the Program Builder you can create tracks by dragging and dropping sessions from the left hand panel. You can manage your Agenda tracks by creating additional tracks, remove, reorder or duplicate tracks and sessions to include as many as needed. To do, select the button displayed as three dots to select the option that you would like to action.
On your registration site, your attendees will have the ability to to navigate between tracks to engage with the various sessions and activities that are available.
Creating Tracks for your Program
Tracks are the first layer to build your program. You can build tracks using different dimensions such as date, location, audience and any other categorization that helps to organize your program seamlessly and effectively.
Follow these steps to create your Tracks:
- Input a Title and Description (if necessary)
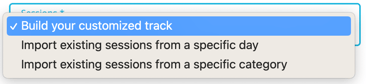
- Choose between creating your Track from scratch, or by importing sessions from a specific day or specific category (this will depend on how you have set your registration)
- Customize your session date and time format according to your needs.
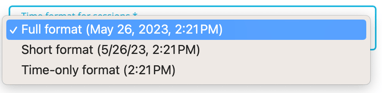
Note: The time format is automatically adjusted based on the regional settings selected in General > Essentials > Regional settings.
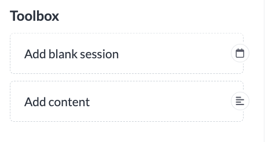
Toolbox
Within the Toolbox area of the page you will have the option to incorporate Blank Sessions or to Add Content.
Adding Blank Sessions
Selecting the Blank Sessions option allows you to create sessions directly from the program page. Blank sessions are not associated with any categories, options, or groups in the Tickets section (unlike Existing sessions).
Follow these steps to create your sessions:
- Add a Title and Description using the text editor
- Include a Start and End Date
- Link any Speakers as needed, this will display their name and profile image within the program
- Assign a color highlight if you would like to create visual distinction
Adding Content
The Content option allows you to create items such as Titles, Pictures and Videos. Simply add a Title and a Description using the text editor, and select a color highlight should you need to create an extra level of visual distinction.
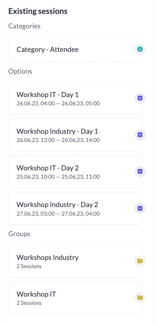
Existing Sessions
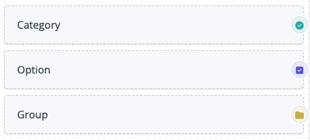
Existing sessions are sessions that are linked to categories, options, or groups. When you add a category, an option, or a group in the Tickets section, it will automatically be available in the left panel so that you can drag and drop it onto your track(s). You can easily distinguish them by their dedicated colored icons in the backend.
Important To Note
Any changes made to sessions will automatically be reflected in the associated category, option, or group in the Tickets section. Likewise, any updates made directly in the category, option, or group will be reflected in the existing sessions.
Please ensure accuracy and consistency when modifying sessions, categories, options, or groups. Existing sessions cannot be directly duplicated in the program, but categories and options can be duplicated in the Tickets section. When you drag and drop a group onto a track, you can select if you want to import the group along with the linked sessions or only the group without any sessions.
If you plan to use Existing sessions, we recommend finalizing the setup of your Tickets section before building your program.
Please note that the instructions outlined below are related to the build process for any registration events activated prior to June 2023.
Creating your Agenda/Program Page
In the Content area of your EventMobi Registration platform you will find an option for Website where you can edit and manage your registration pages.
Select the three dots on the left of the Program option to find the Edit option available.
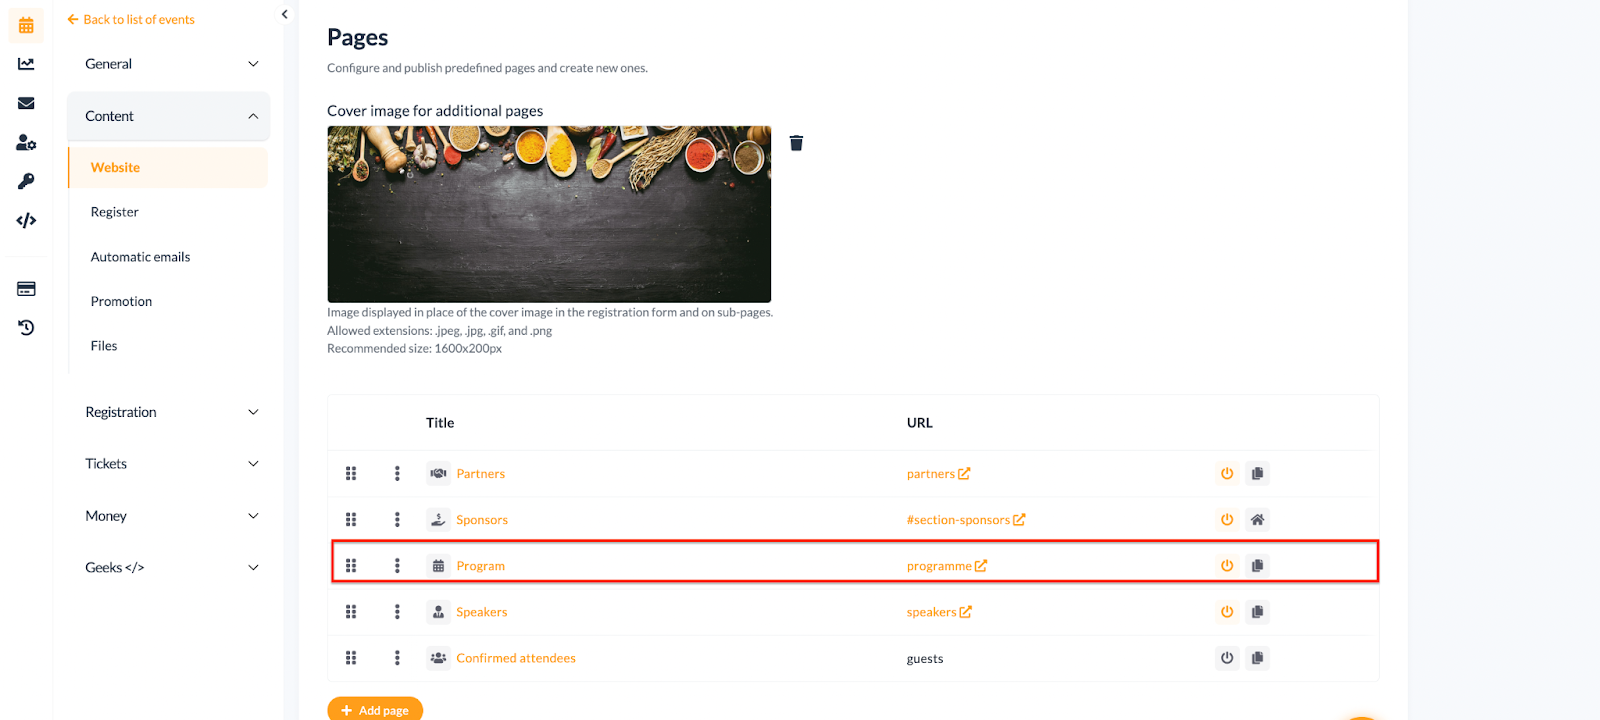
Adjust the name of your Program if needed (i.e. to Agenda or Schedule of Events), and then define its URL. You will also have the option of adding a Cover Image and a Description for this page.
Adding Items to your Agenda/Program
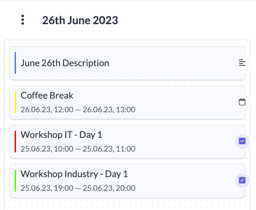
Adding Days
Begin building out your Agenda/Program page by adding in Days. To do so, select the Add a Row option followed by Day. Fill in the information for Date, Title and Description if needed.

Adding Sessions
Once your day has been added, you can then organize it into multiple Sessions (if applicable). To do so, select the Add a Row option followed by Session. Edit the session to include all relevant information.
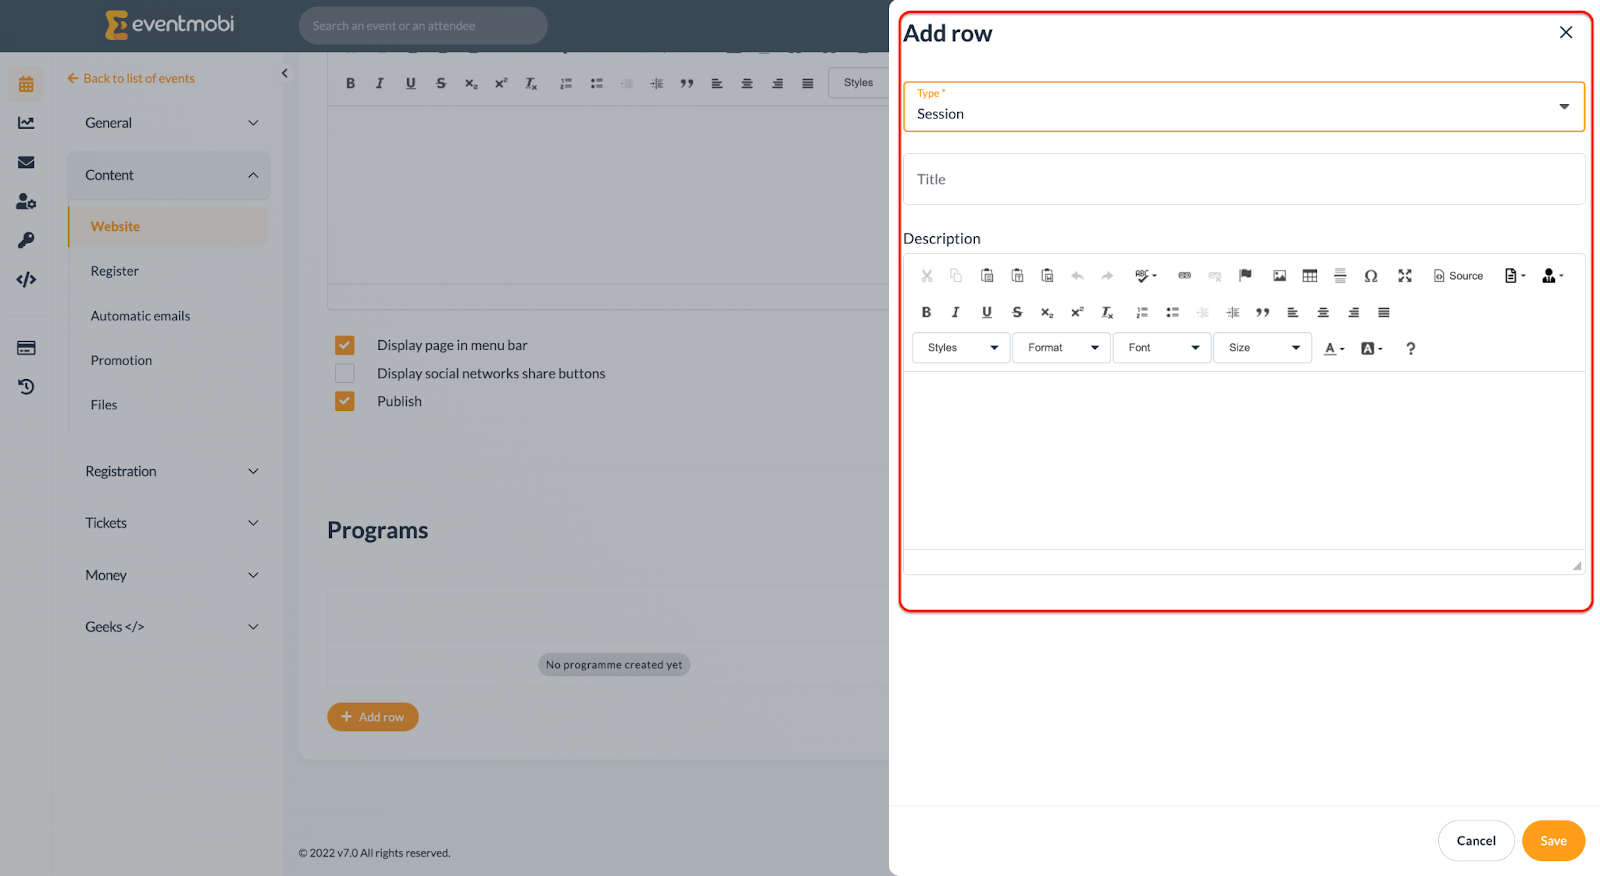
Adding Time Slots
Your Agenda/Program can be broken down even further using the Time option to outline the specific hours and/or time slots that sessions will be taking place. To do so, select the Add a Row option followed by Time. Input the time of day, and a description for that particular time slot. You can add as many time rows as needed within each day, session or as a standalone entry.
If your Agenda/Program runs over multiple days and sessions, you can simply repeat the steps outlined above to continue adding your information to this page.

Tips for Building your Agenda/Program
- Your Agenda/Program can be made of Days, Sessions and/or Times. If needed, these items can be used in combination to help in outlining how your event sessions and activities will be organized, for example, an event may take place over several days, or only over a few hours.
- If you are working with a complex Agenda/Program and want to simply the process of adding this information to your registration site, consider using a Blank Page to outline your session information instead.
- Within each row of your Agenda/Program, you can refer to a Speaker that you have created on the Speakers page of your registration site. This will display the Speaker's description directly from the Agenda/Program page when you hover over their name.
Note: This is a virtual representation displayed on the program page and does not reflect in the current integration with the Eventmobi App. - You can use drag and drop on elements and Agenda/Program entries to organize items easily.