![]()
Table of Contents
- Finding Your API Key in Stripe
- Reviewing Your Statement Descriptor
- Connecting Stripe to EventMobi
- Link Gateway to Events
- How To Test Your Payment Gateway
- Managing Payments and Refunds with Stripe
- Understanding Stripe's Decline Codes
- How To Access Stripe's Support
Finding Your API Key in Your Stripe Account
An API key from your Stripe account must be created and added to your Experience organization to make the connection between your payment gateway and your Core Registration site(s). The instructions below outline how to create an API key from your Stripe account to use it with EventMobi's Experience platform.
- Visit the Developers Dashboard of your Stripe account.
- In the API Keys area, you will see two sections: Restricted Keys and Standard Keys.
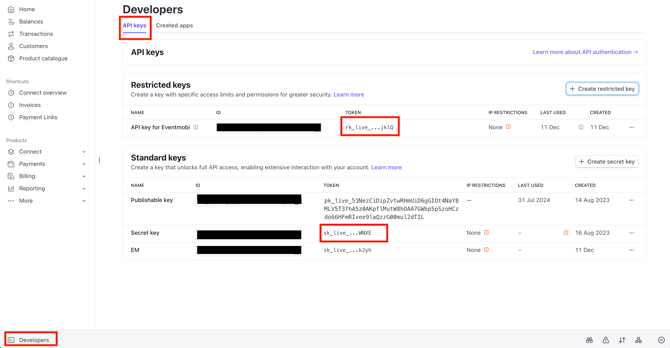
- Under Restricted Keys click Create Restricted Key.
- Under "How will you use this API key?" select Providing this key to another website.
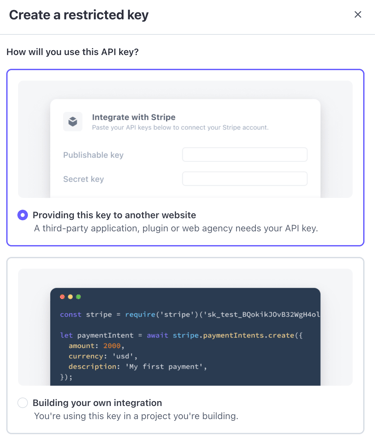
- Click Continue.
- Under Enter website details enter Eventmobi as the Name and the url as https//experience.eventmobi.com
- Click Create Restricted Key and copy it into the corresponding field in the Experience Manager.
- Create a secret key and select the option Building your own integration under How will you use this API key.
- follow any verification steps presented by Stripe.
- Give the key a name and copy the key when shown and paste it into the Signing secret key field in the Experience Manager.
Don't see this key in your Stripe account?
Your permissions in Stripe may also need to be updated to access the Live Mode Secret Key for your account. An admin from your team will have access to adjust your permissions from your Stripe account.
A Stripe Live Mode Secret Key will only be displayed once, for data security purposes. If you don't have the key recorded somewhere, you may need to rotate the key or create a new one.
Reviewing Your Statement Descriptor
The Statement Descriptor set in your Stripe account will determine what business name displays on credit card statements. Before you connect your Stripe account to EventMobi, please make sure your Statement Descriptor is something easily recognizable.
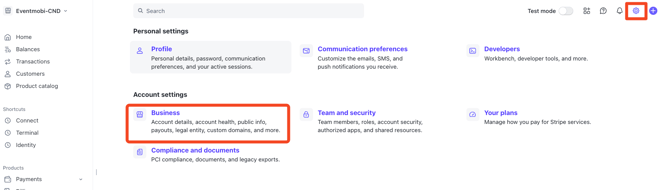
To review and edit your Statement Descriptor, visit the Settings area of your Stripe Dashboard and select the Business Settings option. Click on Public Details to view the current Statement Descriptor and to make changes, if needed.
Why is this important? Having a recognizable Statement Descriptor will help to prevent payment disputes.
Connecting Stripe to EventMobi
When you have your Stripe API Key, the next step is to add it to your organization in the Experience platform. The instructions below outline how to save your API key to your Experience organization.
- Select Payment Gateways from the menu of your Experience Organization.
- Click on Add Connection.
- Input a Name to represent your payment gateway.
- Choose Stripe from the Gateway field.
- Paste the Restricted Key into the Restricted API key field.
- Paste the Signing Secret key into the Signing Secret field, if desired.

- Select Add Connection to save your setup.
- Refer to the Status area to confirm that your payment gateway is Active.
Link the Gateway to Your Event
After connecting your payment gateway at the organization level, follow these steps to link it to your event:
-
Open the Experience Manager.
-
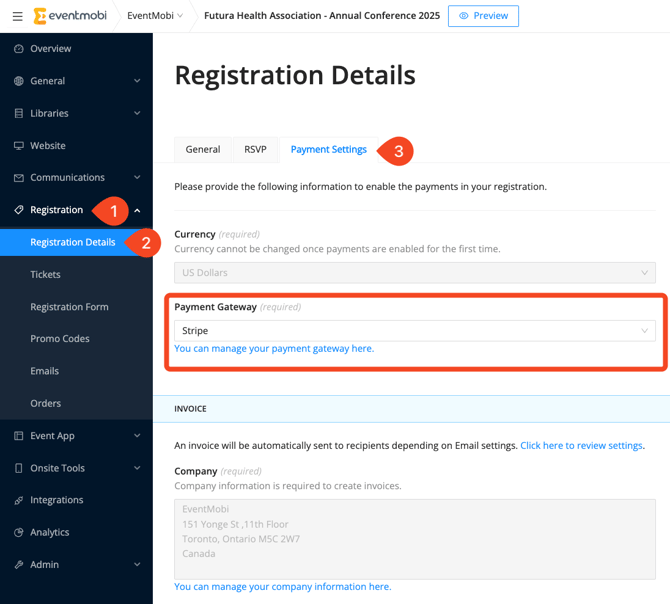
Go to your event and select Registration from the menu.
-
Click into Registration Details.
-
Navigate to the Payment Settings tab.
-
Choose the appropriate payment gateway from the Gateway dropdown menu.
Your gateway is now linked to this event and ready to be used for paid tickets.
How To Test Your Payment Gateway
An actual payment must be processed to test your payment gateway. We recommend creating a ticket with a small fee (example: $1.00) to test, and then registering with a credit card.
Once the registration payment has been processed, you can initiate a refund from your payment gateway.
Managing Payments and Refunds with Stripe
You can view your balance and manage your payout settings from the Balances area of your Stripe Dashboard.
You can process a refund for payments from the Payments area of your Stripe Dashboard. Once you've found the payment, you can click into it and select the Refund option to apply a partial or full refund for the payment.
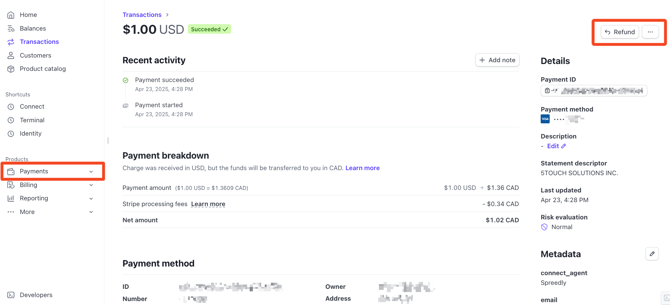
Note: All refunds must be processed from your payment gateway.
Understanding Stripe's Decline Codes
Stripe uses decline codes to indicate the status of a payment. You can find a detailed list on Stripe's FAQs page, but some of the decline codes to take note of are:
- 51: Insufficient funds.
- 55: Incorrect PIN was entered.
- 96: System error.
- 1A: Additional authentication is needed.