![]()
Your EventMobi Registration allows you to create campaign emails that can help in promoting your event and/or communicating with your attendees. Using this email type, you can do such things as invite people to register or send reminders on important details and dates related to your event.
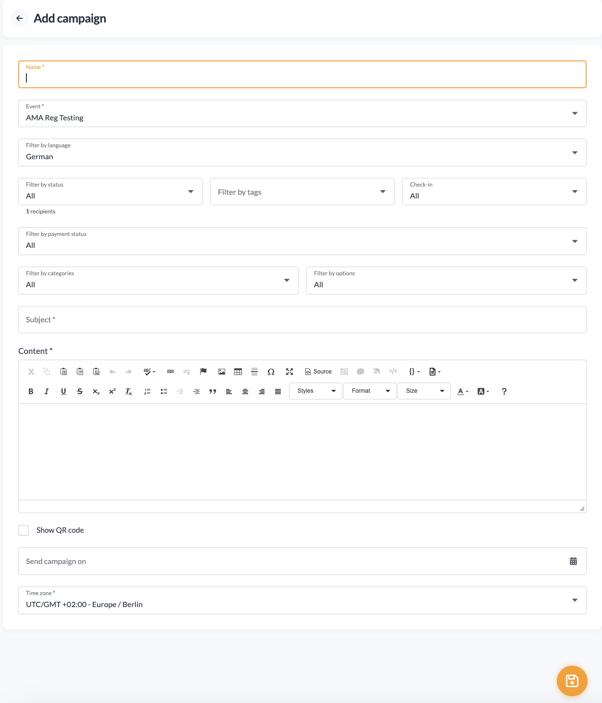
Creating your Campaign
Campaign Emails can be created and managed from the Emailing area found under the General area of your event within the EventMobi Registration platform.

This is also the area that you will want to visit when looking to edit an existing campaign that you have already created.
Targeting Your Campaign Email to Subsets of Attendees
When creating your campaign, you will have the option of targeting a subset of the attendee list, to ensure that the communication is only received by those it it intended for and/or relevant to.
The following series of filters and features will help to make the process of narrowing down this subset of attendees easy for you to manage. When needed, you can even choose to use a combination of these items to further define who should receive your campaign, and how they will receive it.
FILTERS
| Language | Send your campaign based on the language that someone has registered in (for multilingual events). |
| Registration Status | Send your campaign based on the registration status of the person, for example if their registration was rejected. |
| Tags | Send your campaign based on the tag(s) that you have assigned to that attendee (i.e. VIPs). |
| Payment Status | Send your campaign based on the status of payment for registration, for example if payment has not been made (for paid events only). |
| Categories | Send your campaign based on the categories that people have registered for (for events with multiple categories). |
| Options | Send your campaign based on specific options (you can select multiple). |
FEATURES
| Subject | Edit your email subject. |
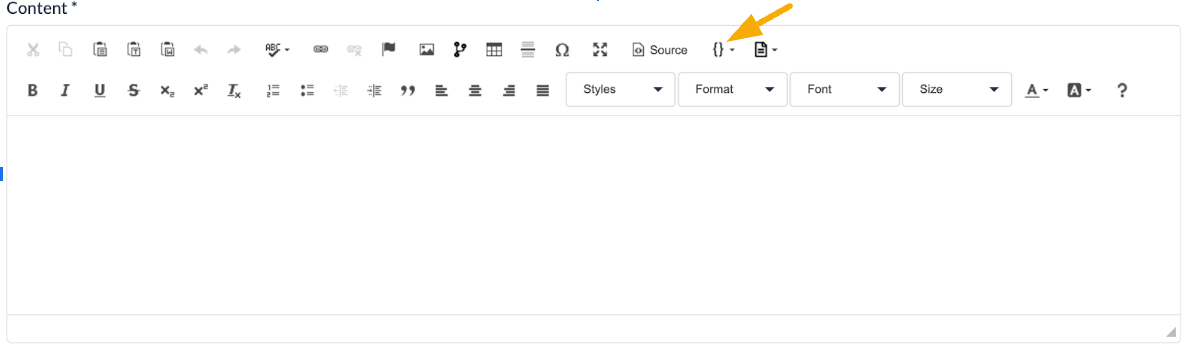
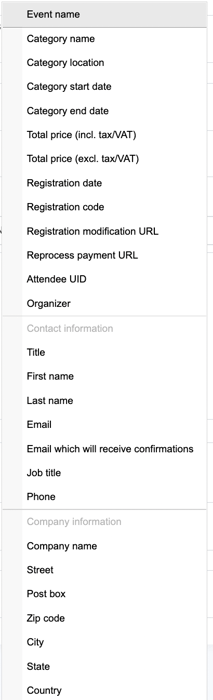
| Content (RICH TEXT EDITOR) | Use the rich text editor to personalize the email you are sending to the attendees. This feature will also allow you to customize the look of the email campaign that you are sending out by allowing you to adjust the font size and colour or to include things like images, hyperlinks, documents and more. You can include attendee information or event information, by using our tags/codes. (see screen shot below) |
| QR Code | Include a personal QR Code within the email campaign (if you have not already done this within your confirmation email). |
| Preschedule |
Schedule the date that you would like the email campaign to be sent to your attendees (or subset of attendees). Note: Make sure you have selected the correct timezone for your event so that this email will be sent out on the correct date and time. |
Note: The logo, cover image, and basic information that you have assigned to your event are used in your campaign. All you need to focus on before sending is establishing the content and the target group that should receive it!
Sending Your Campaign
All saved campaigns will appear in the Campaign List page for you to select and send as needed. If you want the opportunity to review the campaign before sending it to your attendees, use the Test Email feature available!
Some Helpful Tips for Working with Campaigns
- Send a test email first! The user who clicks on Send Test will be the recipient of the test email.
- The emails are fully branded with your event’s logo, colours, and cover image.
- All mail-merge and other customization options that are available for confirmation emails are also available with the emailing module.
- Be very careful when scheduling an automatic campaign. Make sure you’re only scheduling it after you have finalized the setup.
- Easily duplicate an existing campaign to save time.