Sessions: Creating Personal Schedules For Attendees
Discover how to create and manage personal schedules for event attendees, assign sessions, review schedules, and troubleshoot common issues.
Table of Content:
- Video Tutorial: How To Create Personal Schedules for Attendees?
- Assigning Attendees to Sessions One at a Time
- Assigning Attendees to Sessions in Bulk using Excel Import
- Reviewing Personal Schedules in Experience Manager
- Creating a Section for Personal Schedules
- How Attendees Can View Their Personal Schedule
- Settings & Troubleshooting
1. Video Tutorial: How To Create Personal Schedules for Attendees?
2. Assigning Attendees to Sessions One at a Time
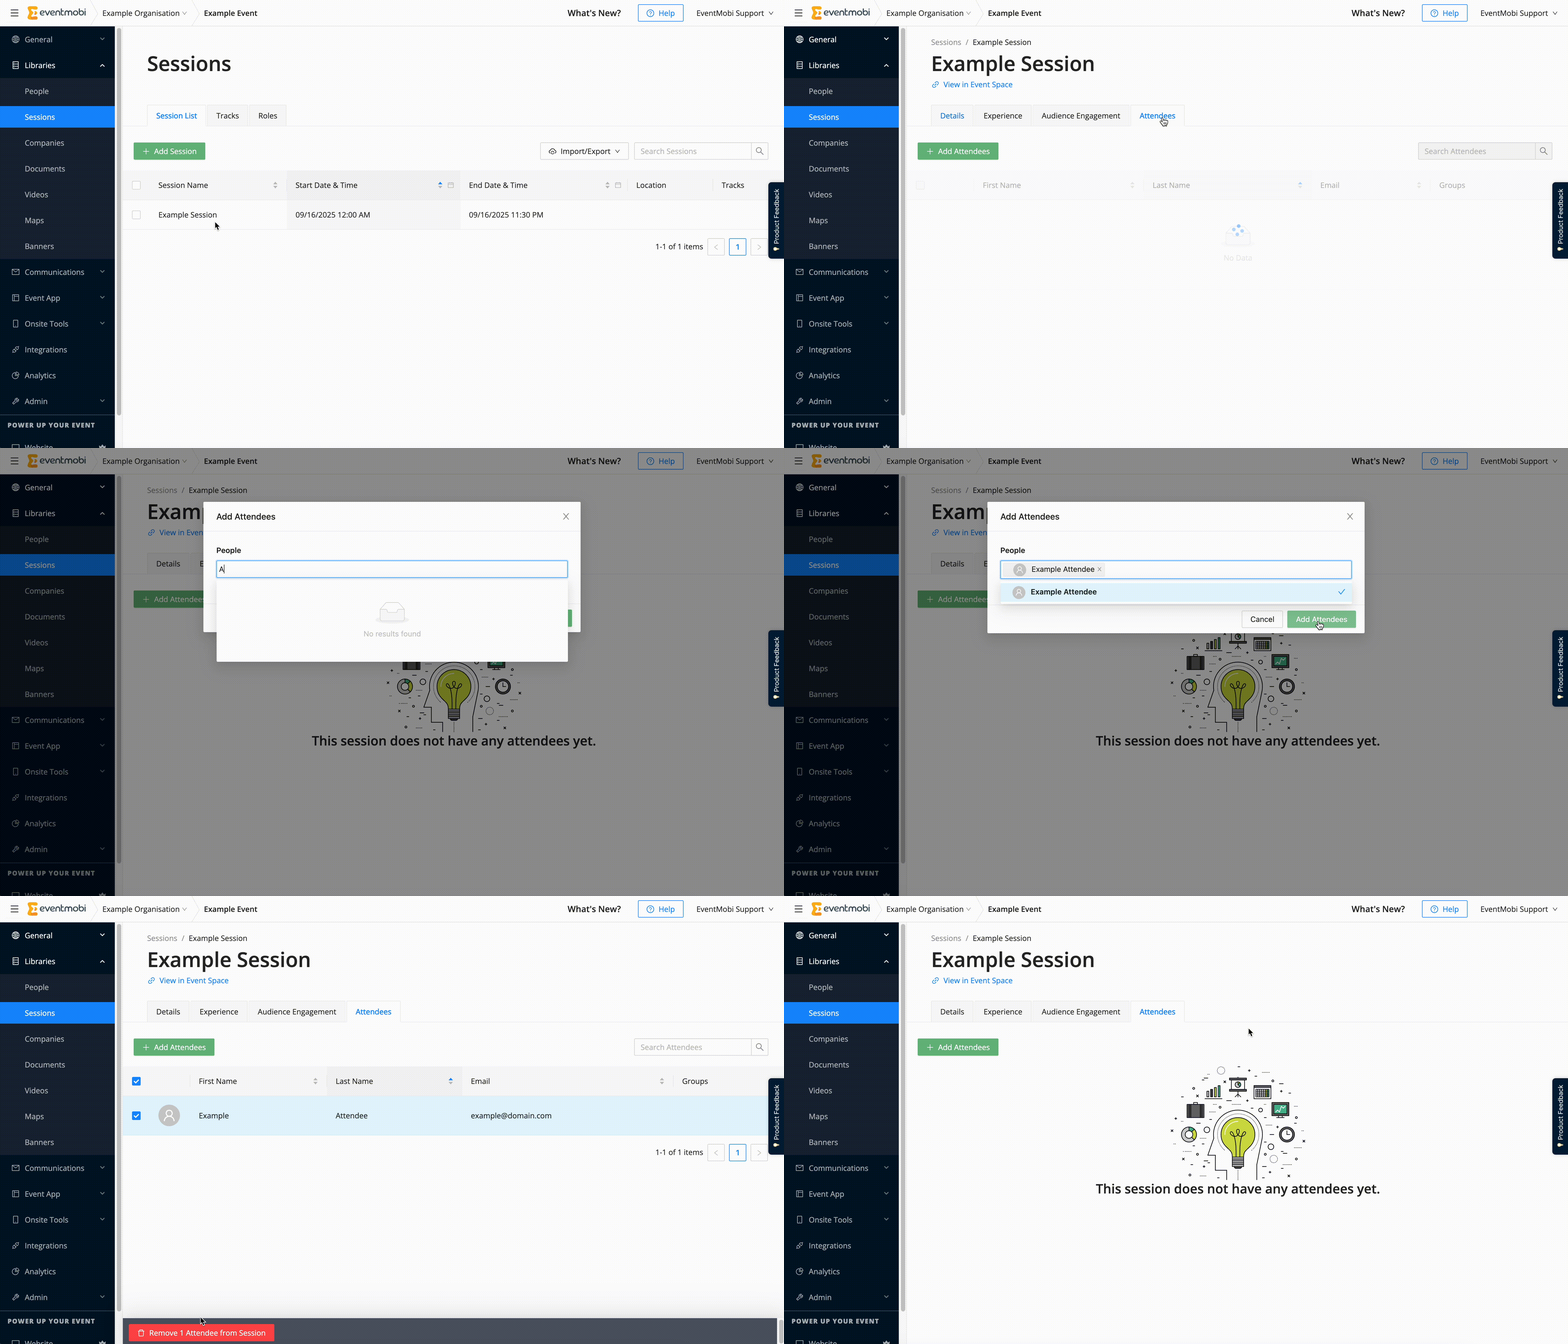
Personal schedules can be assigned to your attendees directly within the Sessions library of your Experience Manager. This allows you to determine what sessions will automatically appear within the Attendee Dashboard for specific attendees, rather than requiring them to find and add sessions in the Event App themselves.
- Access the Sessions Library
- Select the session you would like to create personal schedules for
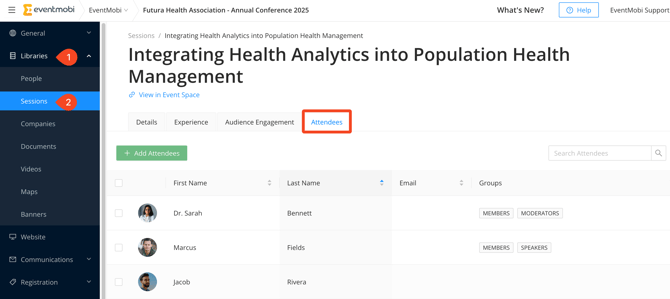
- Enter the Attendees tab and select the Add Attendee button in green
- Type in the name of the person you would like to add, and save
Removing Attendees From Sessions
- Access the Session library.
- Select the session you would like to update the personal schedule for.
- Enter the Attendee tab, and select all relevant attendees you want to remove from this session.
- Click on the Remove Attendee from Session button in red on the bottom of the page to remove selected attendees.
3. Assigning Attendees to Sessions in Bulk using Excel Import
- Access the Sessions Library.
- Select the Import/Export button from the right-hand side of the page.
- If you have not yet added the session to your library, select Import to download a blank template. If you are looking to assign schedules to a session you have already created, then select Export to download a template containing all of your existing sessions in the library.
- In the Attendees column of the Sessions template, input the External ID of each attendee you would like to assign the session to. Separate each External ID using a comma and a space.
Note: Excel cells are limited to 32,767 characters. To optimize this, we recommend assigning your own External IDs to People profiles when importing new attendees, as these IDs cannot be changed post-upload.
Pro-Tip: Convert Column to Comma Separated List
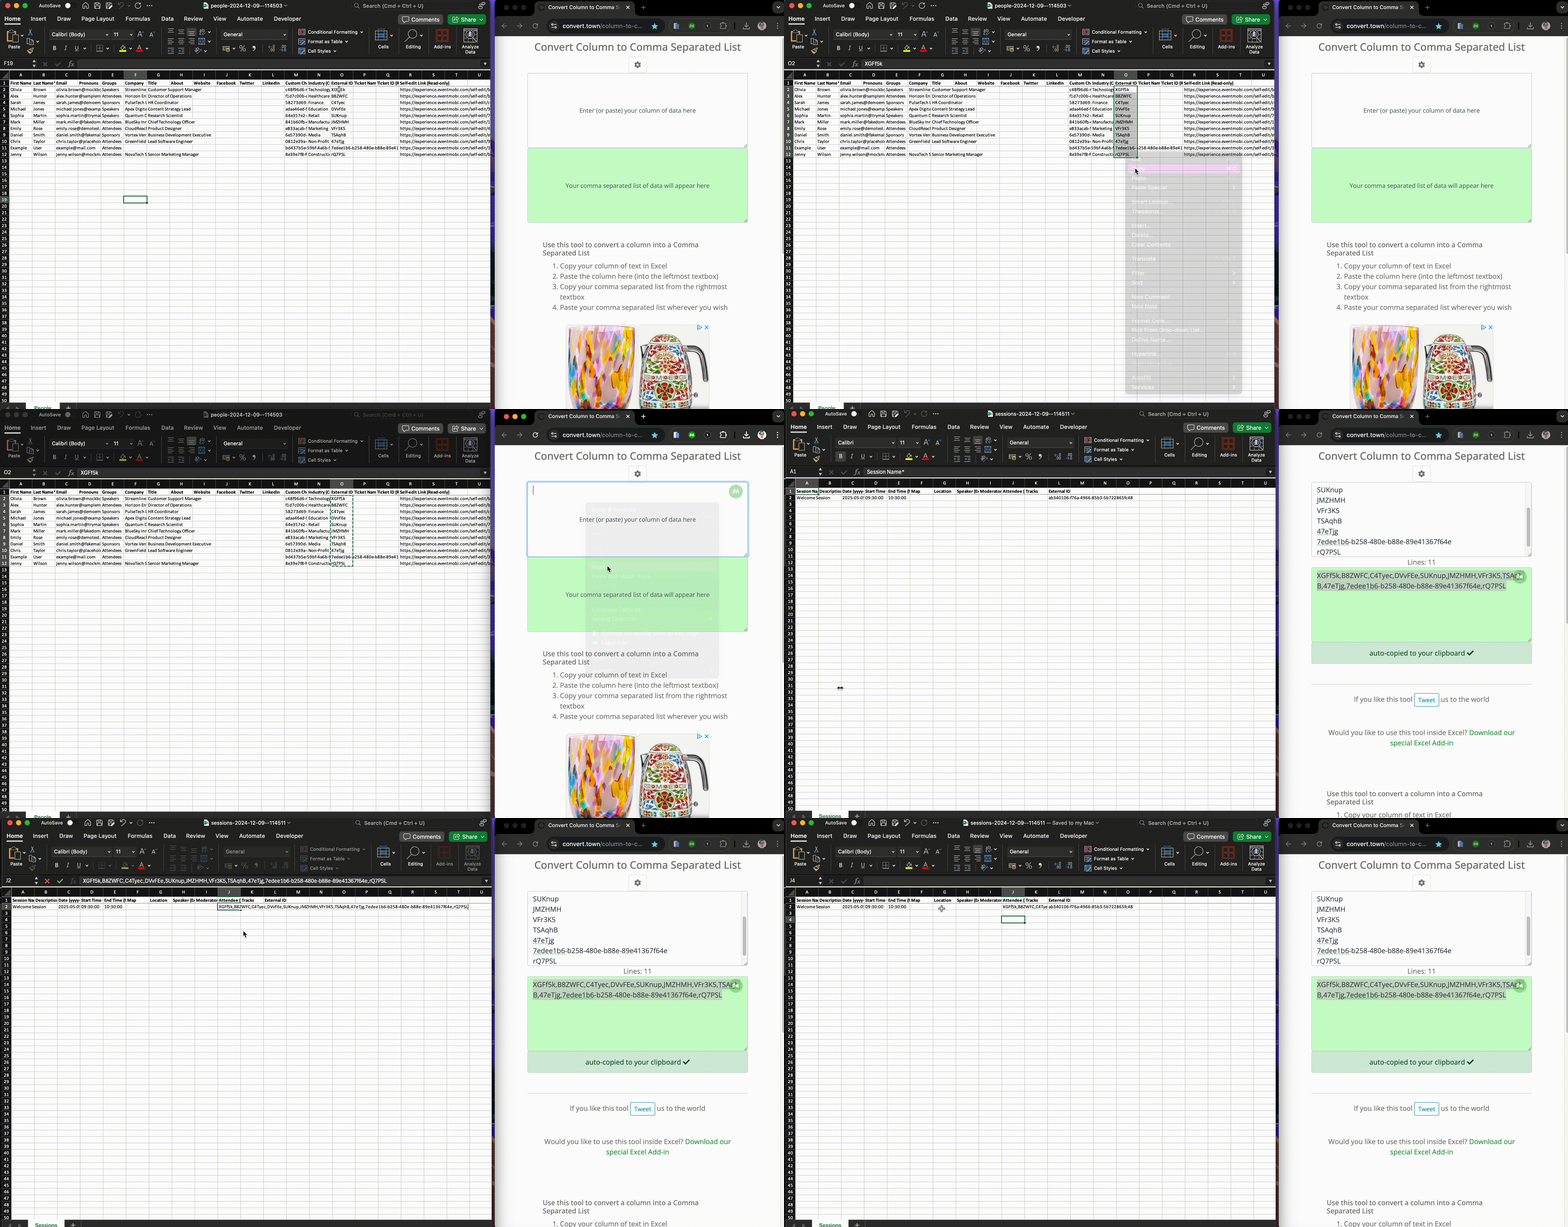
To simplify the process of assigning sessions, you can utilize this third-party tool designed to convert a column of External IDs into a comma-separated list. This list can then be easily pasted into the "Attendees (External IDs)" cell of your session list.
Here’s a step-by-step example to guide you through the process:
1. Export Your Attendee List: Start by exporting your people list from the People library within Experience Manager.
2. Locate External IDs: In the exported file, find the column labeled "External ID". Select all the entries in this column and copy the data.
3. Use the Conversion Tool: Navigate to the Third-Party Converter. Paste your copied data into the designated input box. The tool will automatically convert your entries into a comma-separated list and copy the result to your clipboard.
4. Add to Your Session List: Go to your session list and find the cell labeled "Attendees (External ID)" where you wish to assign your attendees.
5. Paste the List: Paste the comma-separated list into this cell.
6. Save and Import: Finally, save your changes and import the updated session list back into your session library in Experience Manager.
4. Reviewing Personal Schedules
Personal schedules can be reviewed at the session, or attendee level, depending on your preference.
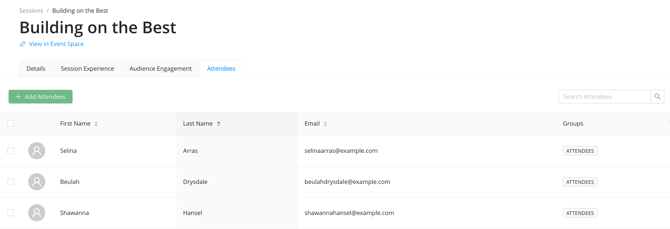
4a. By Session
- Enter the Sessions library.
- Select the session you would like to review the personal schedule for.
- Use the search bar located to the right if you are looking for a specific attendee in the list.
- Click on the attendee name to be directed to their People profile and view their full personal schedule.
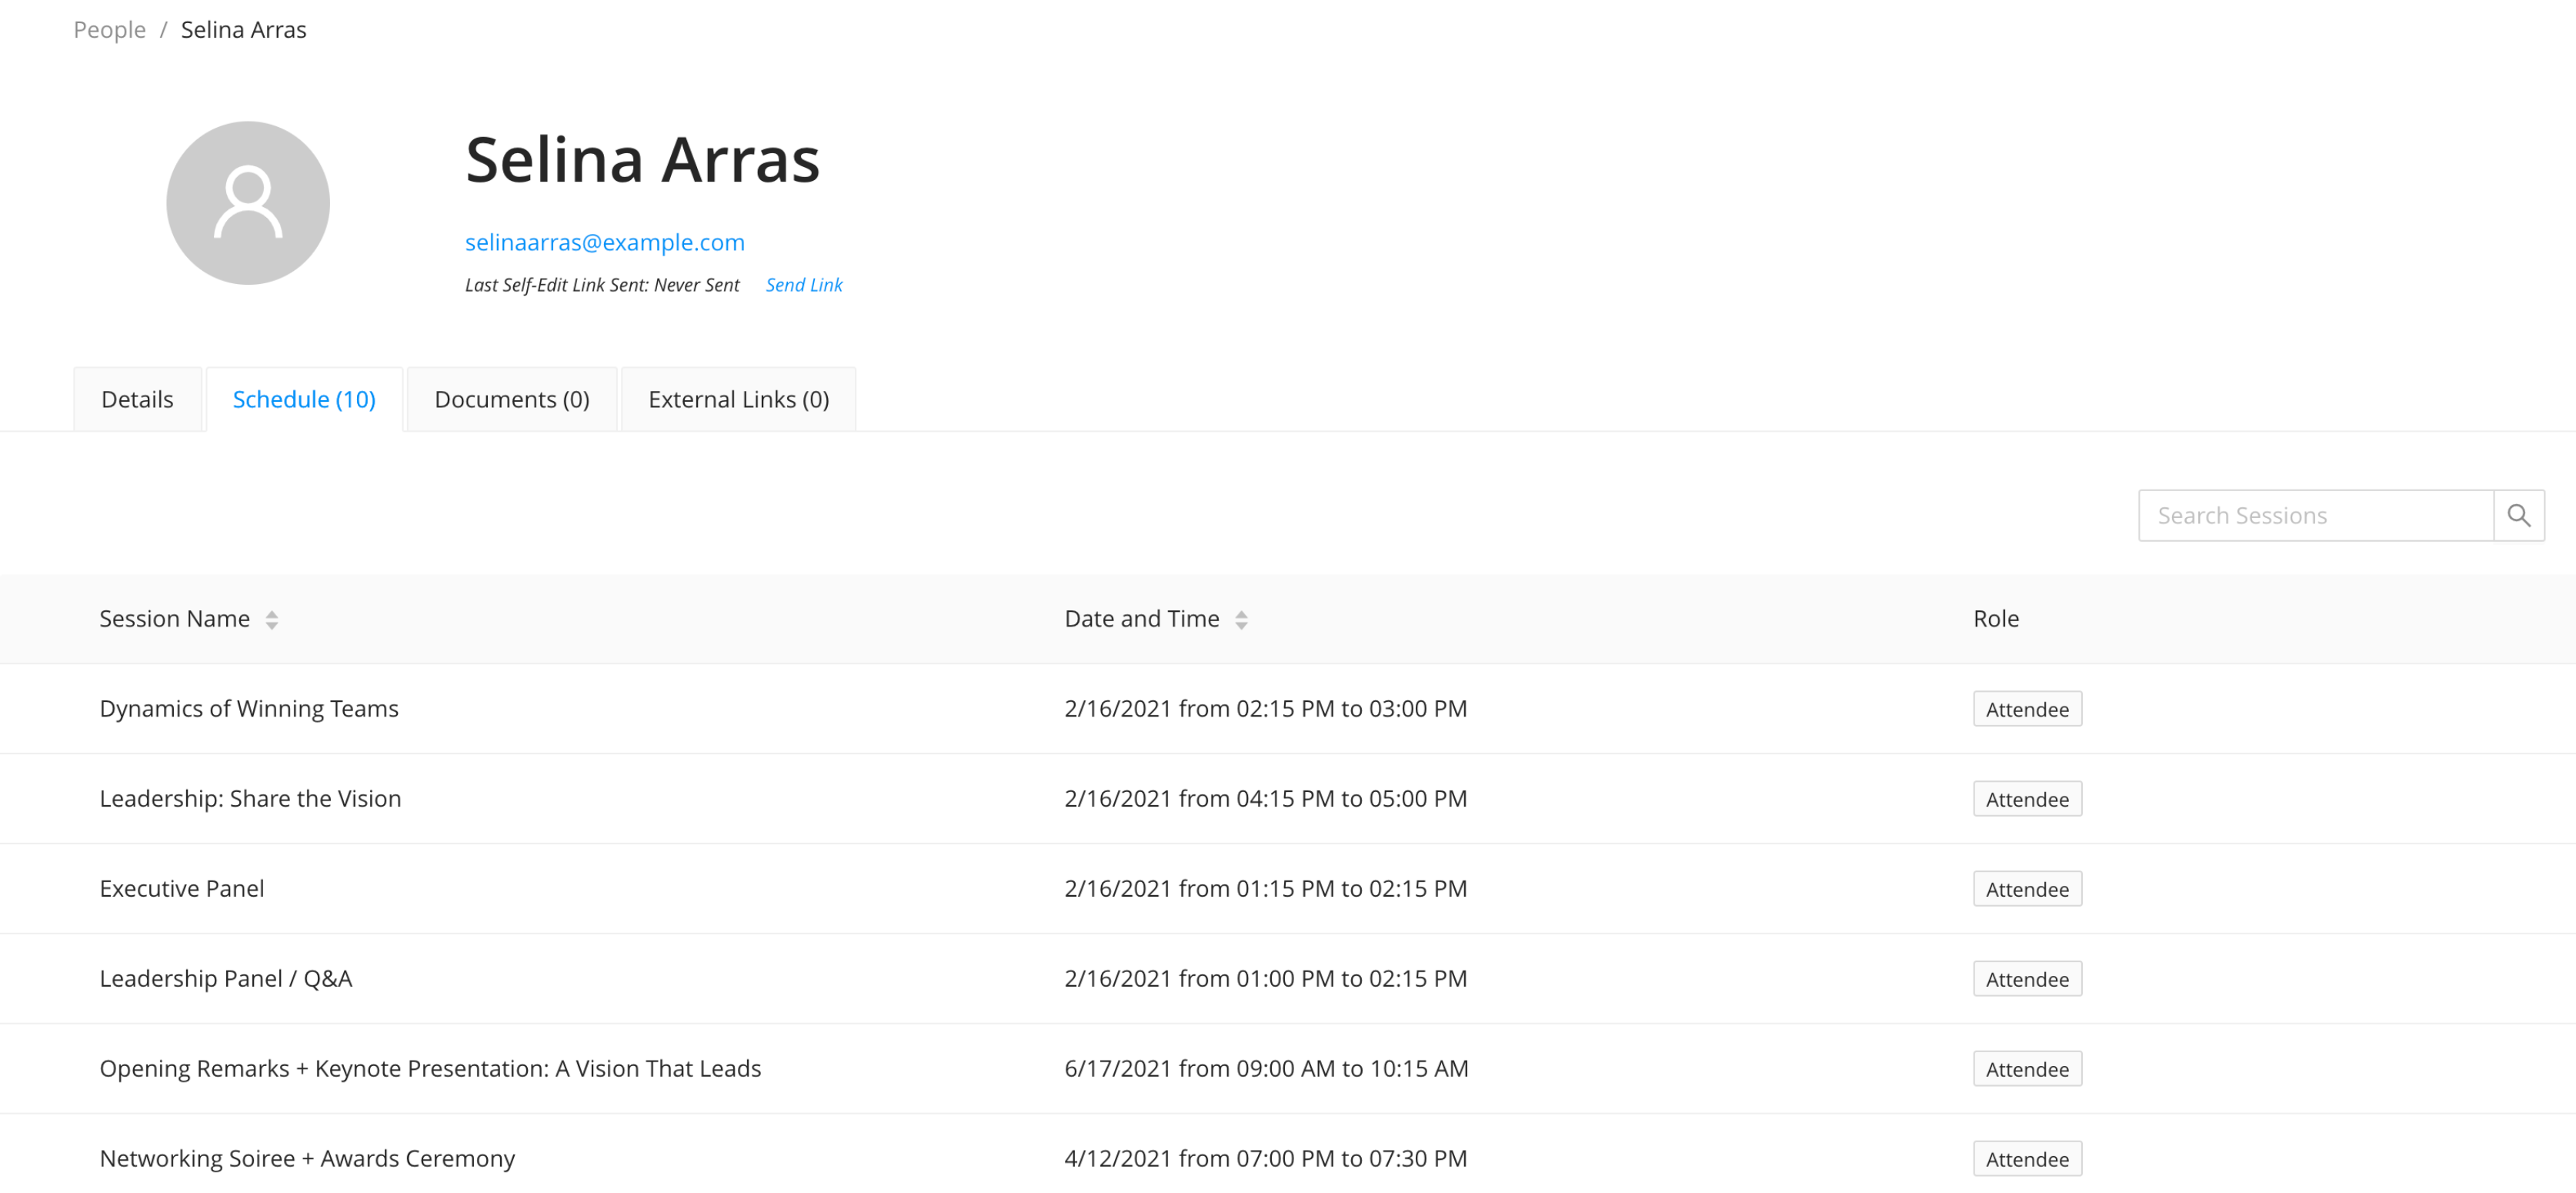
4b. By Attendee
- Enter the People library
- Select the profile that you would like to review the personal schedule for
- Choose the Schedule tab to see how many sessions have been saved, and review which ones are currently assigned
5. Creating a Section for Personal Schedules
You can add a shortcut to the Personal Schedule page of the Attendee Dashboard directly in the Event App menu by following the steps outlined below:
- Go to the Sections area found under the Event Space product of your Experience Manager
- Click Add Section
- Choose the Link option from the drop-down menu
- Provide the section with a name (i.e. Personal Schedule)
- Input the following URL:
https://eventmobi.com/eventcode/agenda/user/day/all(replace eventcode with the event code for your event) - Save the section.

TIP: You can use that URL to link to the full personal schedule in other places as well, such as the Home Page.
6. How Attendees Can View Their Personal Schedule
In the Event App, attendees can view their personal schedules within the Attendee Dashboard by selecting the Agenda option. This agenda view will display the current day's personal schedule for the attendee, or the next day of the event that the attendee has sessions added to their agenda for.

7. Settings & Troubleshooting
Rename Personal Schedule Item in Attendee Dashboard
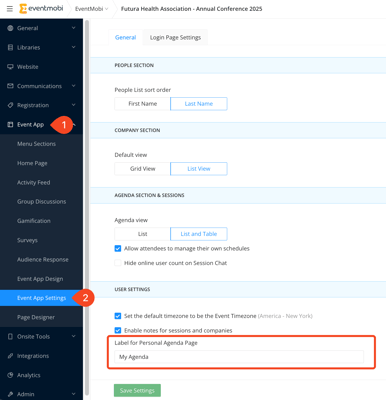
To modify the menu item that allows logged-in users to access their Personal Schedule in the Attendee Dashboard, navigate to Event App > Event App Settings within the Experience Manager. In this section, you will find a field labeled Label for Personal Agenda Page, where you can customize the text to rename this menu item as desired.
Enabled/Disabled "Add to Schedule" Button in Agenda
If you prefer that your attendees do not have the ability to add or remove sessions from their personal agendas, navigate to the Event App > Event App Settings in the left menu of the Experience Manager. By unchecking the box labeled "Allow attendees to manage their own schedules," you will disable this option for them, while still enabling users to view session details within the Event App. Organizers will retain the ability to assign or remove sessions from attendees' personal schedules, and attendees can continue to access their personal schedules through the Attendee Dashboard.

Handling "Data Set Too Large" Issue in Session Export
If your event includes a large number of attendees who are creating personal schedules in the app, then you may happen to notice DO-NOT-MODIFY - Data set too large appear in the Attendee column of your session list when you export. Typically this column of your template will include a list of external IDs for the attendees that have added the session to their personal schedule.If the total number of characters in the Attendee column surpasses Excel's maximum limit of 32,767 characters, you will see a message stating "DO-NOT-MODIFY - Data set too large."
For this reason, no changes can be made to the cell to ensure that all of the personal schedules that have already been saved will be maintained. To make changes to the personal schedules for these particular sessions, you will instead need to manually adjust them from the Experience Manager by entering the session and visiting the Attendees tab.
Any modifications made to cells marked with "DO-NOT-MODIFY - Data set too large" in the Sessions Excel template will overwrite existing personal schedules, resulting in the loss of previously saved content.
