Branded App Client Submission Requirements
What do I have to do if I want to submit a branded app to Google Play and Apple App Store by myself?
If you opted to handle the submission process for your branded app with your own team, it's important to know that you need to work with EventMobi in any case to successfully handle the app build aspect of this process. That means, we work with you to perform the app build data generation from our end. After the Build is shared with you, you can submit the app to Google Play and Apple App Store.
During this process, EventMobi does not have access to the admin details of your App Store developer account, so some information needs to be set up and shared with us, so our team can start working the app build for you.
Note: This data can be captured in advance to help in speeding up the build and submission process for your Branded App.
Putting in a basic way and contextualizing with EventMobi App and Branded Apps, a Build File is a version of the EventMobi App created for a Branded App. A build file contains all the generated app code that can be published to Google Play or Apple App store.
Common data for the build files for Google Play and Apple Store Apps
For both apps versions, we would need:
- Name of the App for the App Stores - 30-Character Limit.
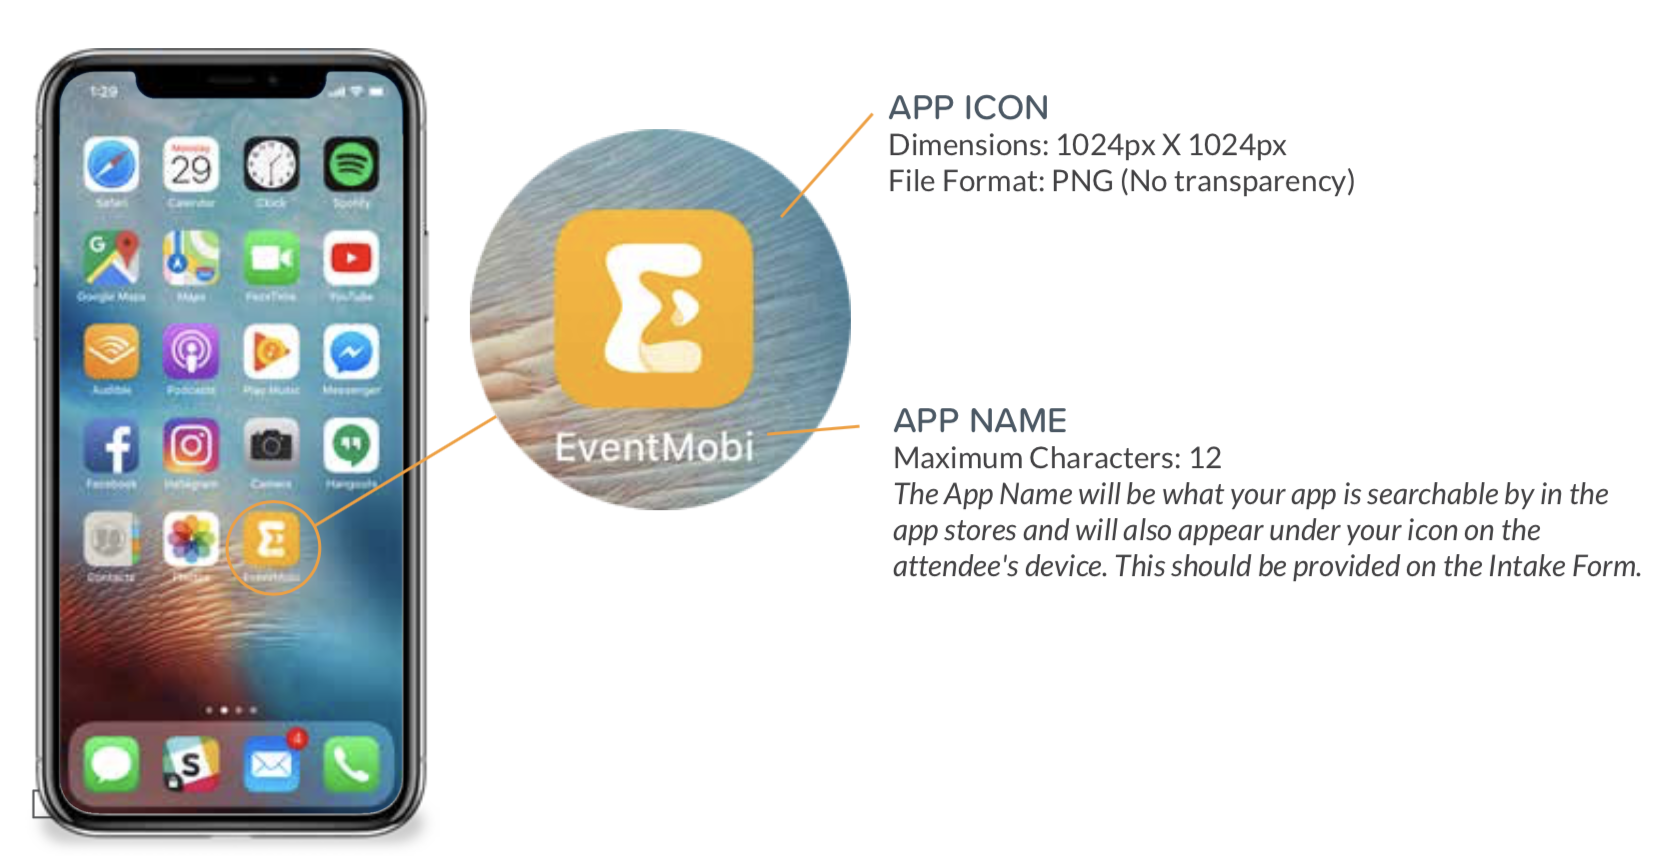
- Name of the App, which shown below of the App icon on mobile devices - 12-Character Limit
- App Icon Image in PNG file format, 1024×1024px size and NO transparency set, which will appear on the app store listing and description page. The icon is also shown on the home screen and app menu of users' mobile devices.
- Start-Up Image/Splash Image
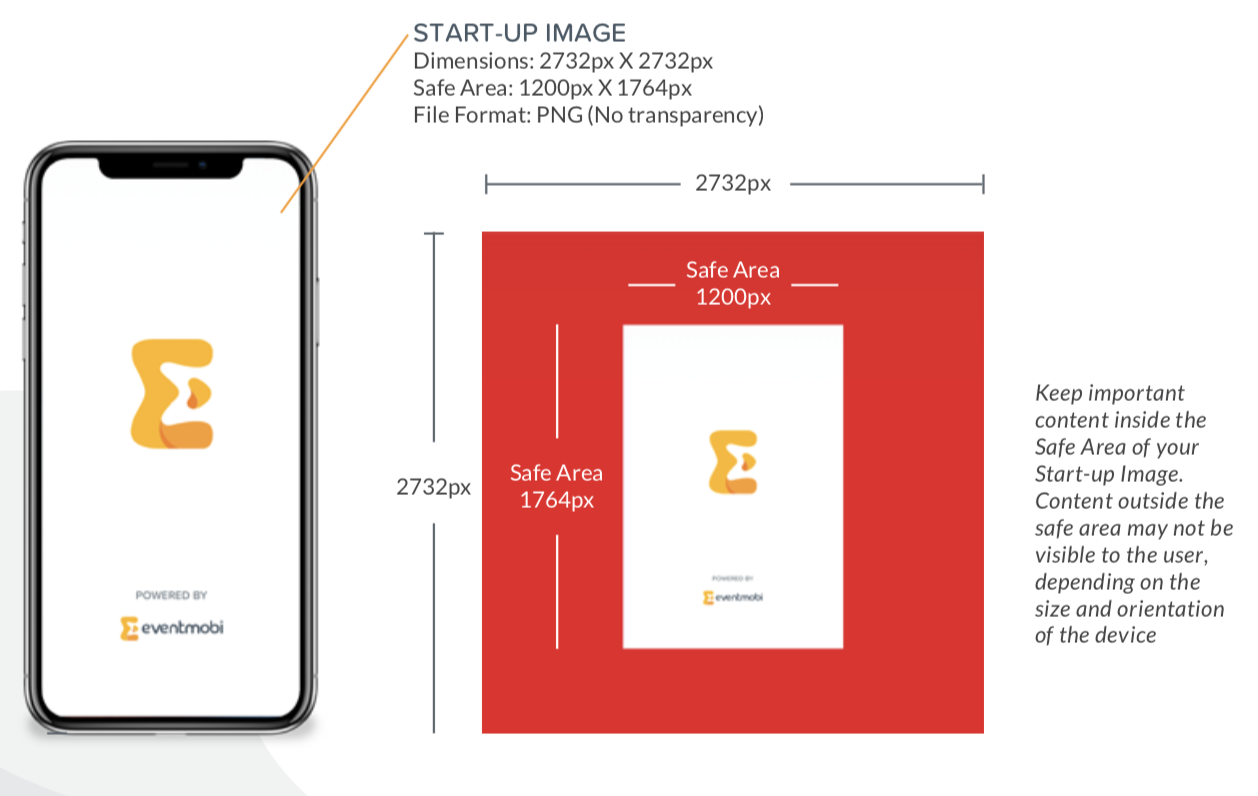
This image will appear when users open the Branded App. The start-up image appears when the app is loading.
Please be aware of the Image safe zone. You'll notice that the start-up image is square. This is Apple's new requirement, and it accounts for the cropping on all different sizes of devices that the app will be accessed on.
Please ensure that no logos or text is in the RED ZONE so that we can account for the cropping on the sides and top of the image.
Image Requirement: 2732×2732px with 1200×1764px in the safe zone.
For Google Play Store Version
Getting ready to submit your Brander App over Google Play Store is a straightforward process.
All you will need to do after providing us the images app images is getting the App build file we can provide for you. Here you can get the build file either as an .apk file or as an .aab file
After creating a new app, adding all the app store entries required information to it, you will be able to upload the Build File we will deliver to you for signing and publishing
Needed additional Information for Apple App Store Version
Set an Identifier to generate an App ID, Bundle ID and Team ID for Apple iOS Apps
These three pieces of information are located under 'Certificates, IDs & Profiles' area at the App Developer console and these information pieces are needed. With it, we can generate a build of your Event App and send it back to you, so you can publish it on your own.
To create the information, you will need to set up a new App ID Identifier.
Below are the steps necessary to create an App ID Identifier and which information you should share with EventMobi's Branded Apps Team:
- On the Apple Developer Console, go to 'Account' then select 'Certificates, IDs, and Profiles.
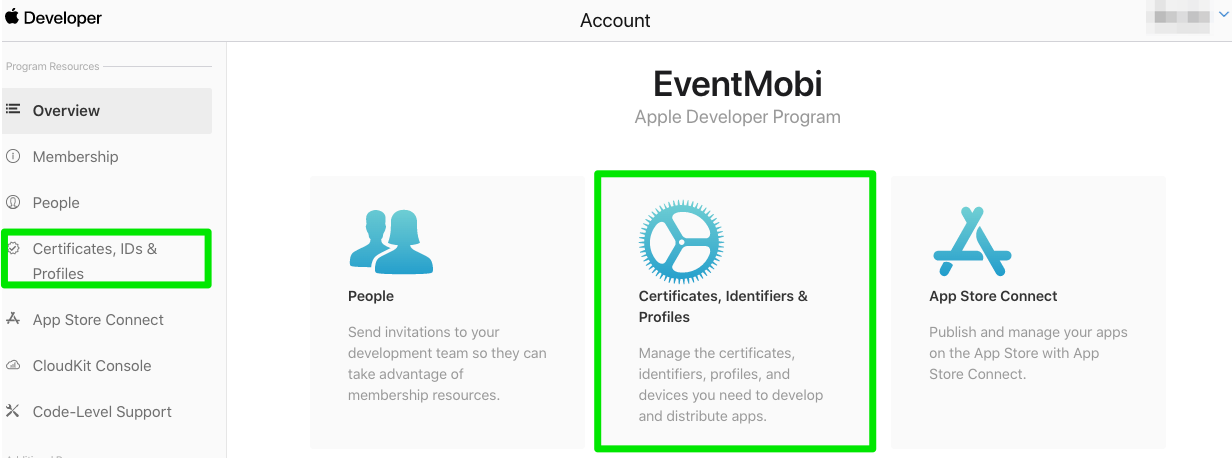
- Under Program resources, then choose the 'plus sign' under identifiers

- Select 'App IDs', then press 'Continue'

- Under 'Select a type' Choose 'App' then click 'Continue'

- On the 'Register an App ID' you will need to fill the following:
Description
Bundle ID that had to be filled in as a reverse-domain name, e.g., com.companyname.appname or com.eventmobi.eventcode22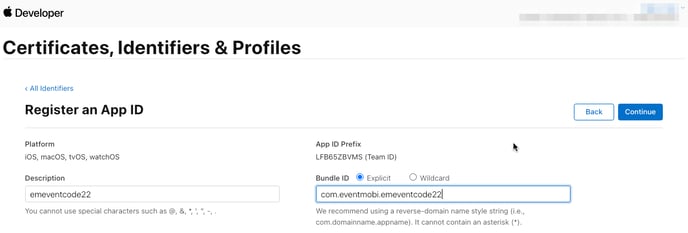
- Scroll down the page to see further Apple Capabilities and tick the 'Push Notification' Check Box, then click 'Continue'

Please Note:
In the description field, You cannot use special characters such as @, &, *, ', ", -, .
The Bungle ID and Team ID needed to be provided to EventMobi's Branded Apps Team.
Without the Push Notification set, the build creation at our end will not succeed
- Apple Push Notification Services Keys
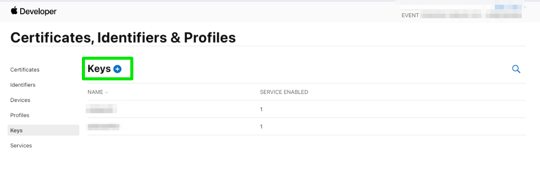
- Go to Apple Developer Console, then select "Certificates, Identifiers & Profiles

- Press the blue + button under "Keys"
- Enter a Key Name, tick the "Apple Push Notifications service (APNs) check box then hit "Continue"
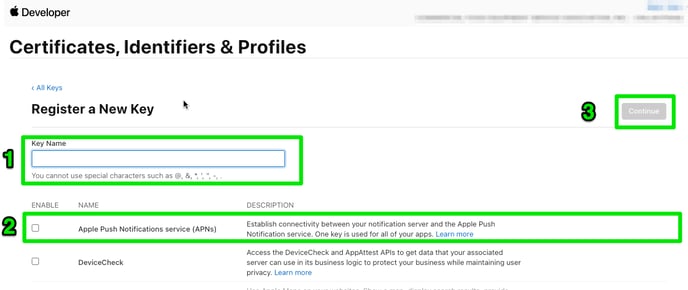
- On the next screen, please take note of the following and send them to us
-
- APNS Key ID
- APNS Key - (this is a '.p8' file that will be generated after pressing the "Download" button) Warning! Don't delete this until we confirm the receipt of this file.
- Team ID - Go back to the Apple Developer Console, under Program Resources choose "Membership" then copy the Team ID then send it to us.

After every requirement has been prepared and placed on the intake form, we can start the build process. Once the build has been completed, we will reach out to hand over the assets. Each step above is REQUIRED to create the build.