![1589391206704.png]](https://help.eventmobi.com/hs-fs/hubfs/1589391206704.png?width=40&height=40&name=1589391206704.png)
Table of Content:
- The Five Primary UTM Parameters
- Creating hidden fields for UTM parameters
- Hidden Fields: Unveiling form condition potentials
- URL Parameter Customization: Expanding beyond field types
The Five Primary UTM Parameters
There are five primary UTM parameters, each providing specific information about user interactions:
- utm_source: Identifies the origin or platform from which the user came (e.g., Google, Facebook, or a specific email campaign).
- utm_medium: Specifies the marketing medium used to promote the content, such as email, social media, or cost-per-click (CPC) advertising.
- utm_campaign: Represents the particular marketing campaign or promotion associated with the link (e.g., spring_sale or newsletter_may).
- utm_term: Tracks the keywords used in paid search campaigns, helping to monitor the performance of different search terms.
- utm_content: Provides additional details about the specific ad or link clicked, often used for A/B testing and content-targeted ads to distinguish between multiple versions or placements.
Using UTM parameters in your extended registration setup allows you to easily track the performance of your marketing efforts. By identifying which sources, channels, and campaigns are driving the most engagement, you can make informed decisions to optimize your promotional strategy and boost event attendance while maximizing ROI.
Creating Hidden Fields for UTM Parameters
Step 1: Add a Hidden Field
From your event’s editing page, go to Registration > Form. Click + Add field and choose Hidden field.
Step 2: Set Up the Hidden Field
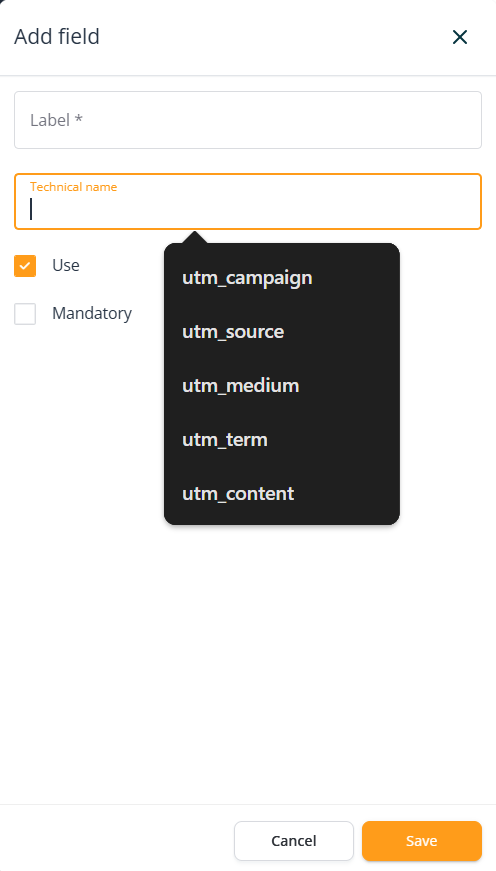
In the field settings, open the Technical name dropdown. Select one of the five standard UTM parameters—utm_campaign, utm_source, utm_medium, utm_term, or utm_content—or create your own by typing it in directly.
If creating a custom name, be sure to use underscores instead of spaces.
Save your changes when you're done.
Step 3: Repeat steps 1 and 2 for each UTM parameter to track all five default UTM parameters, or your custom ones.
Step 4: Now that your registration form has hidden fields for UTM parameters, it's time to include these parameters in your promotional URLs. This is done by adding the UTM parameters directly to the URLs of your marketing campaigns or linked buttons on your promotional websites.
Add a “?” to your event’s registration page URL followed by the utm parameter’s technical name, an equal sign and the desired value that will correspond to that UTM parameter. Use “&” to combine multiple parameters at once. In the example below, the URL indicates that any person who registers for the event through this link came from the source specified as "medium1”.
https://annual-conference.eventmobi.events/register?my_technical_name1=medium1
Other examples:
Example 1: Email Marketing Campaign (one medium)
https://annual-conference.eventmobi.events/register?utm_source=newsletter
Example 2: Email Marketing Campaign (multiple mediums)
https://annual-conference.eventmobi.events/register?utm_source=newsletter&utm_medium=email&utm_campaign=early_bird_promo&utm_term=may_edition&utm_content=version_a
Example 3: Social Media Promotion
https://annual-conference.eventmobi.events/register?utm_source=facebook&utm_medium=social&utm_campaign=conference_announcement&utm_content=post_1
Example 4: Paid Advertising
https://annual-conference.eventmobi.events/register?utm_source=google_ads&utm_medium=cpc&utm_campaign=conference_tickets&utm_term=tech+conference&utm_content=ad_version_b
Please note that there are no limits to the number of utm parameters you can use. Remember to replace the example values with your specific campaign information.
Step 5: Analyze the data collected from hidden fields.
Once your event registration form is live, the hidden fields will automatically capture the UTM parameters from your marketing URLs when users register. This information will be included in your event's registration data and can be exported for further analysis or integrated with your analytics tools.
To extract that data you can use the Export function on the List of attendees. From General>Attendees, Click on the export icon (then Excel or CSV) and select the relevant fields .
Hidden Fields: Unveiling Form Condition Potentials
By setting up form conditions, you can create custom registration paths, display targeted content, or grant access to specific tickets for registrants coming from various marketing channels.
For instance, if you want to offer a discounted ticket to registrants coming from a specific email campaign, you can create a form condition based on the utm_campaign parameter. When a user registers with the URL containing the matching utm_campaign value (e.g., utm_campaign=email_discount), the form condition will recognize it and grant access to the special discounted ticket, creating a personalized experience for the registrant.
This approach can be applied to other UTM parameters as well, allowing you to create dynamic registration forms that adapt to the registrants' marketing sources, content, or campaign information.
URL Parameter Customization: Expanding Beyond Field Types
URL parameters can also be utilized with other field types to pre-populate fields, choose specific tickets, or apply discount codes. Attach custom parameters to your event URL in the following format as an example:
Pre-filling a form field with a specified value:
https://example.eventmobi.events/tech-conference/register?free_field14=exhibitor
Pre-applying a coupon code:
https://example.eventmobi.events/tech-conference/register?coupon=speaker
Distribute the customized URL to potential attendees and when registrants use this URL, the corresponding fields will be pre-populated, or discount codes applied based on the included URL parameters.
🔍 Note
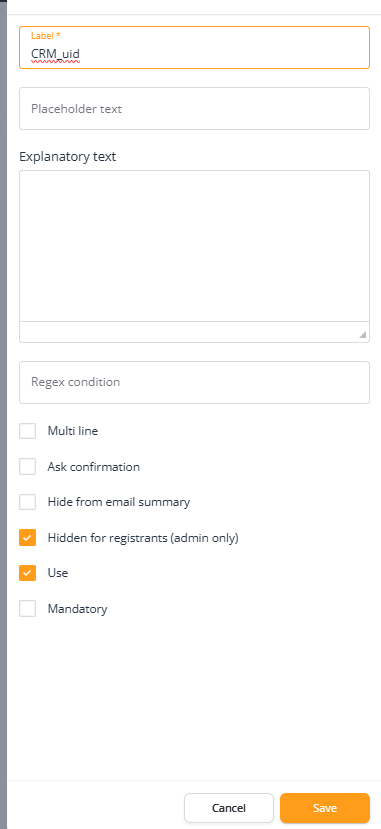
Hidden UTM fields are not the same as fields marked “Hidden for registrants (admin only).” Although both are invisible to attendees, UTM fields capture marketing data automatically, while “admin-only” fields are meant for internal use and can only be viewed or edited by admins. They serve different purposes and shouldn’t be used interchangeably.