Table of Content:
- What Are Custom Fields?
- How to Create Custom Fields
- Using the People Excel Template
- Managing Visibility in the Event App
- Applying Fields to Specific Groups
- How Attendees Can Complete Custom Fields
- Difference Between Documents and Upload Fields
1. What are Custom Fields?
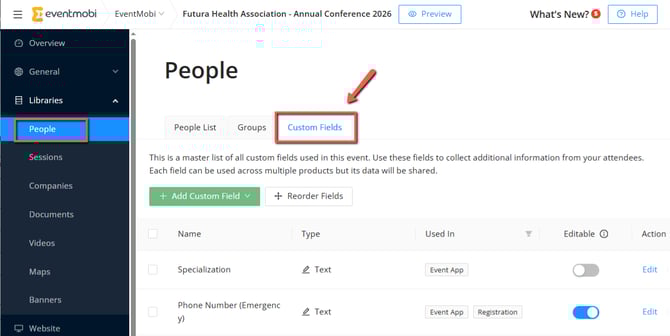
Custom Fields allow you to display and collect extra information from the profiles created in your People library. To manage these fields, go to the Settings tab in the top navigation of your People library, then select Custom Fields.
Where Custom Fields Appear
-
Experience Manager
Custom Fields are visible in the following areas:-
At the bottom of each profile in the People Library
-
Under Registration > Registration Form
-
-
People Excel Template
Custom Fields appear as column headers with "(Custom Field)" included in the title. -
Attendee Dashboard
When editing a profile or viewing another attendee’s profile, Custom Fields are shown under the "Other Information" section.
2. How to Create Custom Fields
-
Click the Add Field button (green) to start creating a new custom field.
-
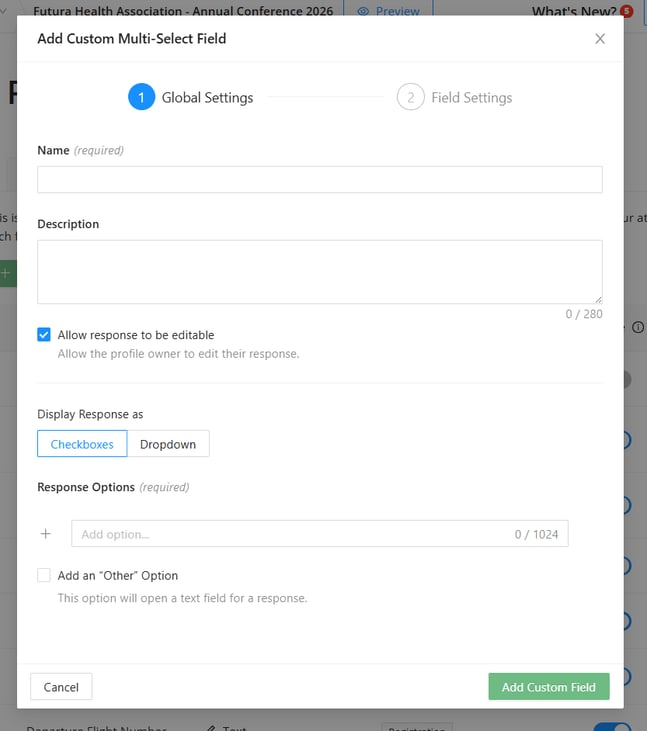
Select the Field Type:

-
Date
-
Single Select
-
Multi-Select
-
Text
-
Upload
-
-
Enter the Field Name as you’d like it to appear in the profile.
-
Add a Description (optional) to provide additional context or instructions.
-
For Single Select and Multi-Select fields:
-
Choose the Display Response Type
-
Add your Response Options.
-
Enable Add an “Other” Option if you want to allow users to input a custom answer via a free text field.
-
-
Click Add Custom Field to save your changes.
Supported file types for Upload Fields are: *.doc, *.docx, *.ppt, *.pptx, *.xls, *.xlsx, *.pdf, *.jpg, *.jpeg and *.png. The maximum file size per file is 24MB.
3. Utilizing the People Excel Template for Bulk Data Entry into Custom Fields
To ensure that each custom field appears as a column in your People Excel Template, it is essential to set up these Custom Fields prior to downloading the template. This step allows you to efficiently input data for each custom field in bulk.

Note: Adding a new column to the template without creating the fields in advance will result in an error message upon import.
Steps to bulk upload Custom Field data:
-
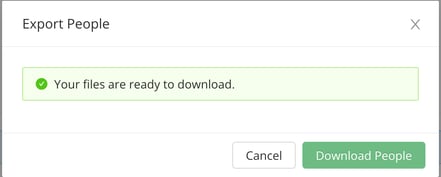
Go to Import/Export > Export > Download People.
-
In the template that downloads, a heading for each custom field is listed as the column header, including Custom Field in parentheses.
- Enter the desired data and save your changes to the template.
-
Return to Import/Export > Import to upload the updated template.
4. Manage Visibility for Custom Fields in the Event App
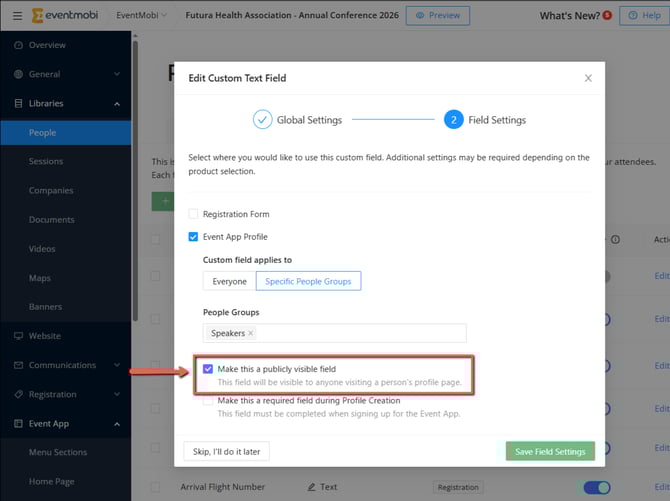
Custom Fields created in the People Library do not automatically appear in the profiles within the Event App. To modify the visibility settings for each field, click Edit > Skip to Field Settings.

Under Field Settings, you can toggle the Make this a publicly visible field option on or off for a specific custom field. This allows you to customize visibility based on your event’s requirements.
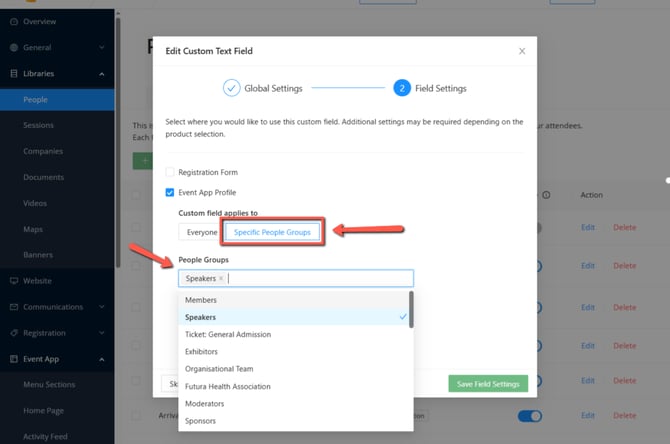
5. Applying Fields to Specific Groups
You can restrict Custom Fields to apply only to Specific People Groups. Custom Fields that are set to apply to specific groups will only be made visible and editable by attendees that have been added to that particular group within the People library.
To assign a custom field to a specific group of people in your People library, click Edit > Skip to Field Settings, then select Specific People Groups under Custom field applies to. This will allow you to multi-select from all available people groups. After clicking Save Field Settings, the custom field will only be visible in the profiles of attendees assigned to the specified groups within the Event App.
6. How Attendees Can Complete Custom Fields
Via Self-Edit Profile Links
-
When using a self-edit link, attendees can update Text Fields only.
-
They’ll be directed to Personal Information > Other Information to enter their data.
Please be aware that, at this time, the Self-Edit Profile Links allow updates exclusively for Text field options. All other types of custom fields can be viewed/edited via the Event App directly.
In the Event App
-
Attendees can complete Custom Fields while editing their profile from the Attendee Dashboard.
-
If marked as required, fields must be completed before accessing the event.
-
They’re editable via Edit Profile > Additional Information.

7. What is the Difference Between Documents and Upload Fields in the People Profile?
The Documents area of each profile is reserved for any files that should be shared within everyone, for example, to make a speaker's presentation slides available or to share an author's poster presentation out of your document library. You cannot set any visibility or access restriction on this field.
Upload Fields, on the other hand, are a little bit different in that they can be used to capture information versus simply sharing it. A few benefits to using the Upload Field option:
- File upload will be requested during the login process
- Upload Fields can be edited by the attendee within the Event App