![1589391206704.png]](https://help.eventmobi.com/hs-fs/hubfs/1589391206704.png?width=40&height=40&name=1589391206704.png)
Table of Contents:
How To Use
Customizing Email Content
Using Sync Sections for Consistent Branding
Configuring a Custom Sender Name
Emailing in Multiple Languages
Deactivating a System Email
Sending Test Emails
Frequently Asked Questions
How to Use
How To Access the System Email Editor
-
Open your event in Experience Manager.
-
Navigate to the Communication module in the left menu.
-
Select System Email from the submenu.
-
Click any email in the list to open the editor.
Customizing Email Content
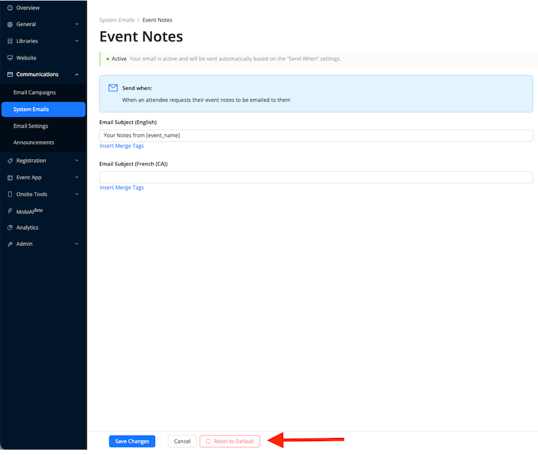
From here, further customize the email content by first inserting any merge tags to the Email subject.
selecting the ‘content builder’ button.
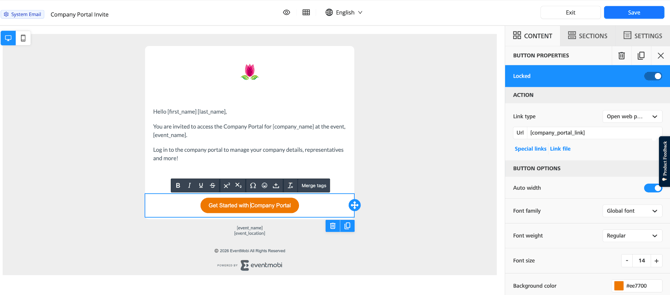
- Use the drag-and-drop editor to modify text, images, layout, colours, and branding.
- Some content blocks are locked (e.g., the company portal button) to prevent accidental removal of critical elements. You'll see a notification if you select a locked block.
- To undo all changes, click Reset to Default to restore the original EventMobi template at any time.
Using Sync Sections for Consistent Branding
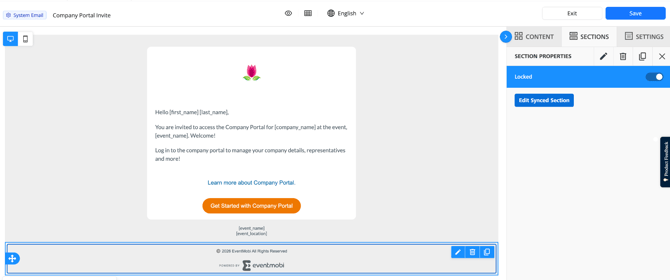
Sync Sections allow you to update a shared element (such as a logo, header, or footer) once and have it automatically apply across all of your system emails — no need to edit each of the emails individually.
- Within the editor, identify any Sync Section (these are shared elements used across emails).
- Edit the element — your changes will propagate to all system emails that use that section.
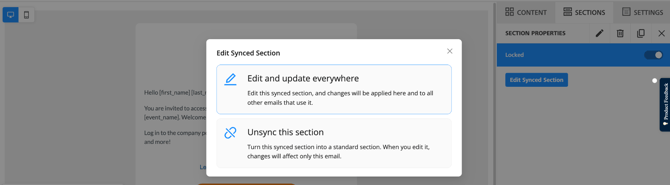
- To reuse a custom element (e.g., a sponsor banner) across multiple emails, save it as a custom section and apply it wherever needed.
Configuring a Custom Sender Name
If your organization has a custom sender email configured, transactional emails will automatically send from this address instead of EventMobi's default.
🔍 Note
Custom sender email configuration is managed at the organization level. More information can be found here or Contact Support if this is not yet set up.
System Emails in Multiple Languages
There are two types of system emails, and it's important to understand the difference as they behave differently when it comes to language settings.
1. Attendee-Facing Emails
These are emails sent directly to attendees, such as event invitations or app access emails. The language an attendee receives is based on their individual language preference, which is set through the event app or attendee portal.
To configure which languages are available, go to:
General > Event Details > Primary Event Language & Secondary Event Language
2. Non-Attendee-Facing Emails
These emails do not follow the same language rules as attendee-facing emails, instead they offer a fixed number of supported languages at all times.
Languages Supported: English, German, French, Portuguese, Spanish
If you're wondering why a language selector isn't appearing for a particular system email, check whether it's attendee-facing or not. Non-attendee-facing emails won't have this option.
⚠️ Warning
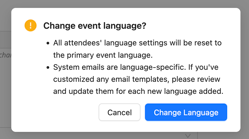
Changing the secondary language in event settings will trigger a warning indicating:
- All attendee language settings will reset to the primary language
- Any previously customized system email templates must be reviewed and updated for the new language
How To Customize System Emails:
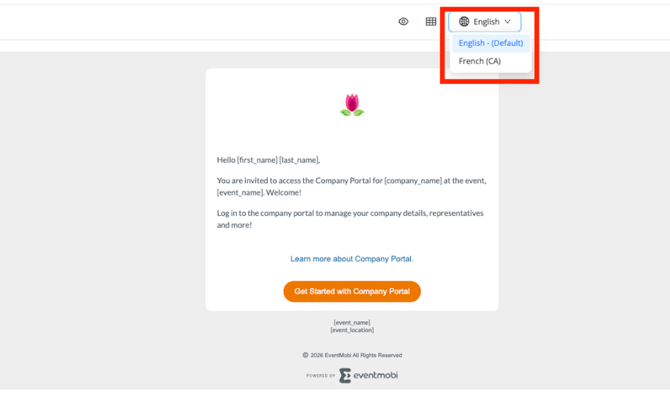
- Open a system email in the editor.
- Use the language selector at the top of the editor to switch between language.
- Customize email content separately for each language.
🔍 Note
Switching languages in the drop down toggle does not auto-translate any custom content you've added. You must manually update your additions in each language.
Deactivating a System Email
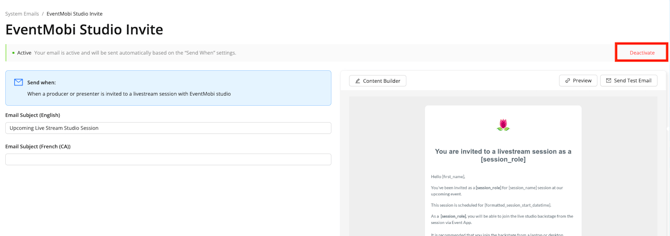
Some system emails can be turned off if they're not relevant to your event. In order to deactivate emails, follow the steps below.
- In the System Email list, locate the email you want to disable.
- Select the red ‘deactivate’.
- If the email needs to be activated in the future simply select ‘Activate’ to reinstate
🔍 Note
Not all system emails can be deactivated. The toggle will only appear for eligible emails.
The emails eligible to be disabled:
- Registration Confirmation Email
- Order Confirmation Email
- Missed Direct Message
- Lead Capture Access Expiration Warning
- EventMobi Studio Invite
Sending a Test Email
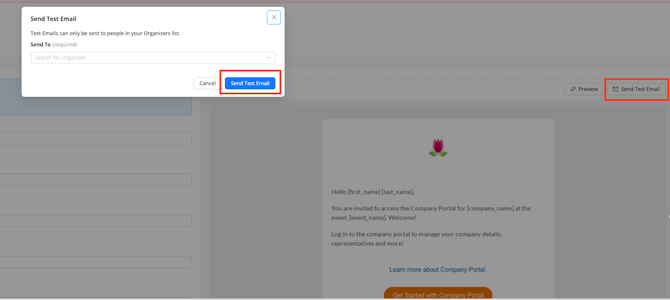
In order to send a test email, start by following the steps below. Please note, test emails can only be sent to people who have been set as an organizer of the event within your experience manager organization. For more information on adding new organizers please visit the article here.
- Open a system email in the editor.
- Click Send Test Email.
- Select the name of the organizer within your organization from the drop down menu.
🔍 Note
Test emails can only be sent to internal organizers — not to attendees. Only primary language previews are available at this time.
Frequently Asked Questions:
Can I see a log of which system emails were sent?
System emails are transactional and sent automatically when triggered, so per-email send logs and analytics are not available. For tracked, reportable sends, use Email Campaigns instead.
Can I send different emails to different attendee groups or ticket types?
Not within system emails. As a workaround, use Email Campaigns targeted to specific people groups.
What happens if I change my event's secondary language after customizing system emails?
Changing the secondary language in your event settings will reset all attendee language preferences to the primary language, and any system email templates you previously customized for the old secondary language will need to be reviewed and updated. To avoid this, set both your primary and secondary languages at event creation using the language selector in the event settings.